We're making it easier to get around Constant Contact with a brand new left navigation. Not all accounts have that change yet, so if your navigation looks different from our articles, that's why–but everything from the top can now be found on the left!

Email and Digital Marketing
How can we help you?
Search our help articles, video tutorials, and quickstart guides

You've got this. You've got us. Search our Knowledge Base to quickly find answers to your questions.

Create and manage campaign folders

Article: 000006499
Updated: January 21, 2025

Create, arrange, rename, or delete folders to keep your campaigns organized in a way that makes sense to you

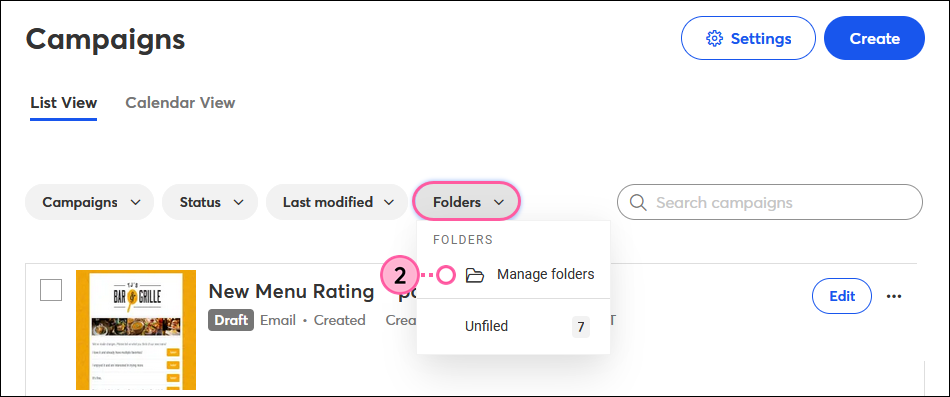
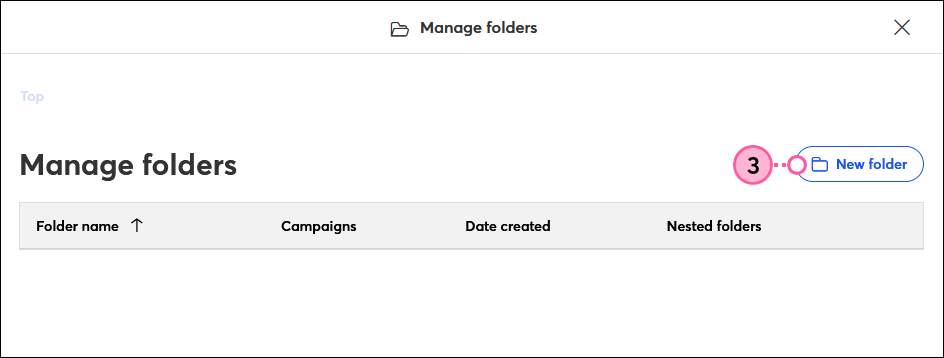
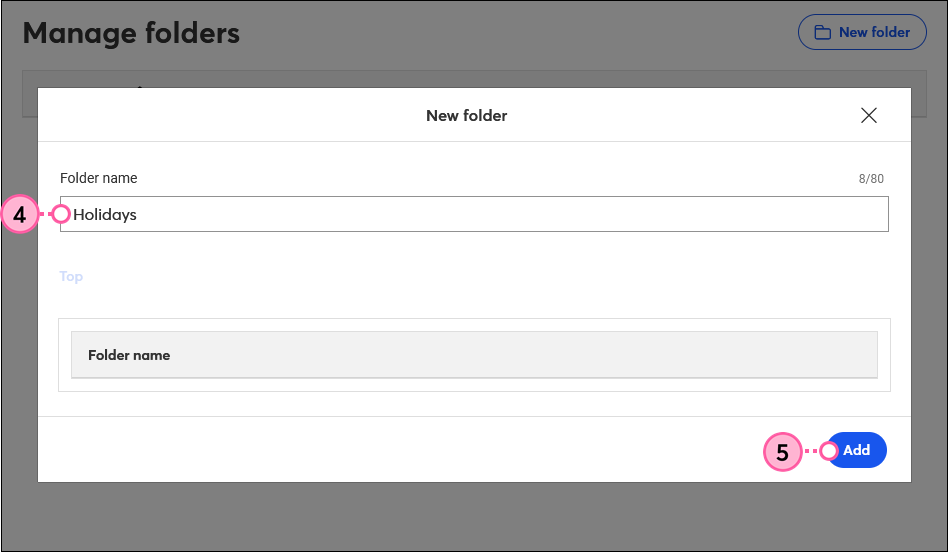
Keep your campaigns organized and easy-to-find by creating folders and sub-folders. Each top-level folder can have two additional levels of sub-folders, and you can create a maximum of 500 folders.


Create a folder or sub-folder

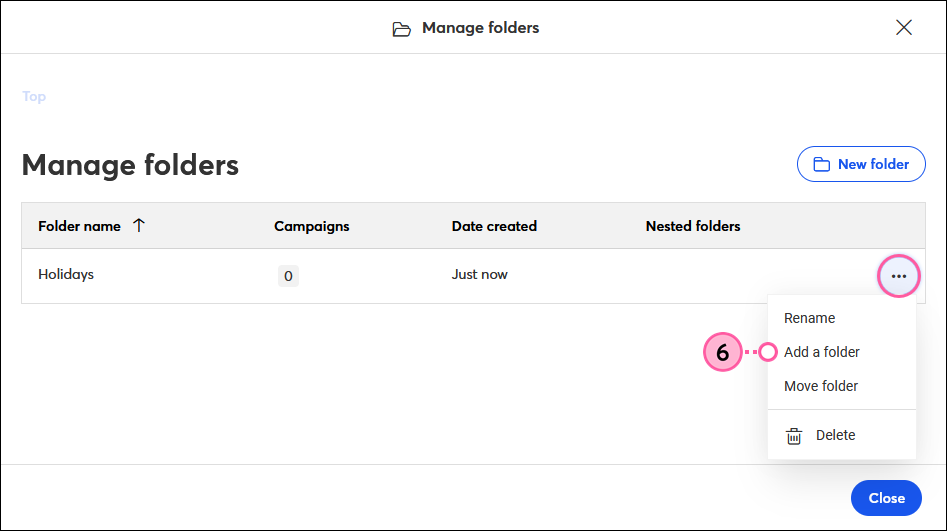
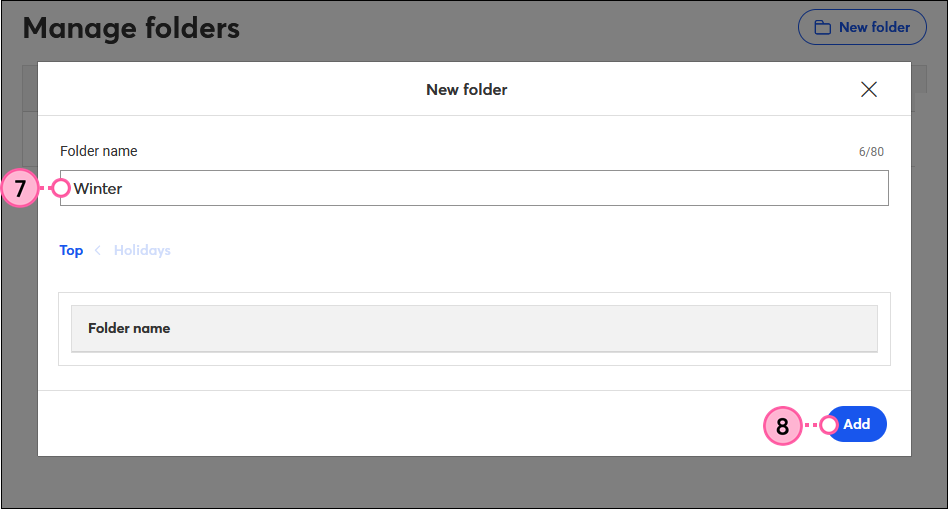
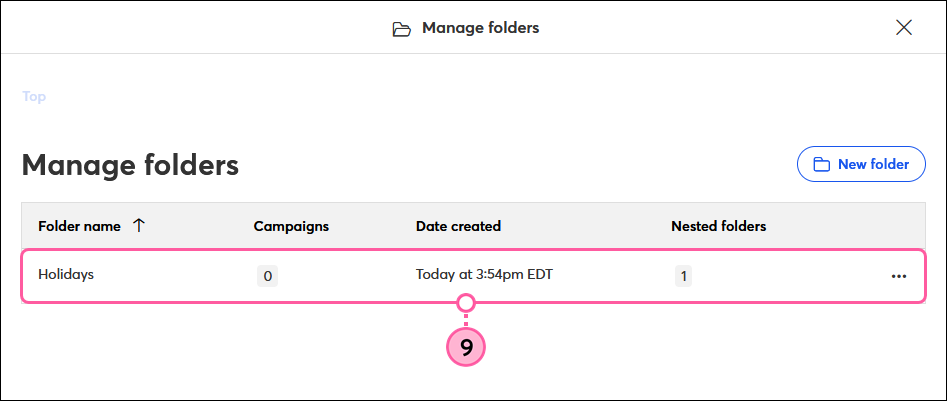
Folders can hold as many campaigns as you want, but to keep them from getting too full, you can create up to two additional levels of sub-folders in each top-level folder. For example, Holidays > Winter > New Year's Eve.

  1. Click Marketing channels > All campaigns.

    Marketing Channels drop-down with All Campaigns option 
     
  2. Click Folders > Manage folders.

    Campaigns page, Folders drop-down, and Manage Folders option selected
     
  3. Click New folder.

    Manage Folders overlay with New Folder button
     
  4. Enter a name for your new folder in the field.
  5. Click Add.

    New folder overlay, Folder Name field, and Add button
     
  6. (Optional) Click the drop-down menu next to a folder and click Add a folder to create a sub-folder.

    Manage Folders overlay, Folder More drop-down, and Add a Folder option selected
     
  7. Enter a name for your sub-folder in the field.
  8. Click Add.

    New Folder overlay, Folder Name field, and Add button
     
  9. (Optional) Click the name of a top-level folder to view the sub-folders nested under it.

    Manage Folders overlay with Top-level folder selected
     
  10. (Optional) Click the drop-down menu next to a sub-folder and click Add a folder to create a sub-folder within it.

    Manage Folders overlay, Sub-folder More drop-down, and Add a Folder option selected
     
  11. Enter a name for your sub-folder in the field.
  12. Click Add.

    New Folder overlay, Folder Name field, and Add button
     
  13. Repeat steps 3-12 for any additional folders and sub-folders you want to create. Once you’re finished, click Close.

    Manage Folders overlay and Close button


Now that you've created your folder structure, it's time to fill your folders with campaigns.


Add campaigns to folders

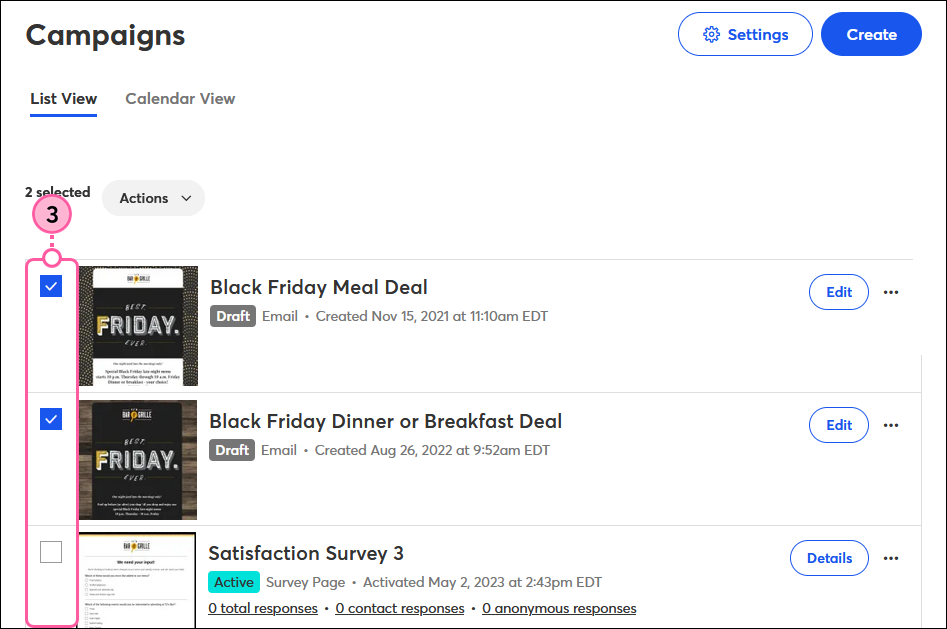
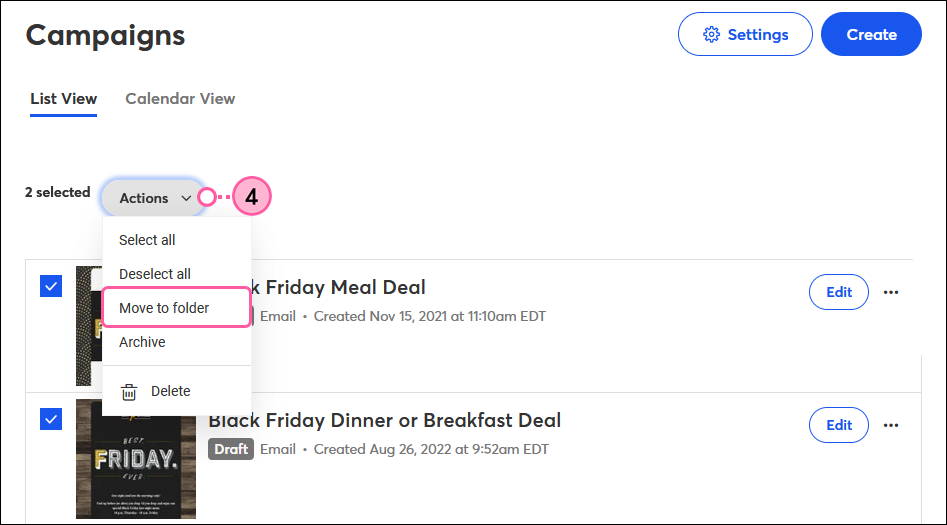
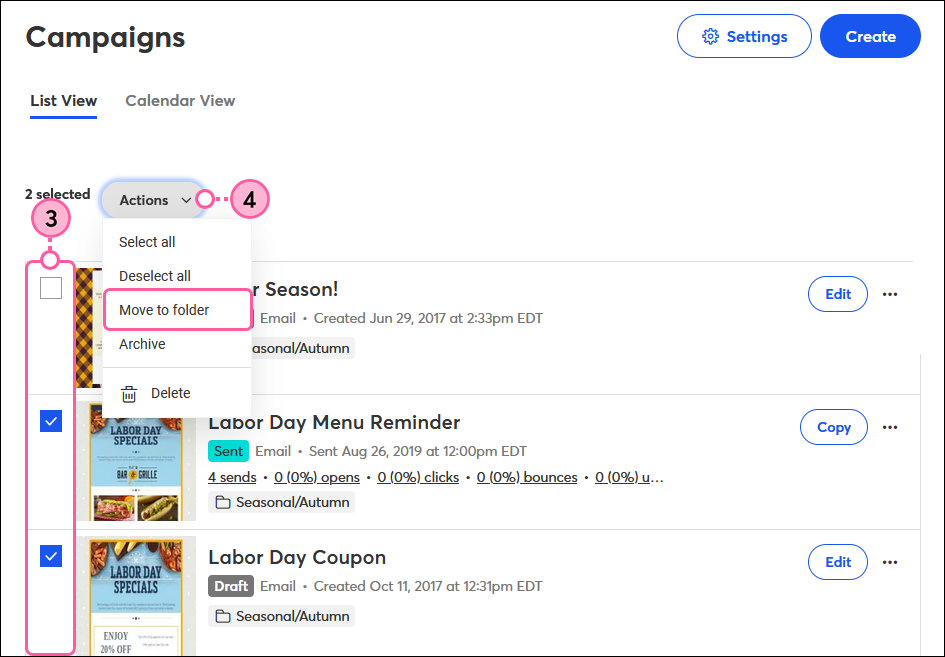
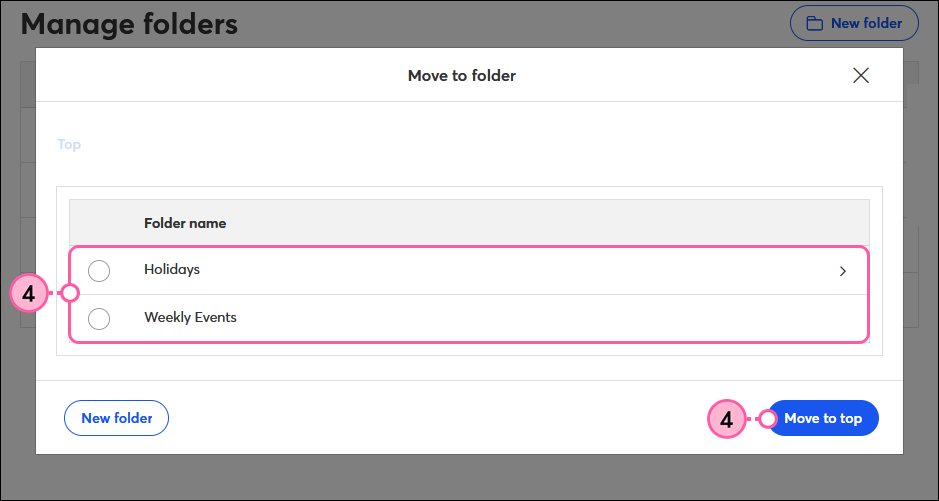
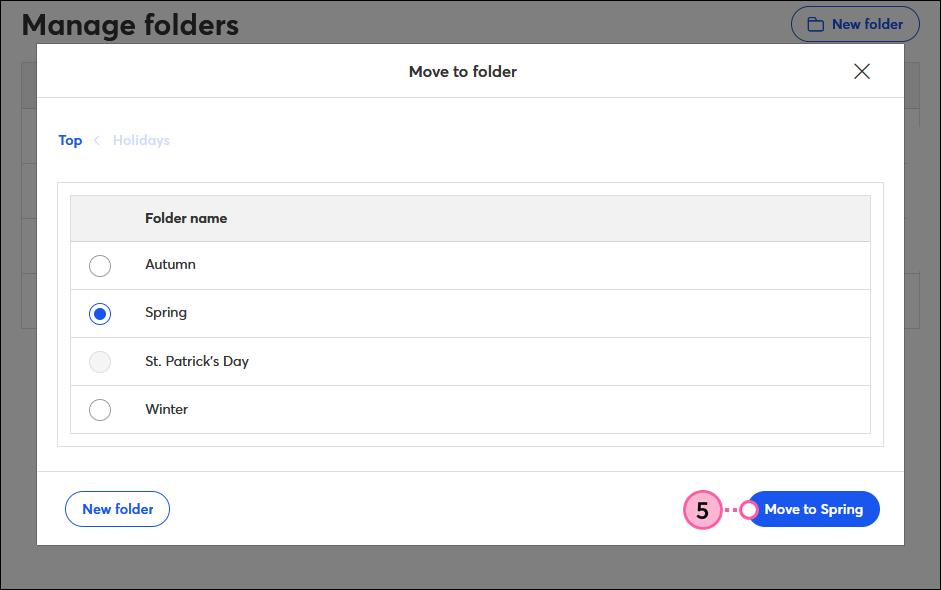
After you've created a folder structure, you can start moving your emails, landing pages, surveys, events, ads, and social posts into it. Each campaign can only live in one folder.

  1. Click Marketing channels > All campaigns.

    Marketing Channels drop-down with All Campaigns option 
     
  2. Click Folders > Unfiled to view all of your campaigns that aren't already in a folder.

    Campaigns tab, Folders drop-down, and Unfiled folder selected
     
  3. Use the checkboxes to select the campaigns you want to move into a folder.

    Campaigns tab with campaigns selected
     
  4. Click Actions Move to folder.

    Campaigns tab, campaigns selected, Actions drop-down and Move to Folder option selected
     
  5. Select the folder you want to move the selected campaigns to.
  6. Click Move.

    Move to Folder overlay, folder selected, and Move button
     

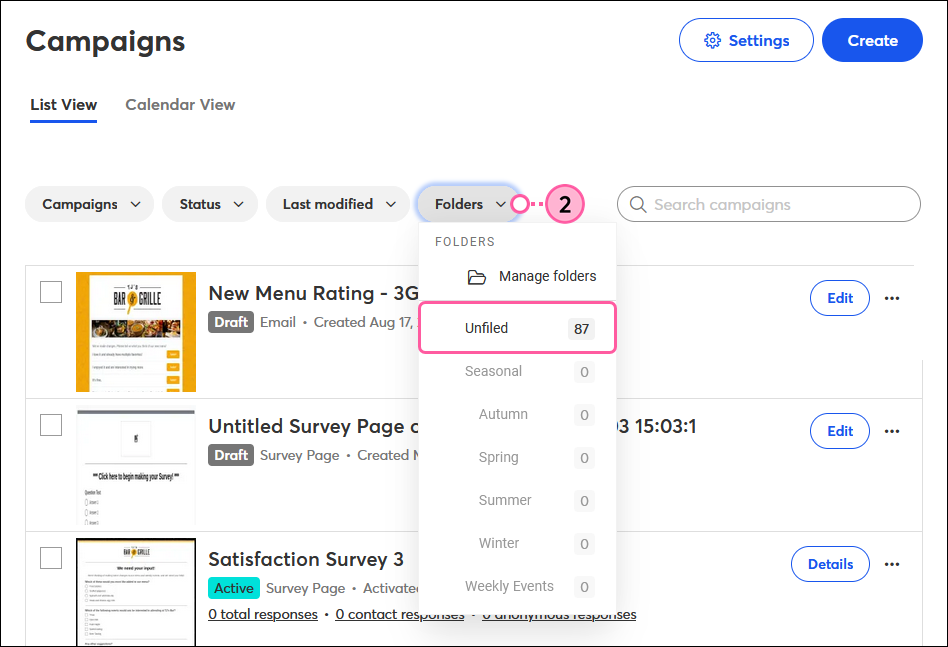
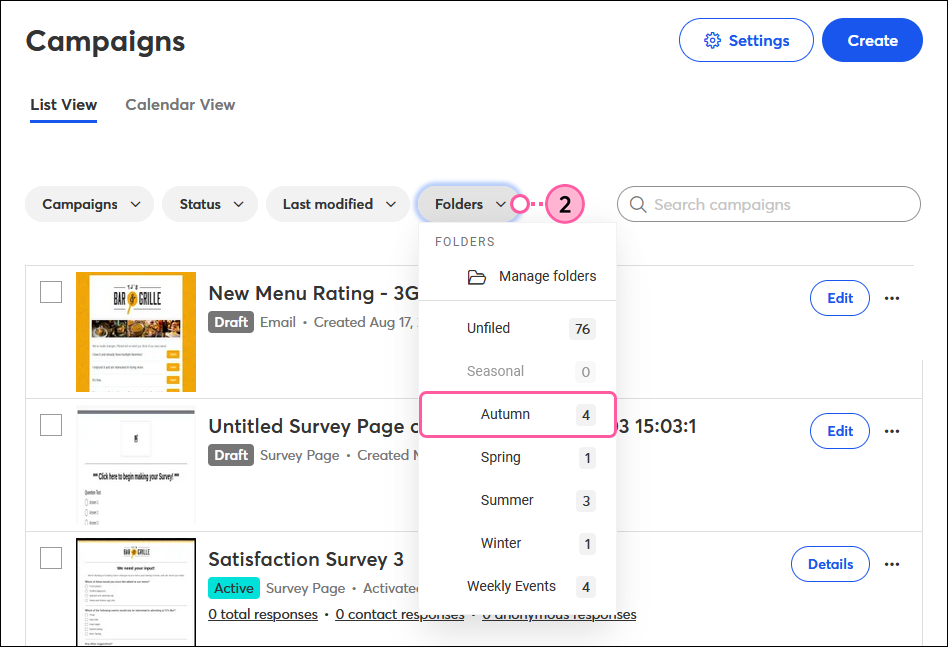
The count next to "Unfiled" decreases, and the count next to the folder or sub-folder increases to reflect how many campaigns you added to it.

Folders drop-down with Unfiled folder file count reduced and folder count increased


Remove campaigns from a folder

It's easy to move your campaigns from folder to folder as needed! If you need to delete a folder, but want to keep the campaigns that are in it, first move them to a new folder or into the "Unfiled" folder to deal with later before deleting the unwanted folder.

  1. Click Marketing channels > All campaigns.

    Marketing Channels drop-down with All Campaigns option 
     
  2. Click the Folders drop-down and select the folder with the campaign you want to remove.

    Campaigns tab, Folders drop-down, and folder selected
     
  3. Select the campaigns you want to move.
  4. Click ActionsMove to Folder.

    Campaigns tab, campaigns selected, Actions drop-down and Move to Folder option selected
     
  5. Choose where you want to move the selected campaigns and click Move.

    Move to Folder overlay, Unfiled folder selected, and Move to Unfiled button
     

The count next to the folder changes to reflect how many campaigns you removed from it.


Rearrange folders

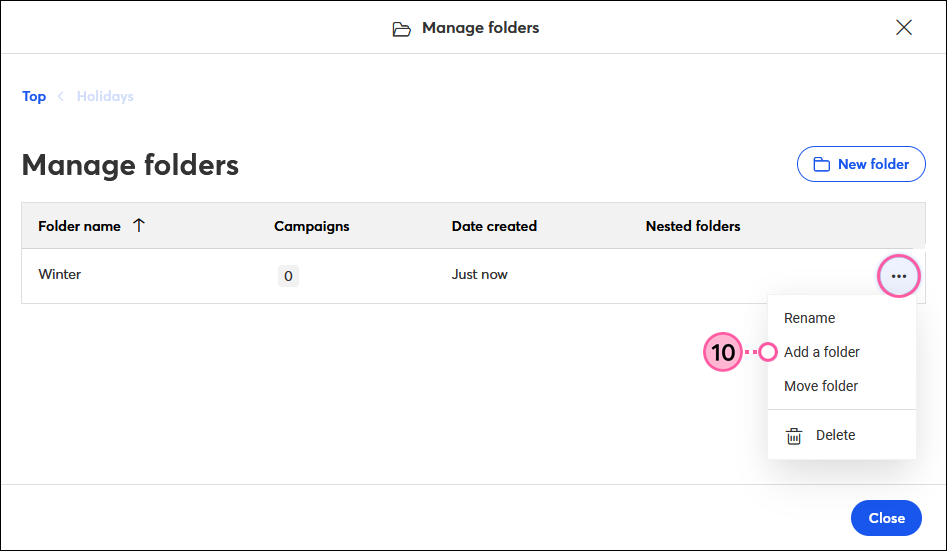
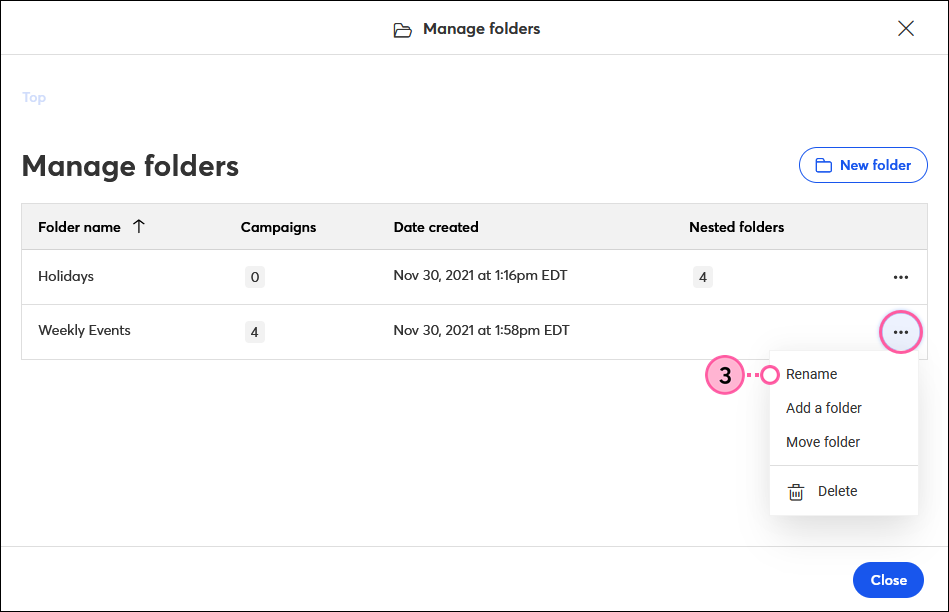
After you've created folders, you have the flexibility to move them into other folders to create sub-folders, or turn a sub-folder into a top-level folder.

  1. Click Marketing channels > All campaigns.

    Marketing Channels drop-down with All Campaigns option 
     
  2. Click Folders > Manage folders

    Campaigns tab, Folders drop-down, and Manage Folders option selected
     
  3. Click on the drop-down menu next to the folder you want to move and click Move folder.

    Manage Folders overlay, sub-folder More drop-down, and Move to Folder option selected
     
  4. Click Move to top to turn a sub-folder into a top-level folder, or select the new folder you want to add your folder to. Folder names that are grayed-out are not available options for your folder.

    Move to Folder overlay, folders to select, and Move to Top button
     
  5. If you selected a folder to move to, click the Move to button.

    Move to Folder overlay, folder selected, and Move button


Since there are only three levels of folders available, if you're moving a folder that has sub-folders under it, you're only able to move it to a folder in the same level or higher.


Rename a folder

Did you spell it wrong? Create it twice? Change your mind about your whole filing system? It's easy to change the name of any folder:

  1. Click Marketing channels > All campaigns.

    Marketing Channels drop-down with All Campaigns option 
     
  2. Click Folders > Manage folders.

    Campaigns tab, Folders drop-down, and Manage Folders option selected
     
  3. Click the drop-down menu next to the folder you want to rename and select Rename.

    Manage Folders overlay, folder More drop-down, and Rename option selected
     
  4. Enter your new folder name in the field.
  5. Click Confirm.

    Rename Folder overlay, Folder name field, and Confirm button
     

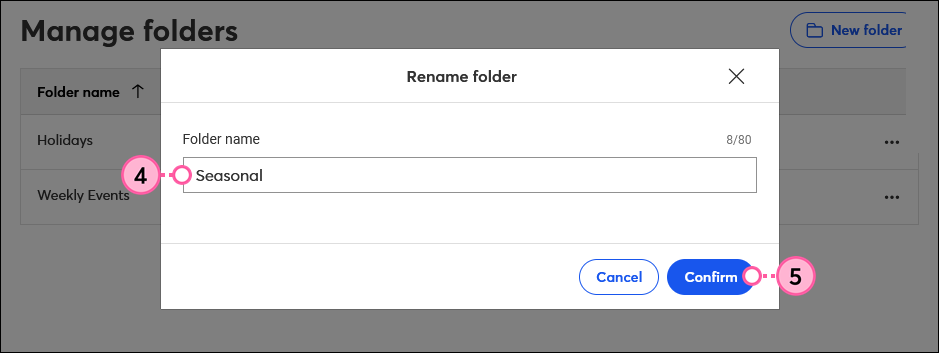
You can have two folders with the same name as long as they aren't in the same folder or sub-folder together.


Delete a folder

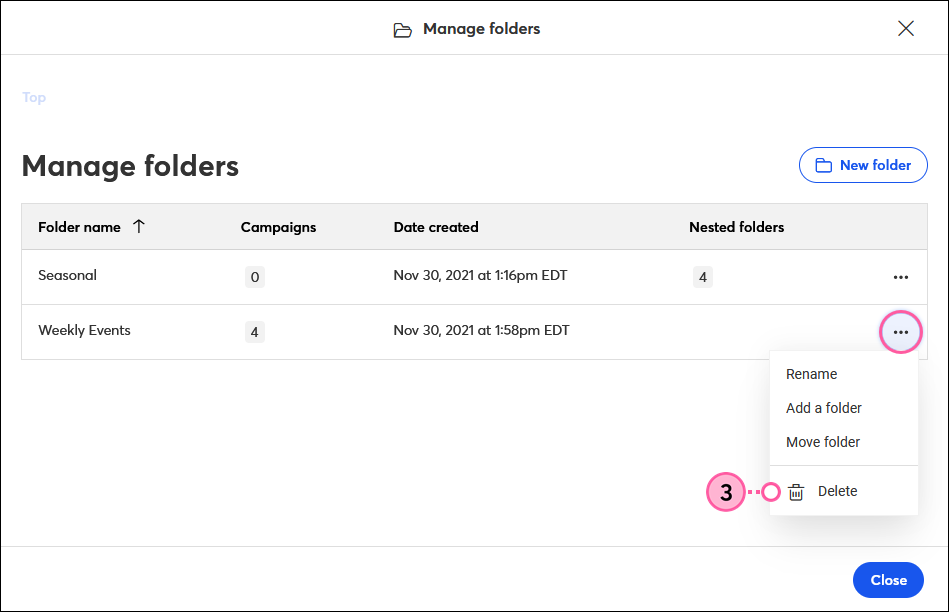
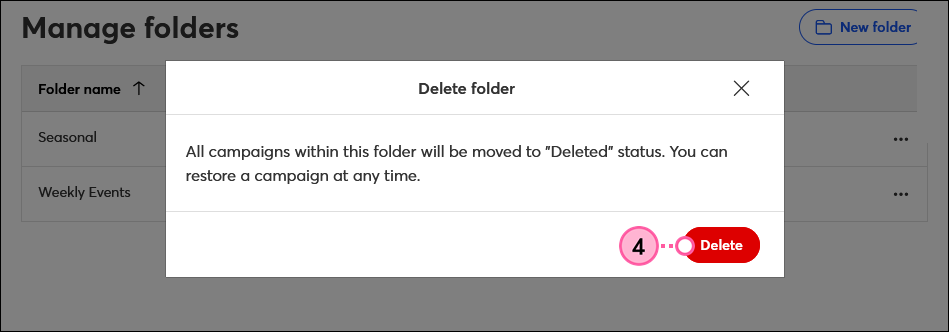
When you delete a folder, any campaigns that are inside it are moved to the "Deleted" folder. If your folder has sub-folders, the sub-folders are deleted and any campaigns within them are also moved to the "Deleted" folder. You can always restore them to the "Unfiled" folder later.

  1. Click Marketing channels > All campaigns.

    Marketing Channels drop-down with All Campaigns option 
     
  2. Click Folders > Manage folders.

    Campaigns tab, Folders drop-down, and Manage Folders option selected
     
  3. Click the drop-down menu next to the folder you want to delete and select Delete.

    Manage Folders overlay, folder More drop-down, and Delete option selected
     
  4. Click Delete to confirm.

    Delete Folder confirmation message and Delete button


Questions?

Ask the Community

Did this article answer your question?


Constant Contact Logo

Copyright © 2025 · All Rights Reserved · Constant Contact · Privacy Center