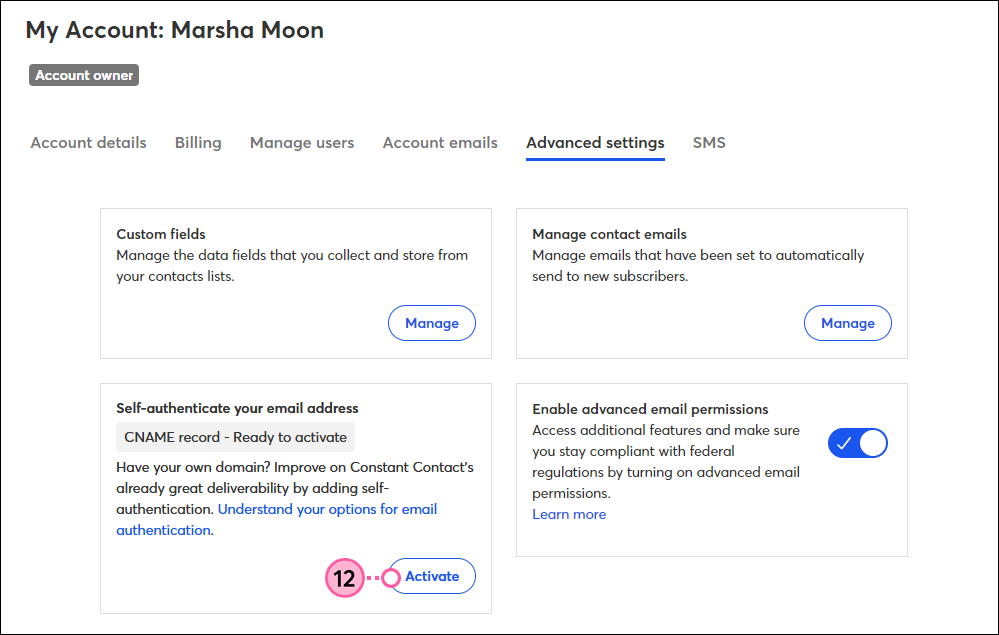
Want to improve your email deliverability and make sure your emails land in the inbox? If you have your own website domain name (ex: halfmoonyoga.com) and an email address at that domain that you use as your "From Address" (ex: marsha@halfmoonyoga.com), authenticating your outbound email helps to verify that the message is actually coming from your organization and that it’s not a spoof or spam.
All email sent through Constant Contact receives basic authentication, but setting up self-authentication within your Constant Contact account builds your reputation as a safe sender under your domain instead of under Constant Contact. Learn more about email authentication.
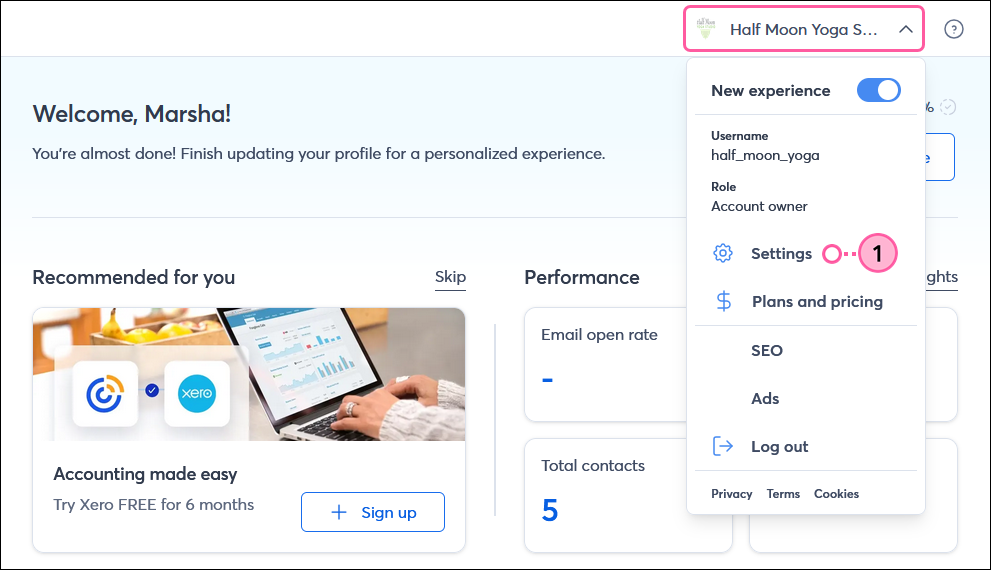
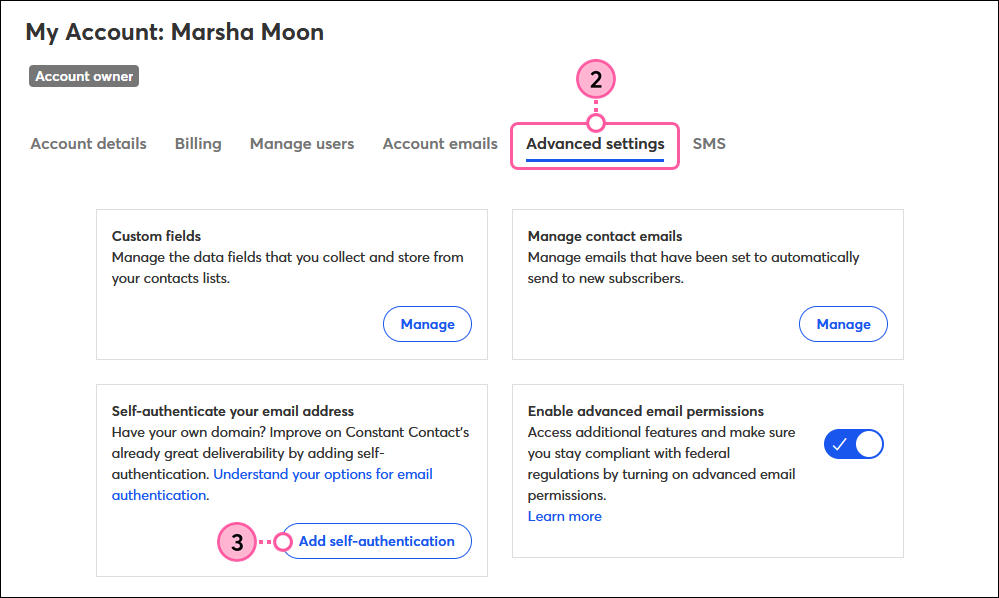
In order to self-authenticate your emails, you'll need to be able to access the DNS records for your domain, usually through your hosting provider. Not sure where your DNS records are hosted? You can do a lookup with this tool.
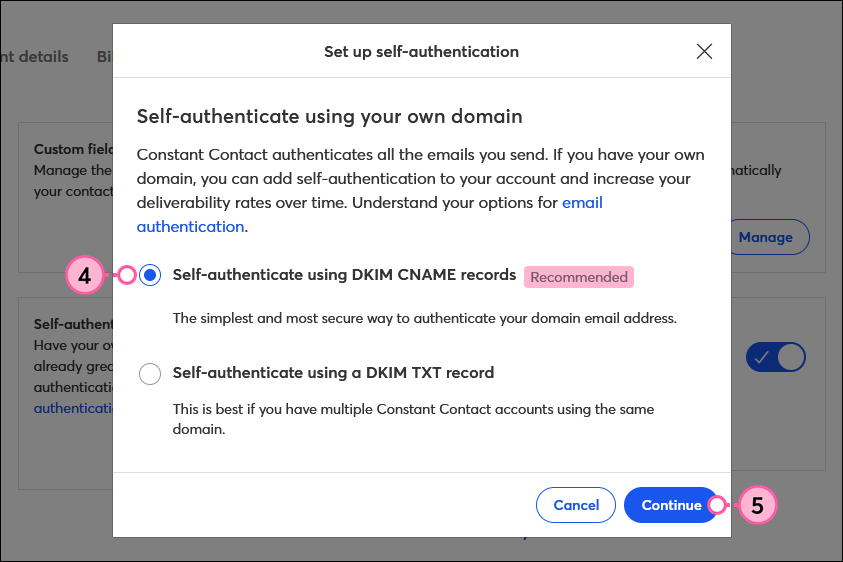
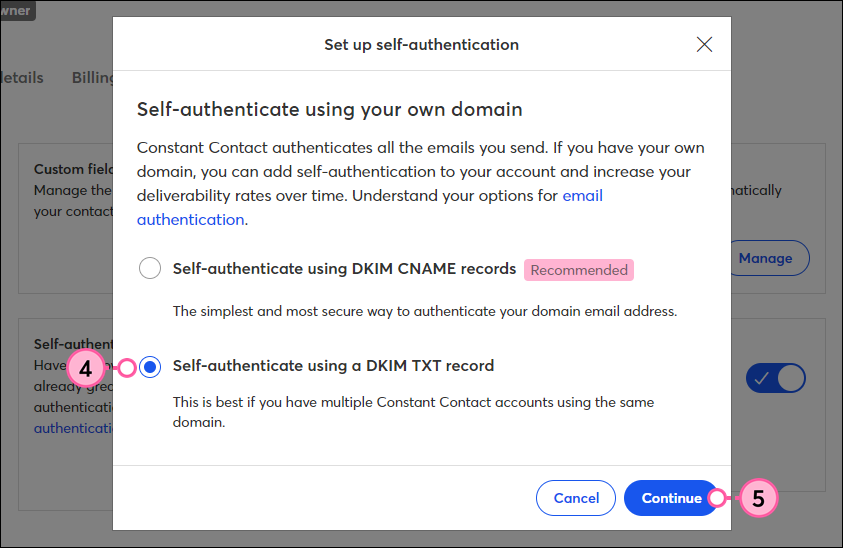
You have two options for the type of record you can add:
| Note: When self-authenticating your emails, you also need to publish a DMARC policy in your DNS records to comply with the latest authentication requirements. |
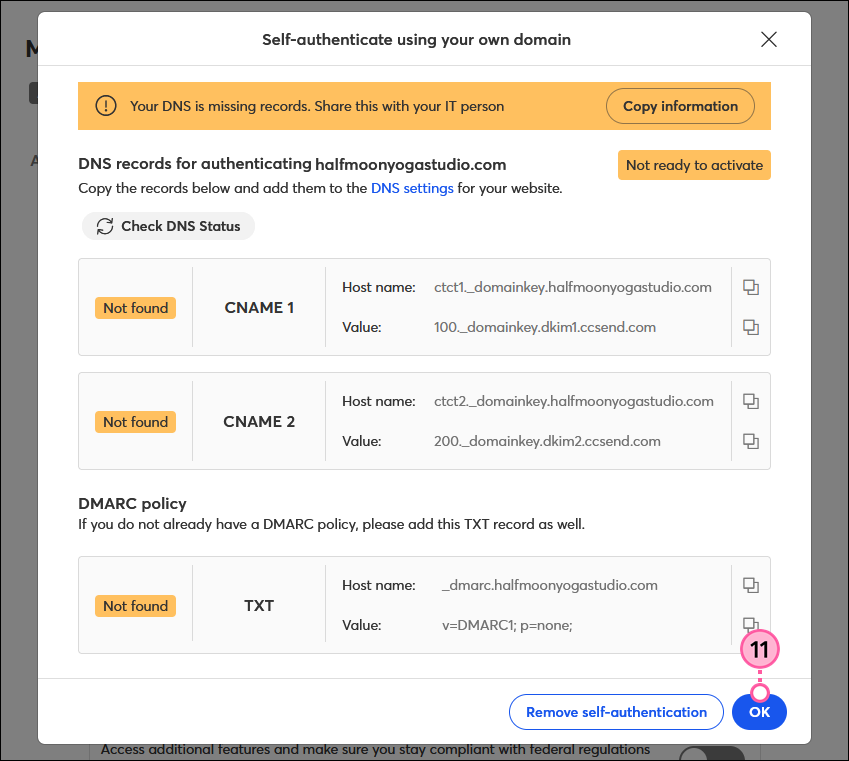
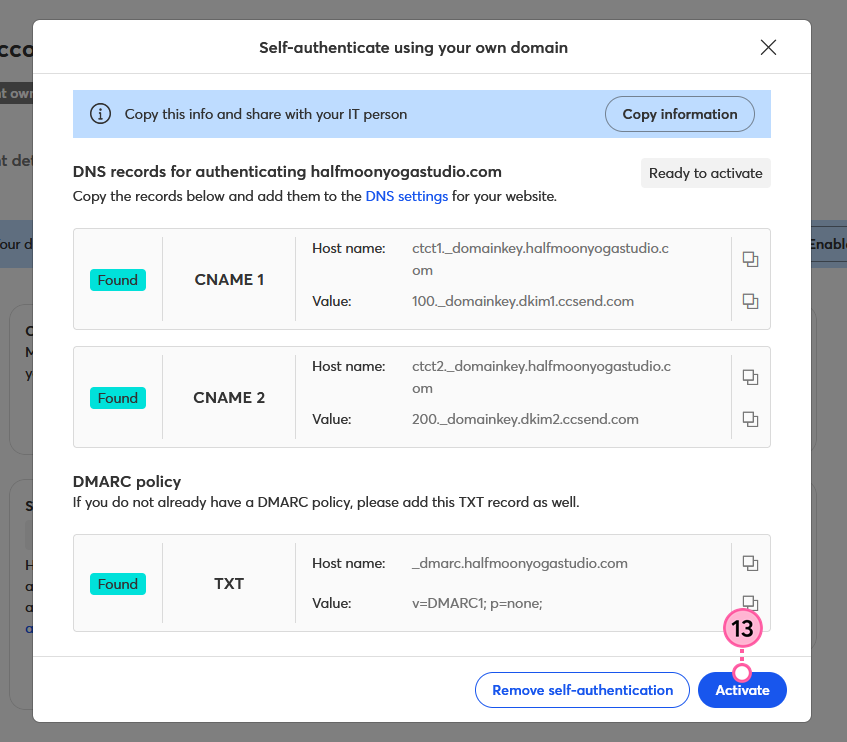
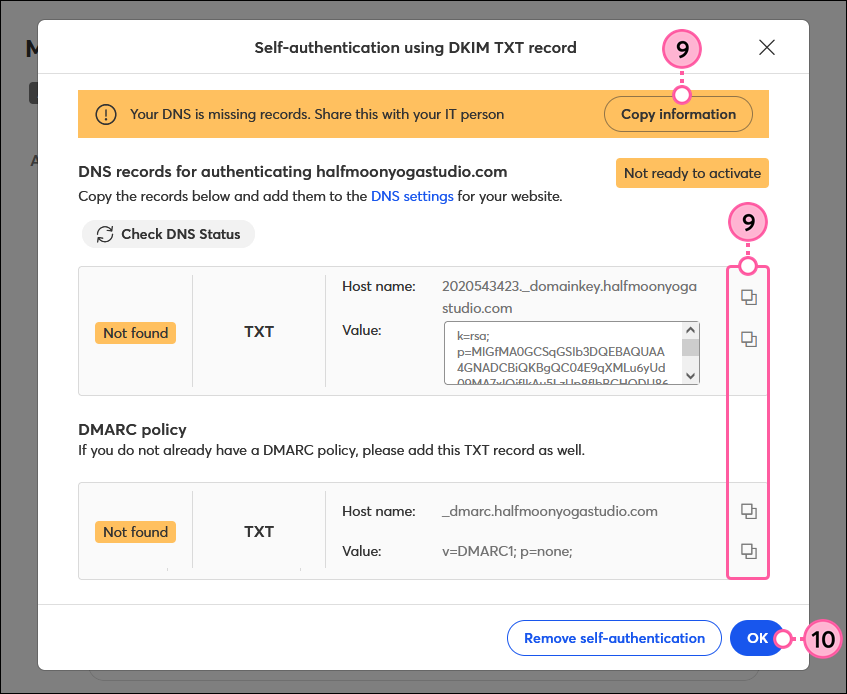
Constant Contact generates the CNAME or TXT record information, as well as the DMARC policy information, you'll need to publish in your domain's DNS settings, which can be done by your IT department or webmaster if you have one, or with the help of your hosting provider. Once your DNS records are updated, it can take anywhere from a couple of hours to a couple of days for the newly published authentication records to propagate through the internet.
Self-authenticating using CNAME records is the simplest and most secure way to authenticate your domain email address.
Note: You can only authenticate one domain in your account.
| Important: If you receive a message that says “This domain is already authenticated in another Constant Contact account,” you'll need to self-authenticate using a TXT record instead. |

| Tip: If you're using a web hosting provider, they can help you create the records within their admin console. Some DNS providers may even automatically add your domain to the record by default. Learn more. |

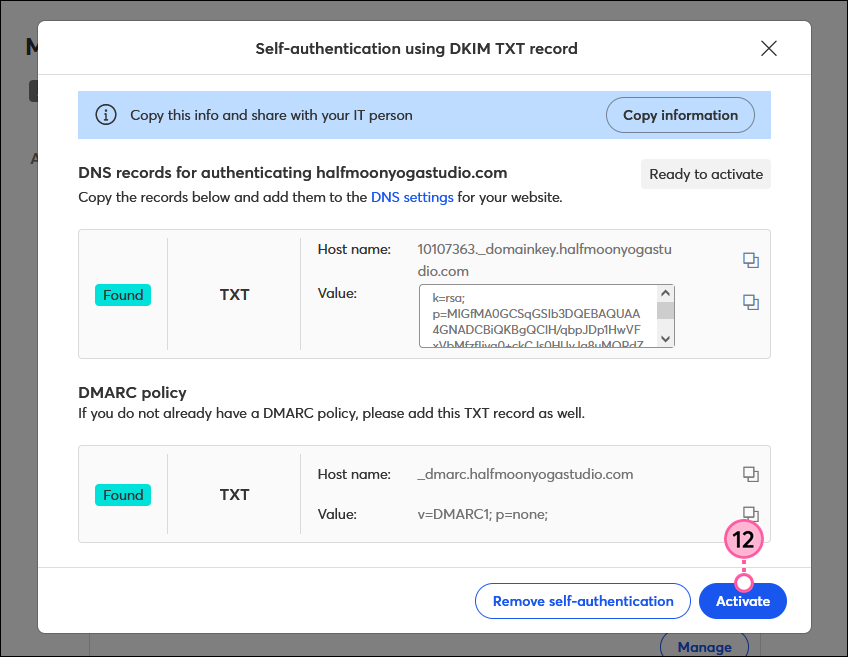
| Important: Don't forget to also publish the DMARC policy record, in addition to the CNAME records, to be able to activate your self-authentication in step 13. |
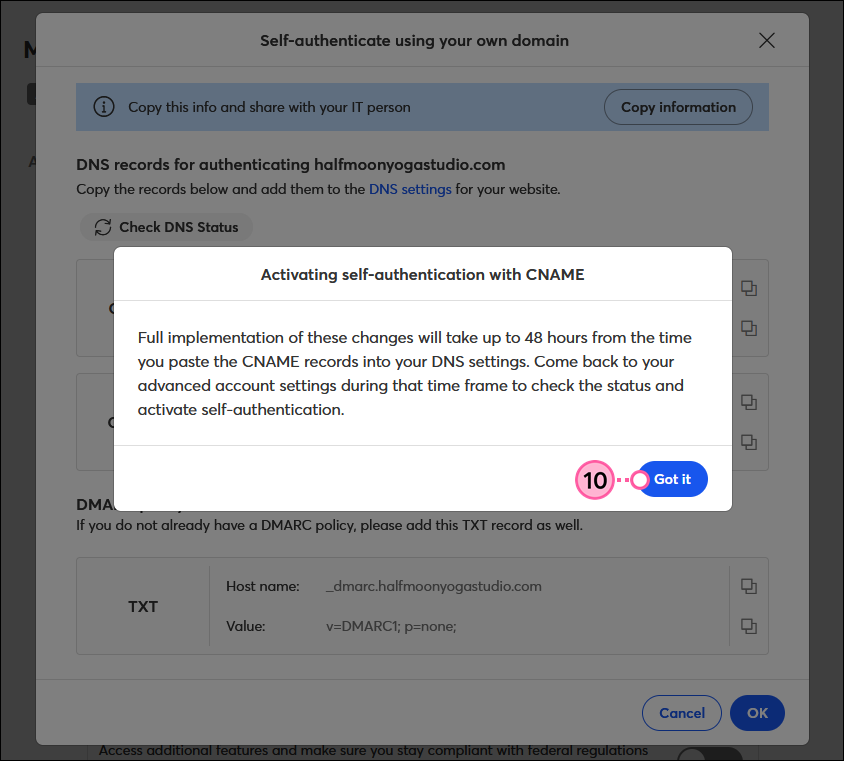
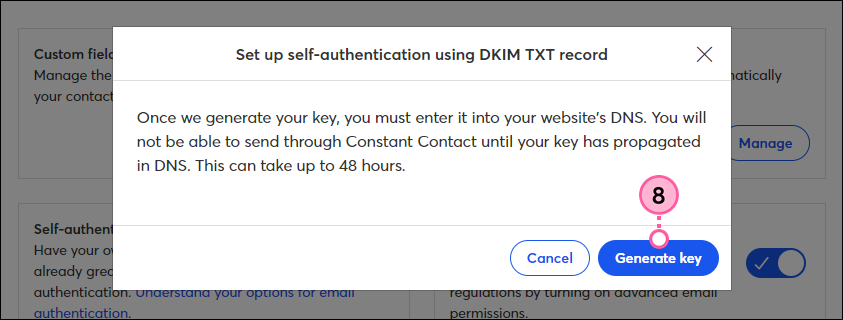
| Important: You won't be able to send emails until your DNS records fully propagate, which can take up to 48 hours. Make sure your webmaster or IT admin is looped into the process before you generate your DKIM key. Sending an email after your DKIM key is generated, but before your DNS record is updated, results in an error message. After your DNS record is updated, it's best to send a test email before sending an email to your contacts. |
When you self-authenticate using a TXT record, Constant Contact generates a public/private DKIM key pair for you. We use the private key to sign your outgoing emails, while you publish the public key in the DNS records for your domain. This option is best if you have multiple Constant Contact accounts using the same domain.
Note: You can only authenticate one domain in each Constant Contact account.
| Did you know? If you're using a web hosting provider, they can help you create the TXT records and store your DKIM key within their admin console. Some DNS providers may even automatically add your domain to the TXT record by default. Learn more. |
Note: If you send email from multiple locations, such as Constant Contact, Google apps, and a CRM tool, each location signs with a different private DKIM key. You will have multiple public keys on your DNS to correspond to the private keys. DKIM keys are differentiated by the selector—in the above example, the selector is 10008432. Constant Contact uses numbers for the selector, but that's not always the case. For example, Google uses letters for the selector instead.
| Important: Don't forget to also publish the DMARC policy record, in addition to the TXT record, for your domain to ensure you comply with the latest authentication requirements. |
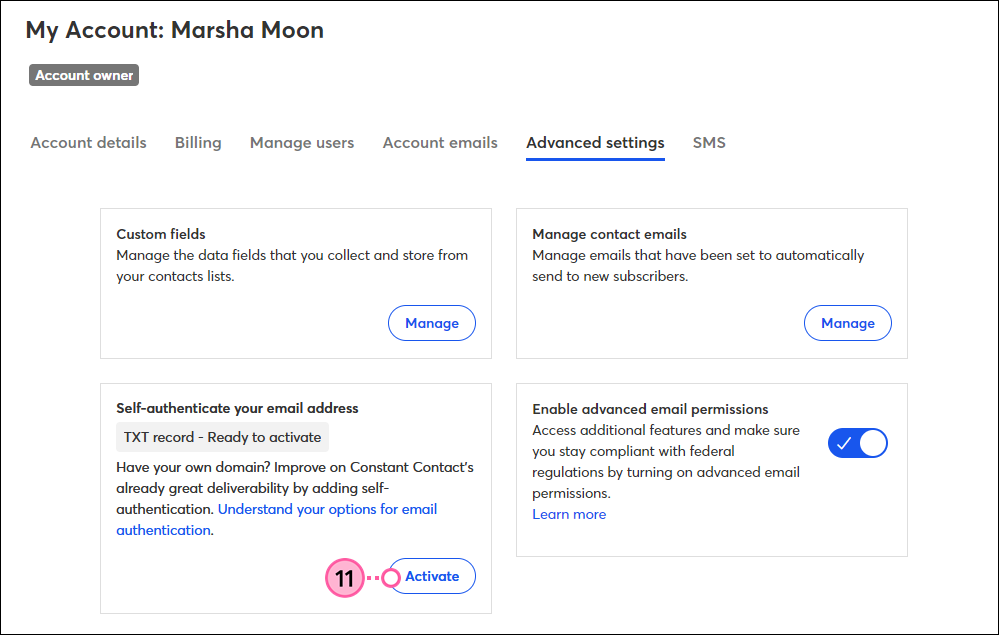
| Important: Before you send your next email, make sure your custom domain email address is verified in your account so that you can use it as the "From Address" in your emails. Once you've self-authenticated, you can only use a "From Address" with your authenticated domain, or your emails are likely to bounce. |
It's a good idea to test your authentication before you send out an email, because it may take anywhere from a couple of hours to a couple of days for the newly published authentication records to propagate through the internet.
To test the new settings:
Once you have a successful test send, you can start sending emails that help build your reputation. If your initial test fails due to having "no signature," wait and try again later.
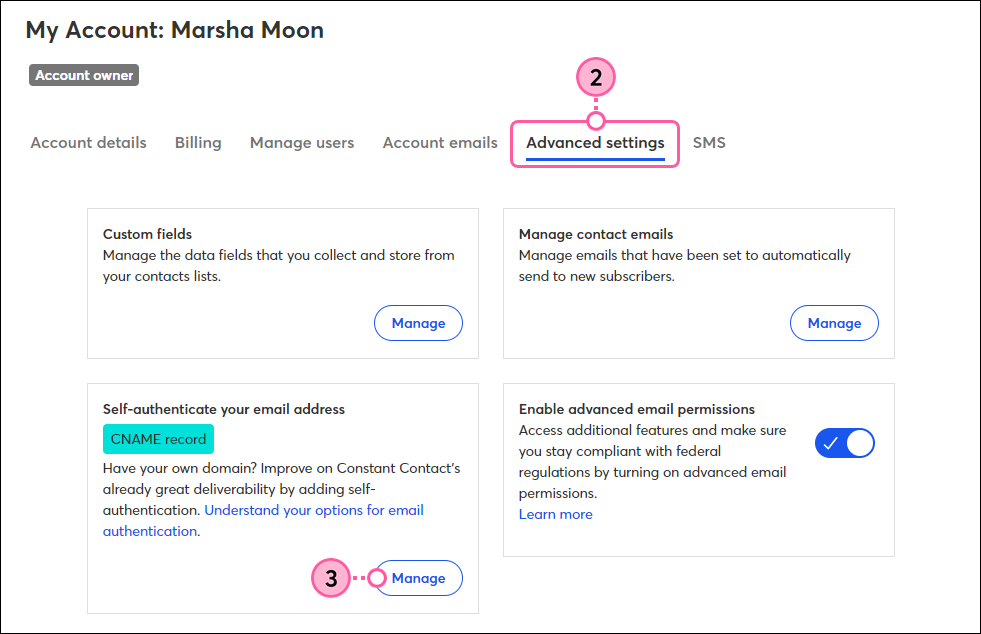
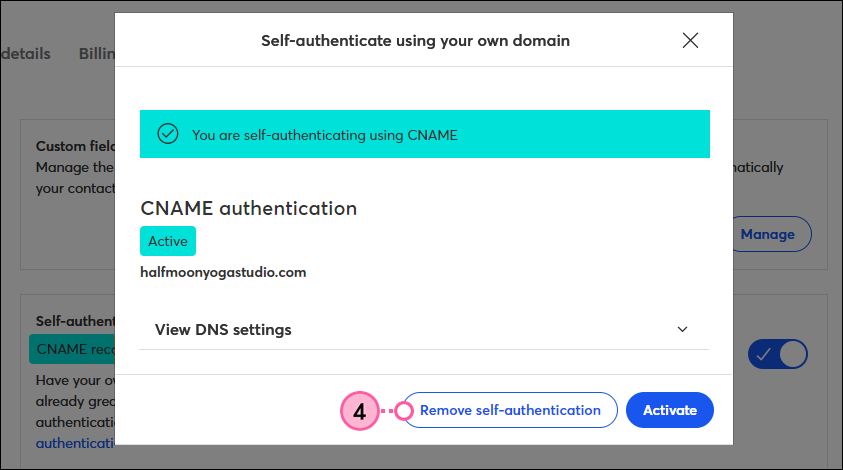
If you want to authenticate a different domain to use for your emails going forward, you’ll need to first remove your current self-authentication.
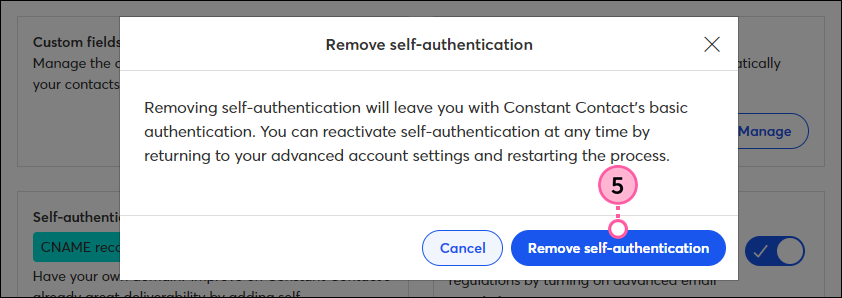
You can now follow the steps above to self-authenticate your new domain using CNAME records or a TXT record.
Any links we provide from non-Constant Contact sites or information about non-Constant Contact products or services are provided as a courtesy and should not be construed as an endorsement by Constant Contact.
Copyright © 2026 · All Rights Reserved · Constant Contact · Privacy Center