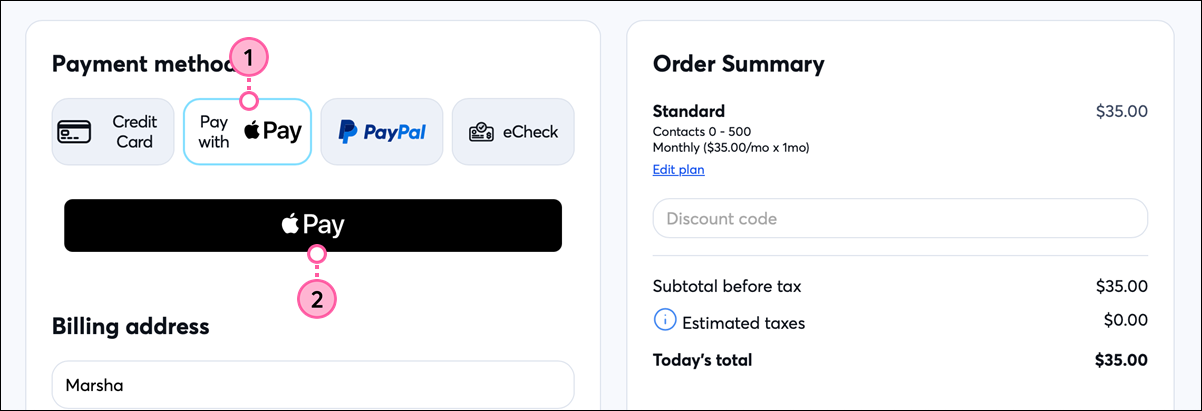
Apple Pay is an easy and secure way to pay for your Constant Contact account. When you’re ready to upgrade from a free trial to a paid account or want to change your email plan, you can set up recurring payments using a stored payment method in your Apple Wallet.
| Important: Apple Pay for Constant Contact is only available on macOS devices and using the Safari web browser. It is not available on Windows devices or third-party browsers on macOS devices. |
We make it easy to set up Apple Pay as your payment method when upgrading from a trial or when changing your email plan, if a charge is associated.
| Note: If your account looks different than what's shown below, please refer to this article instead. |

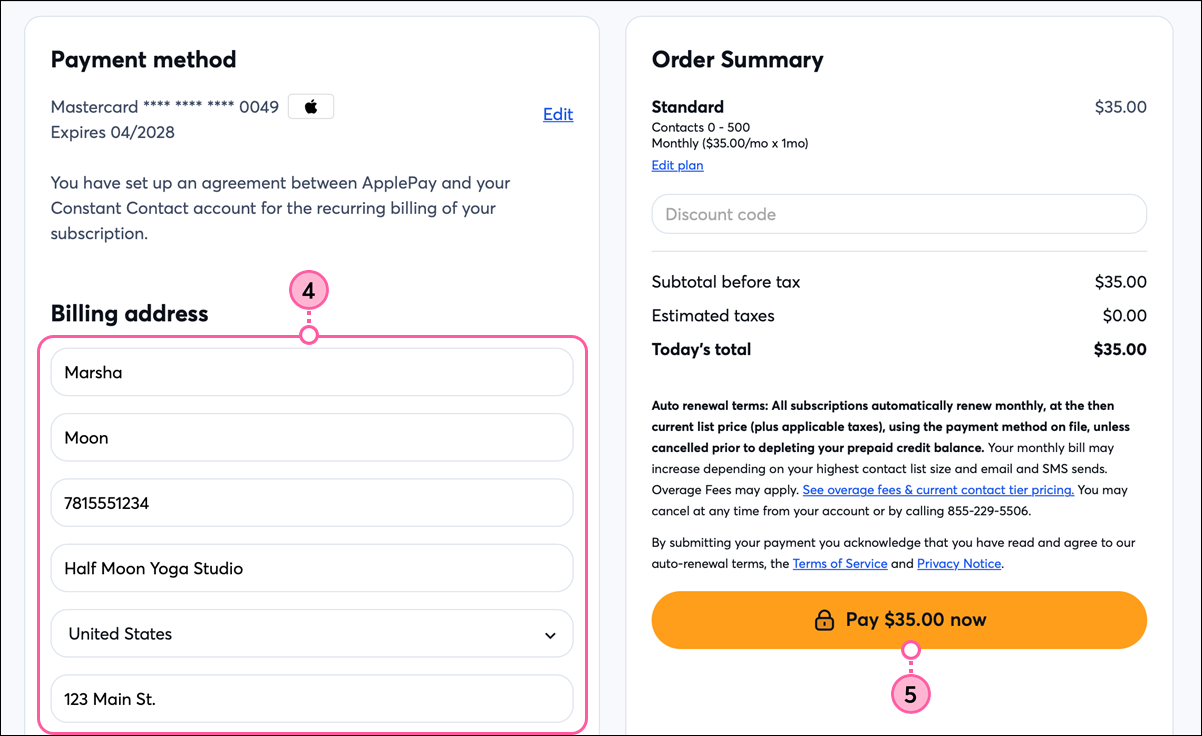
All of the features available in your selected plan are ready to use as soon as your payment is processed. Future billing dates are determined based on the date you upgraded to a paid account. You can change your email plan at any time.
When viewing your payment method in your account settings, you’ll simply see the credit card attached to your Apple Pay account, which you can update as you would any other payment method.
Copyright © 2026 · All Rights Reserved · Constant Contact · Privacy Center