We're making it easier to get around Constant Contact with a brand new left navigation. Not all accounts have that change yet, so if your navigation looks different from our articles, that's why–but everything from the top can now be found on the left!

Email and Digital Marketing
How can we help you?
Search our help articles, video tutorials, and quickstart guides

You've got this. You've got us. Search our Knowledge Base to quickly find answers to your questions.

Import contacts from Microsoft Dynamics

Article: 000053869
Updated: January 22, 2025

Sync contacts and leads from Microsoft Dynamics into Constant Contact

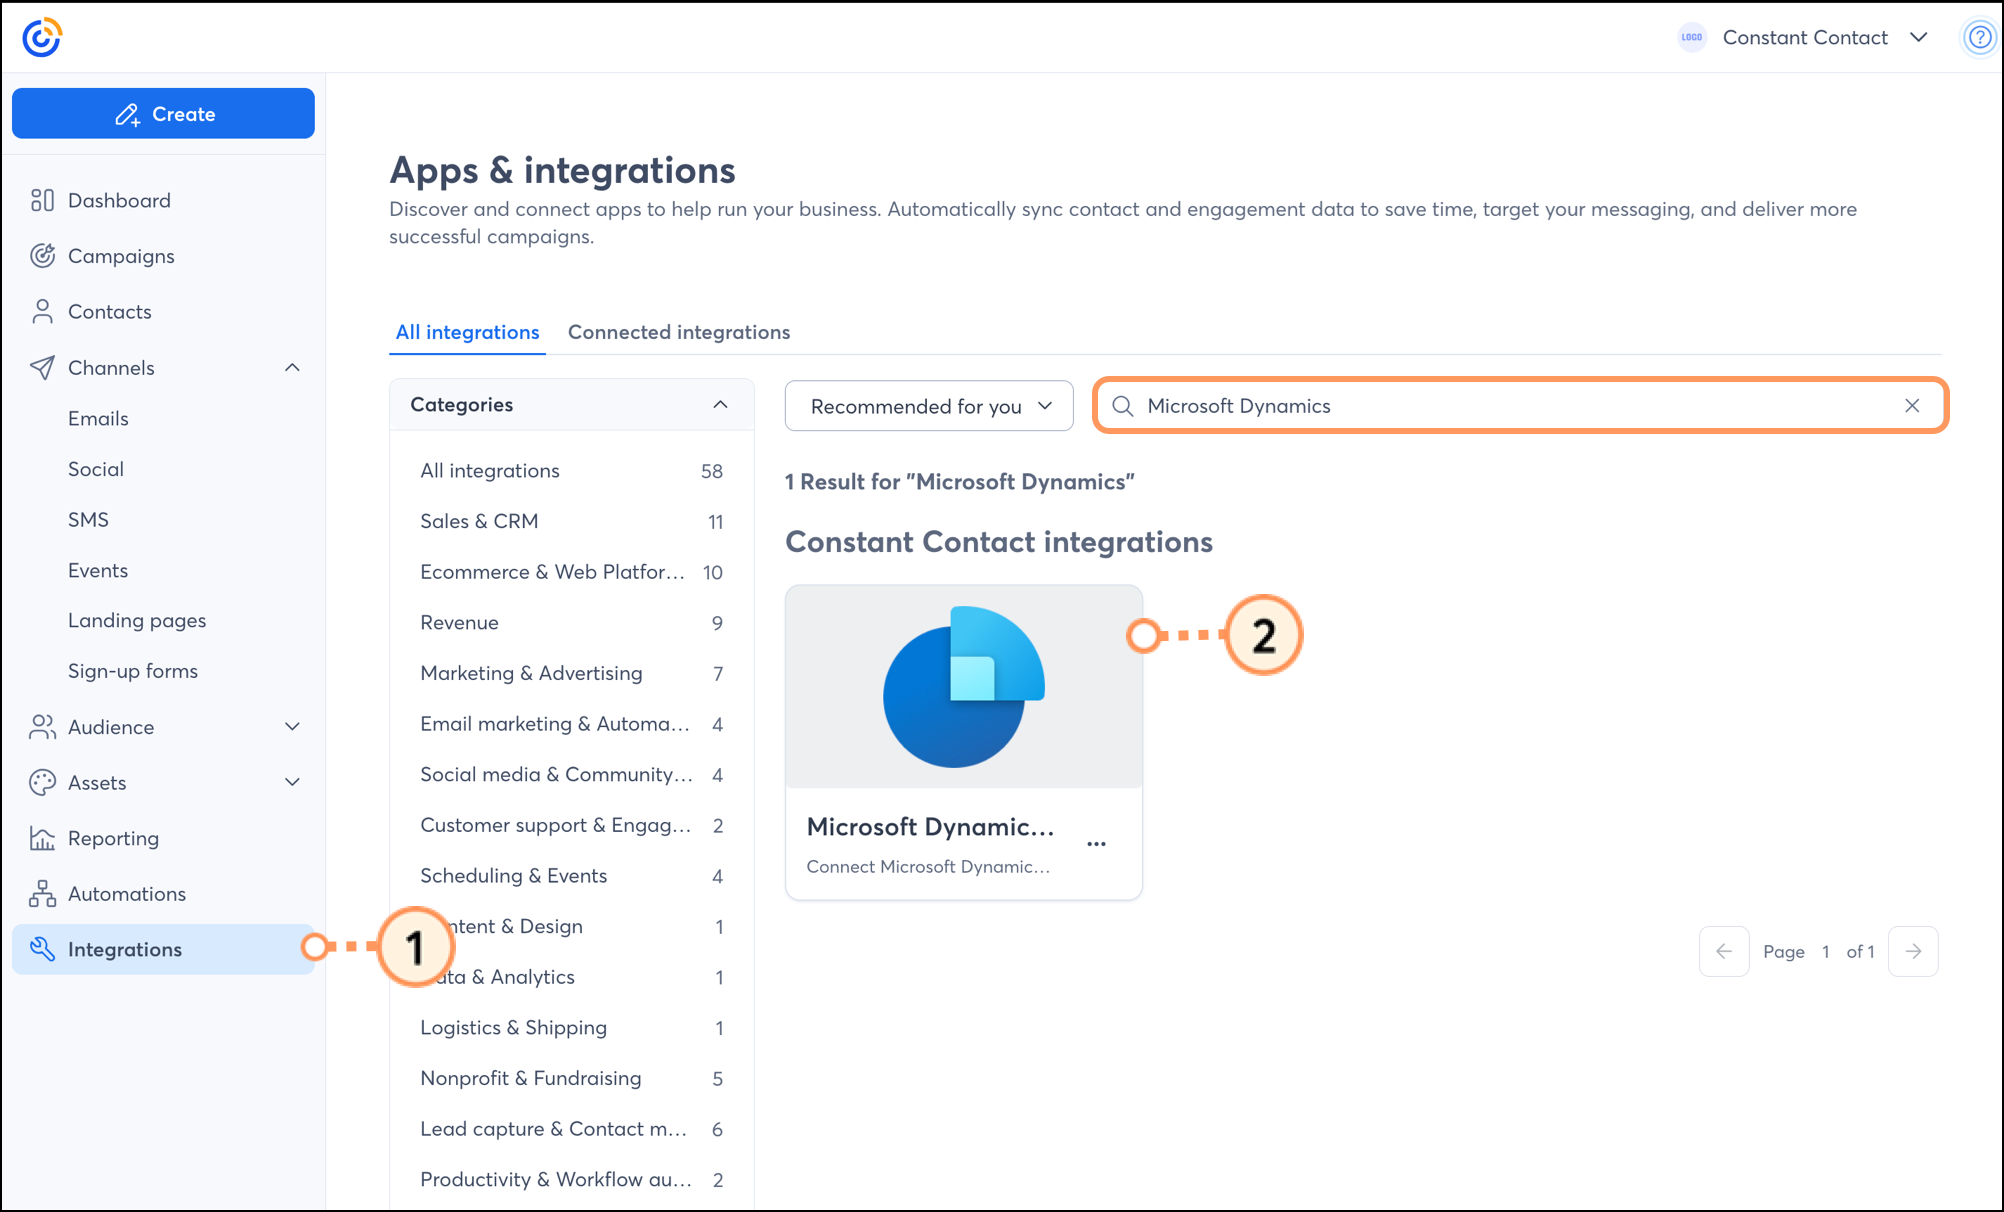
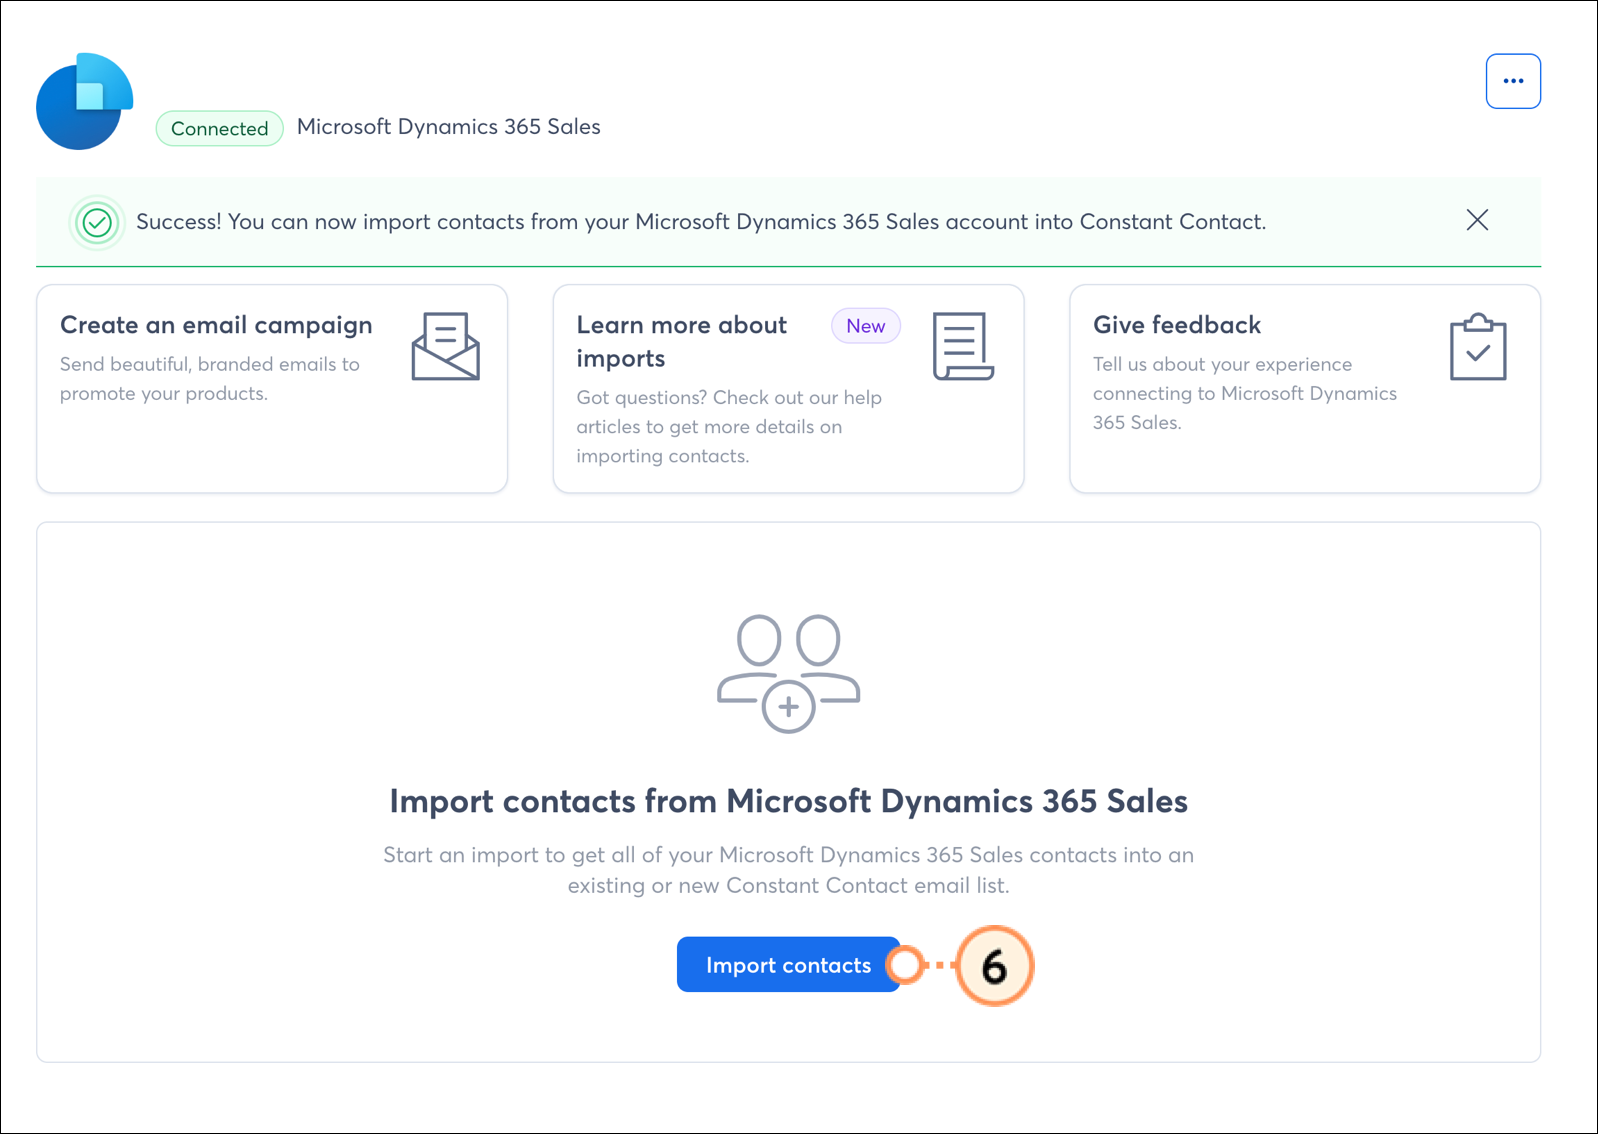
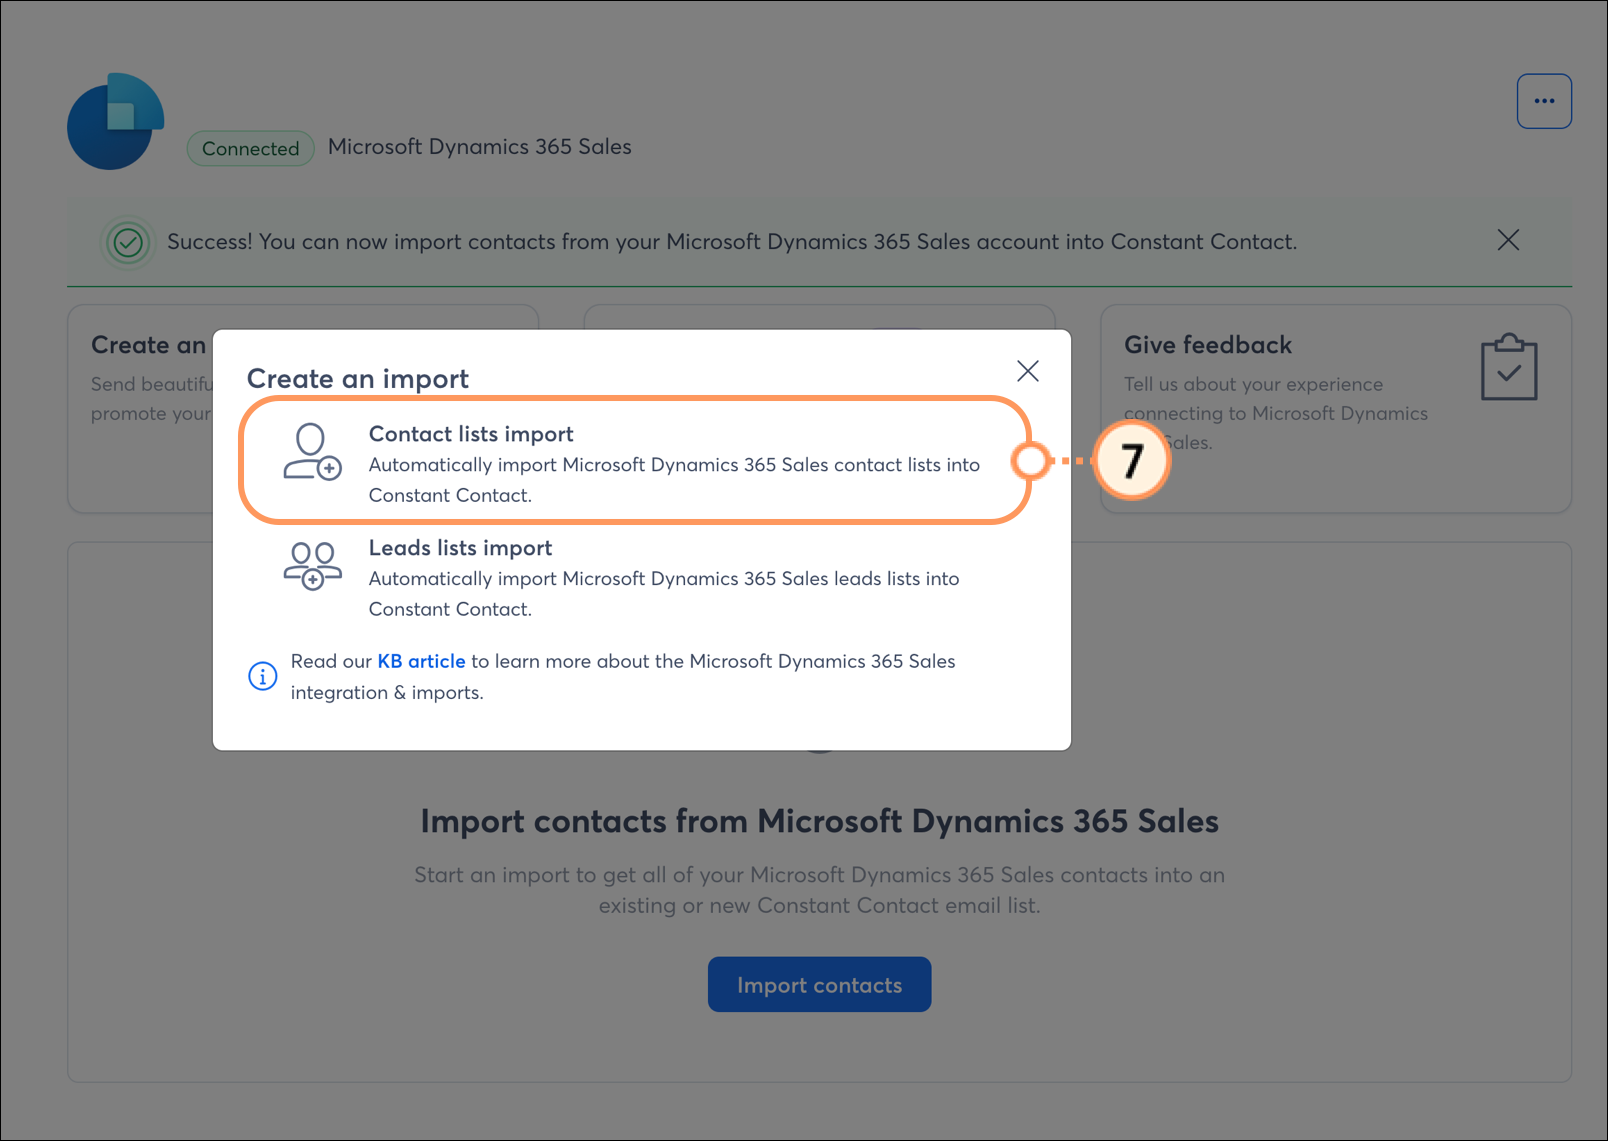
Our integration with Microsoft Dynamics allows you to auto-sync contact and lead data into Constant Contact to save you time and send more targeted emails. There are two methods available for import: by Contacts List or Leads List.

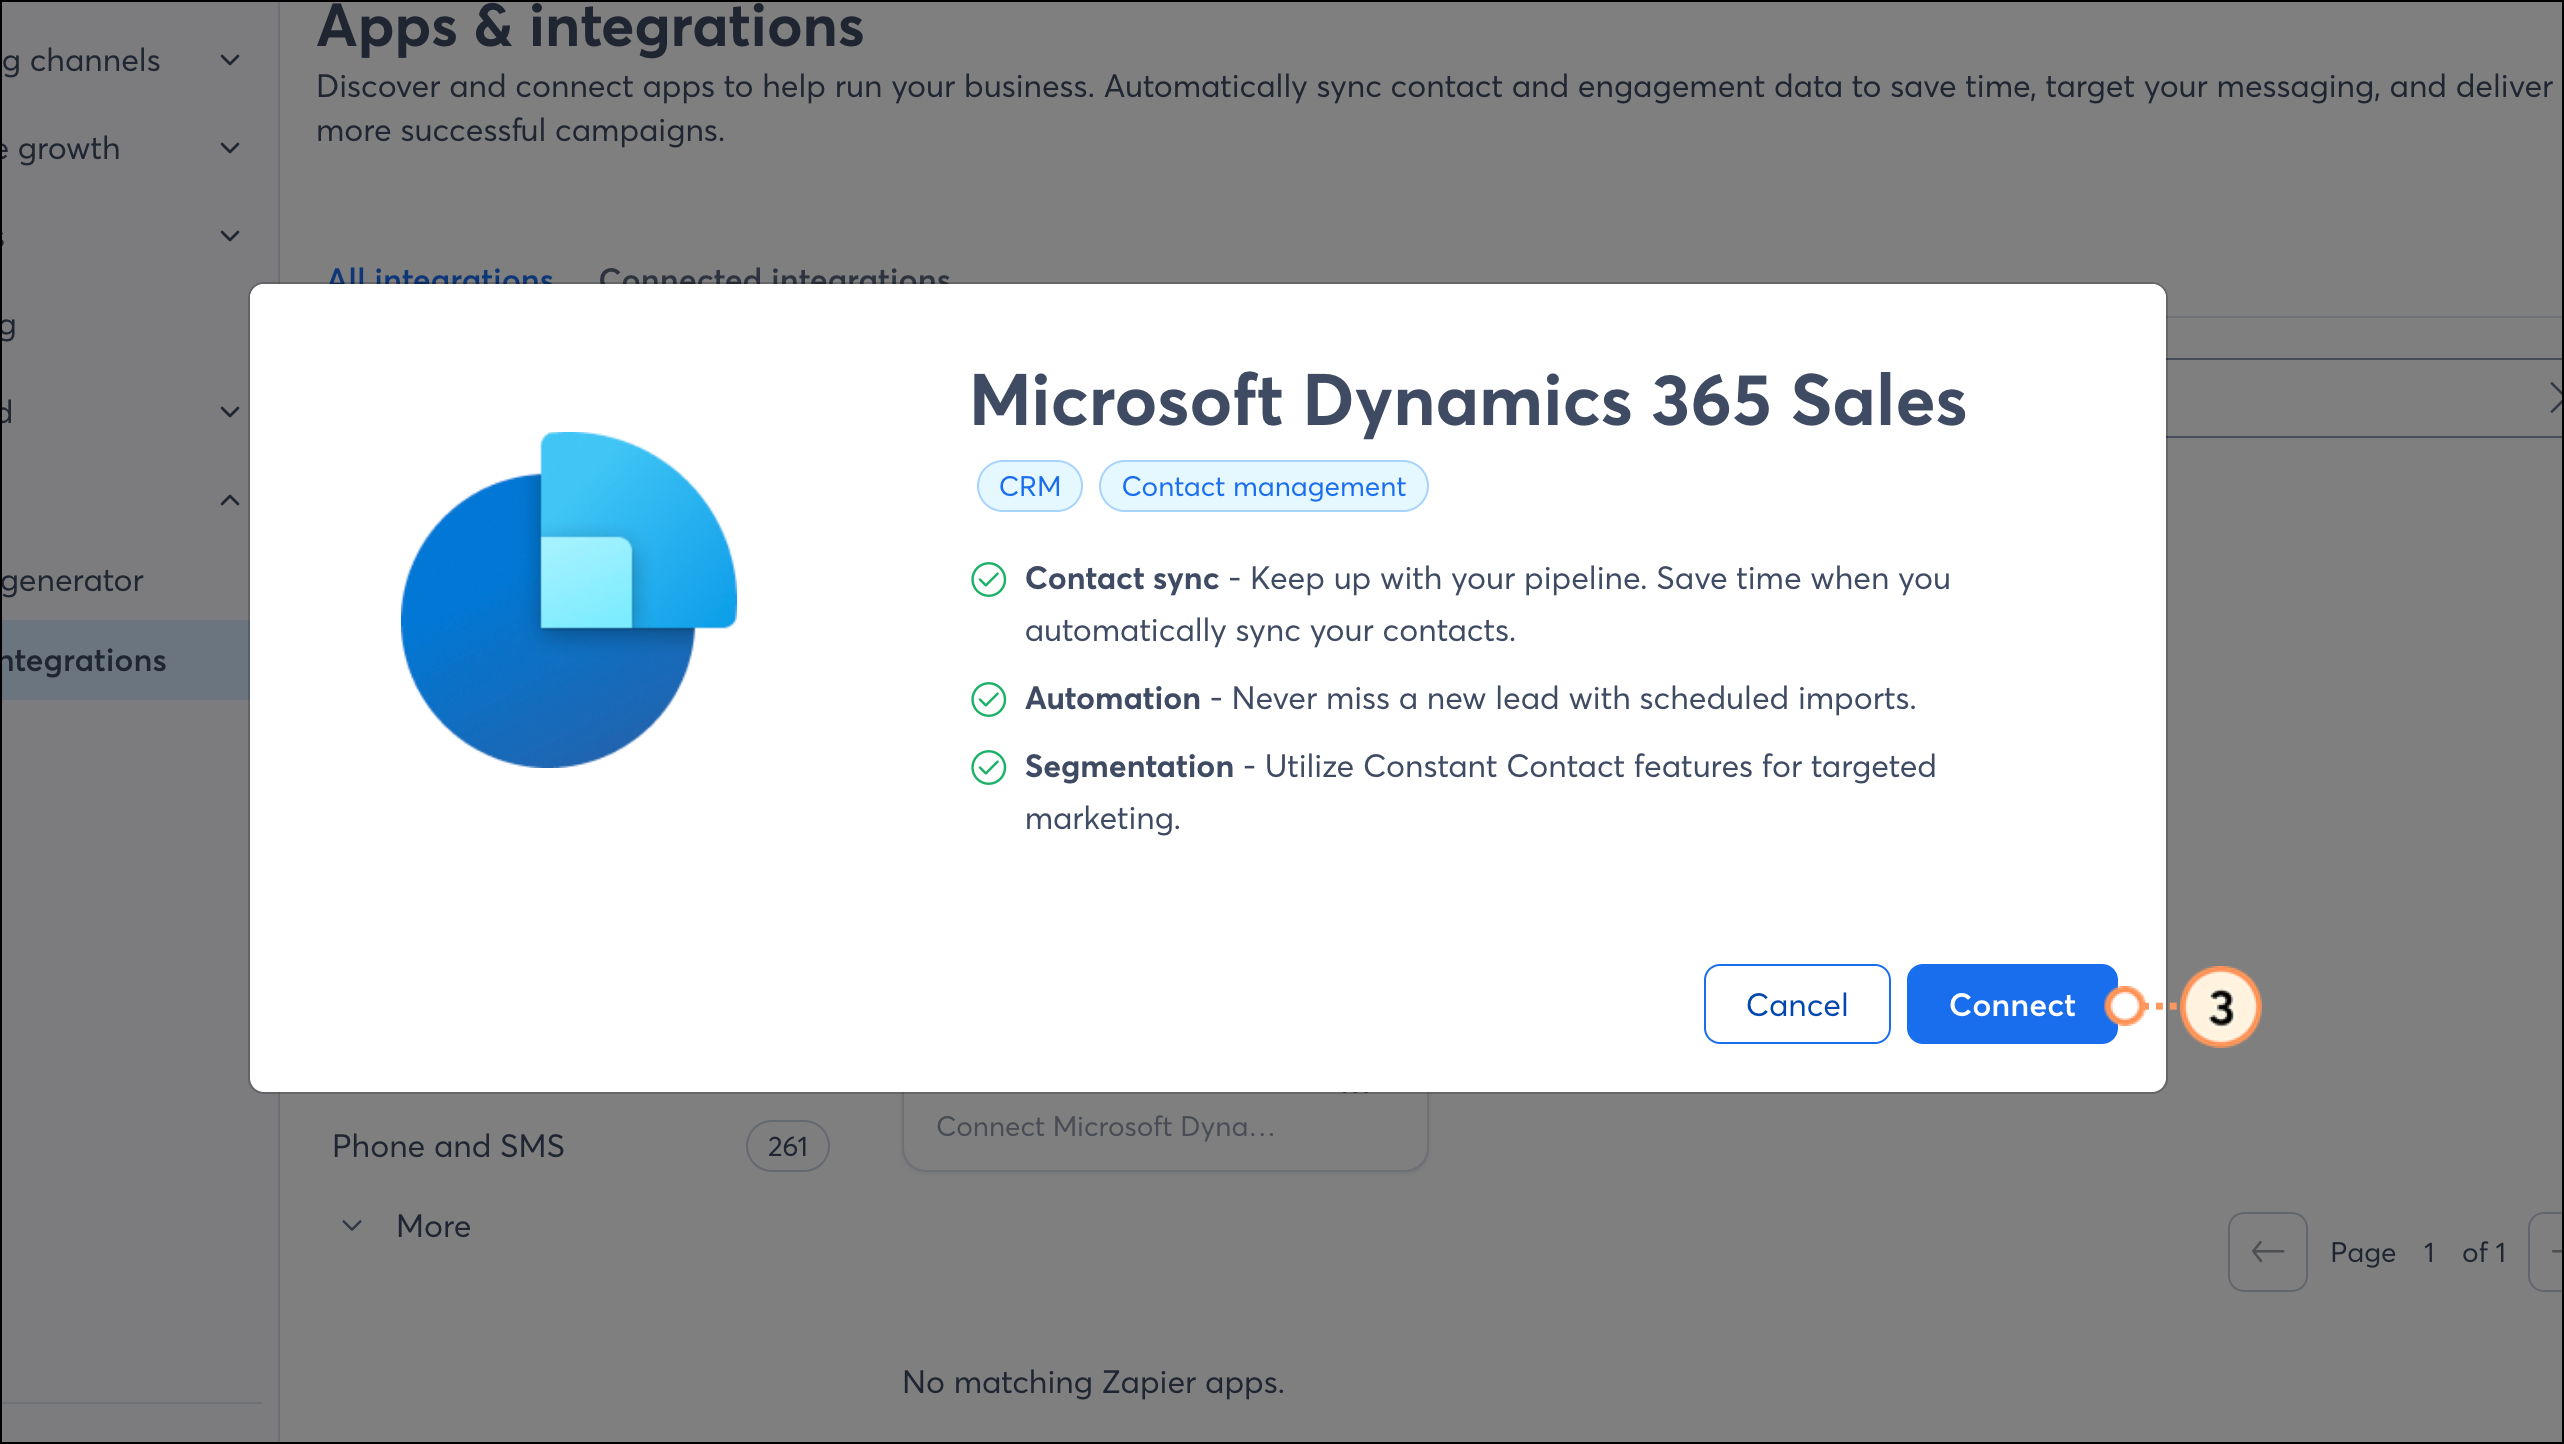
The sync is one-way, and data isn't sent back into your Microsoft Dynamics account.


Connect your Microsoft Dynamics account

  1. Click Integrations.
  2. Under the "All Integrations" tab, either search for Microsoft Dynamics or scroll through the list to locate it. Then click on the block.


  3. Click Login to your Microsoft Dynamics account.


  4. Enter your Microsoft Dynamics Sales Hub URL and click Continue.

    If you need help locating this URL, read the "Locate Your Sales Hub Web Address" section. 


  5. Log into your Microsoft Dynamics account.


  6. Click Import Contacts.


  7. Select the type of import you'd like to conduct:
  • Contacts lists import - Import contacts lists from Microsoft Dynamics. 
  • Leads lists import - Import leads lists from Microsoft Dynamics.

  1. Manage which fields you'd like to import. Click the X to remove a field. Click the "Add a new field" dropdown to add a field. Make sure that each Microsoft Dynamics field corresponds with the appropriate Constant Contact field. When ready, click Save.


  2. Select an Import Type:
  • Overwrite - Overwrite any existing contacts
  • Merge - Merge new contacts with existing contacts
  1. Select the Microsoft Dynamics contact list to import from. To import all contacts, select "All Contacts" from the dropdown menu.
  2. Select the Constant Contact list to import contacts into, or create a new list.
  3. Select the frequency for which the contact lists should update.
  4. Enter a name for the import.
  5. Click Continue.


  6. Click the checkmark box to confirm that you have permission to email these contacts.
  7. Review the summary and then click Import.


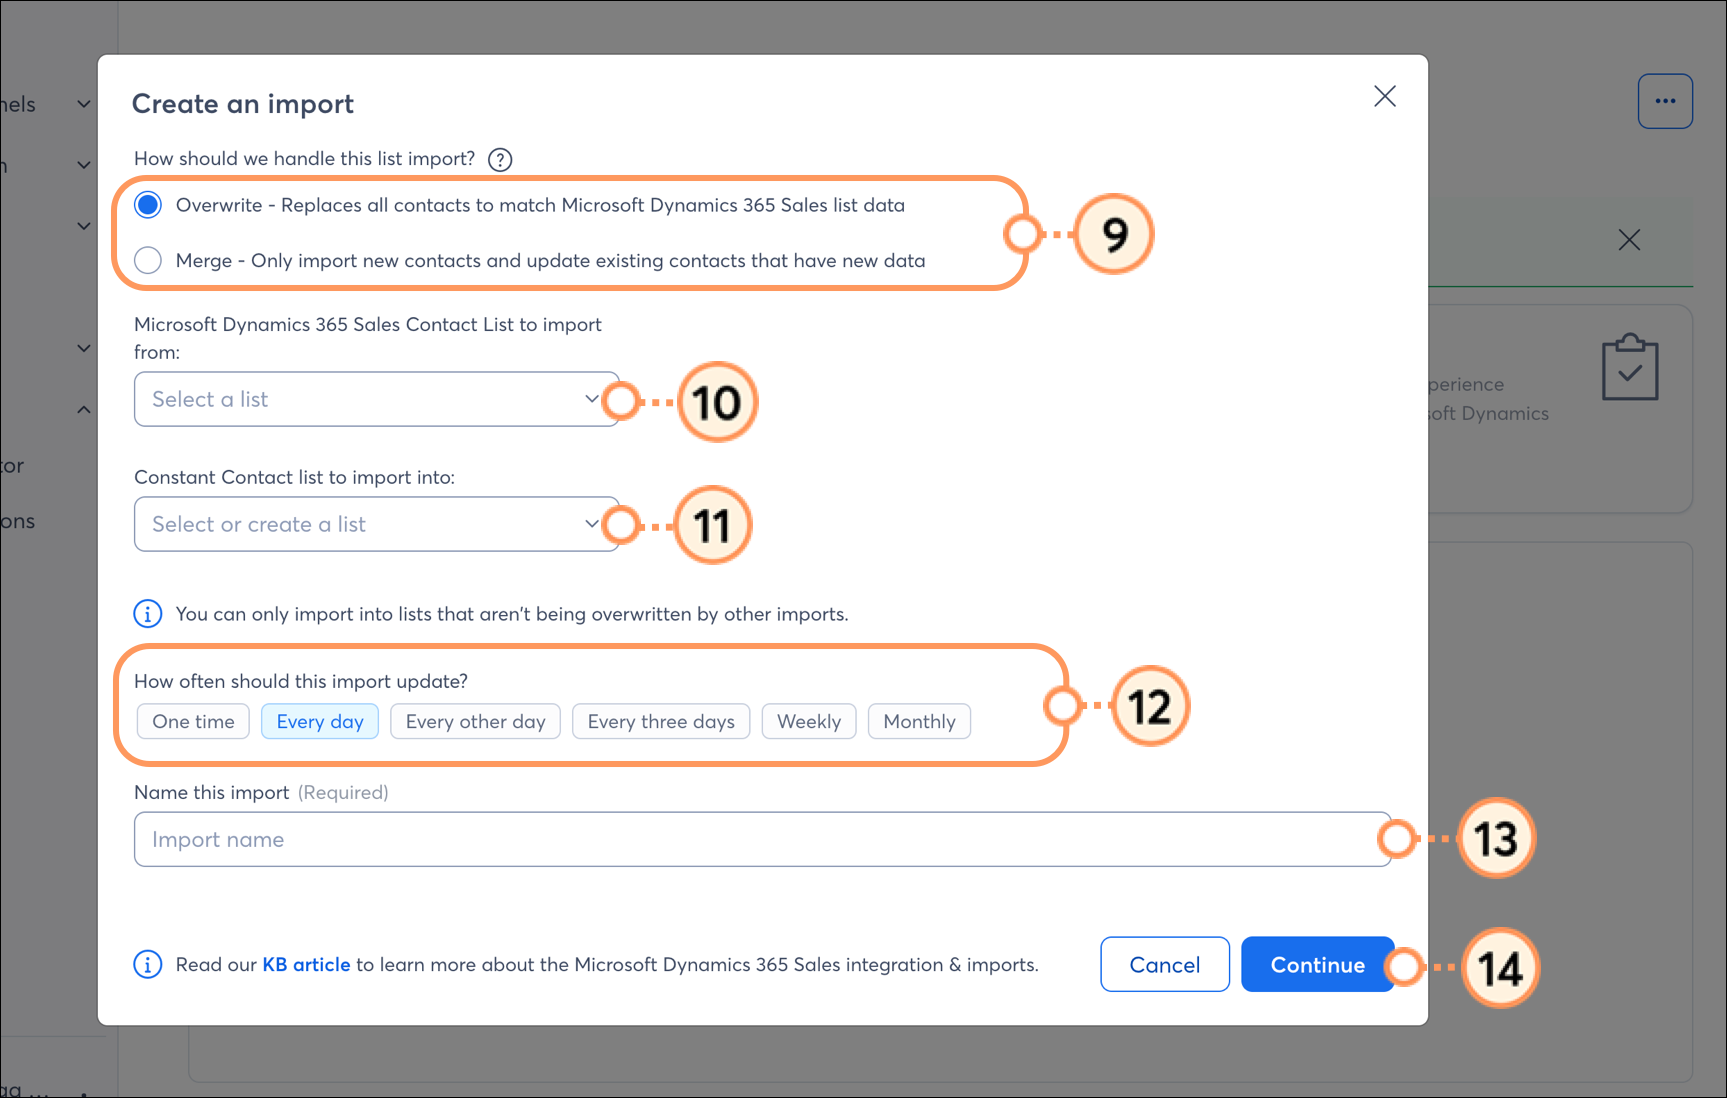
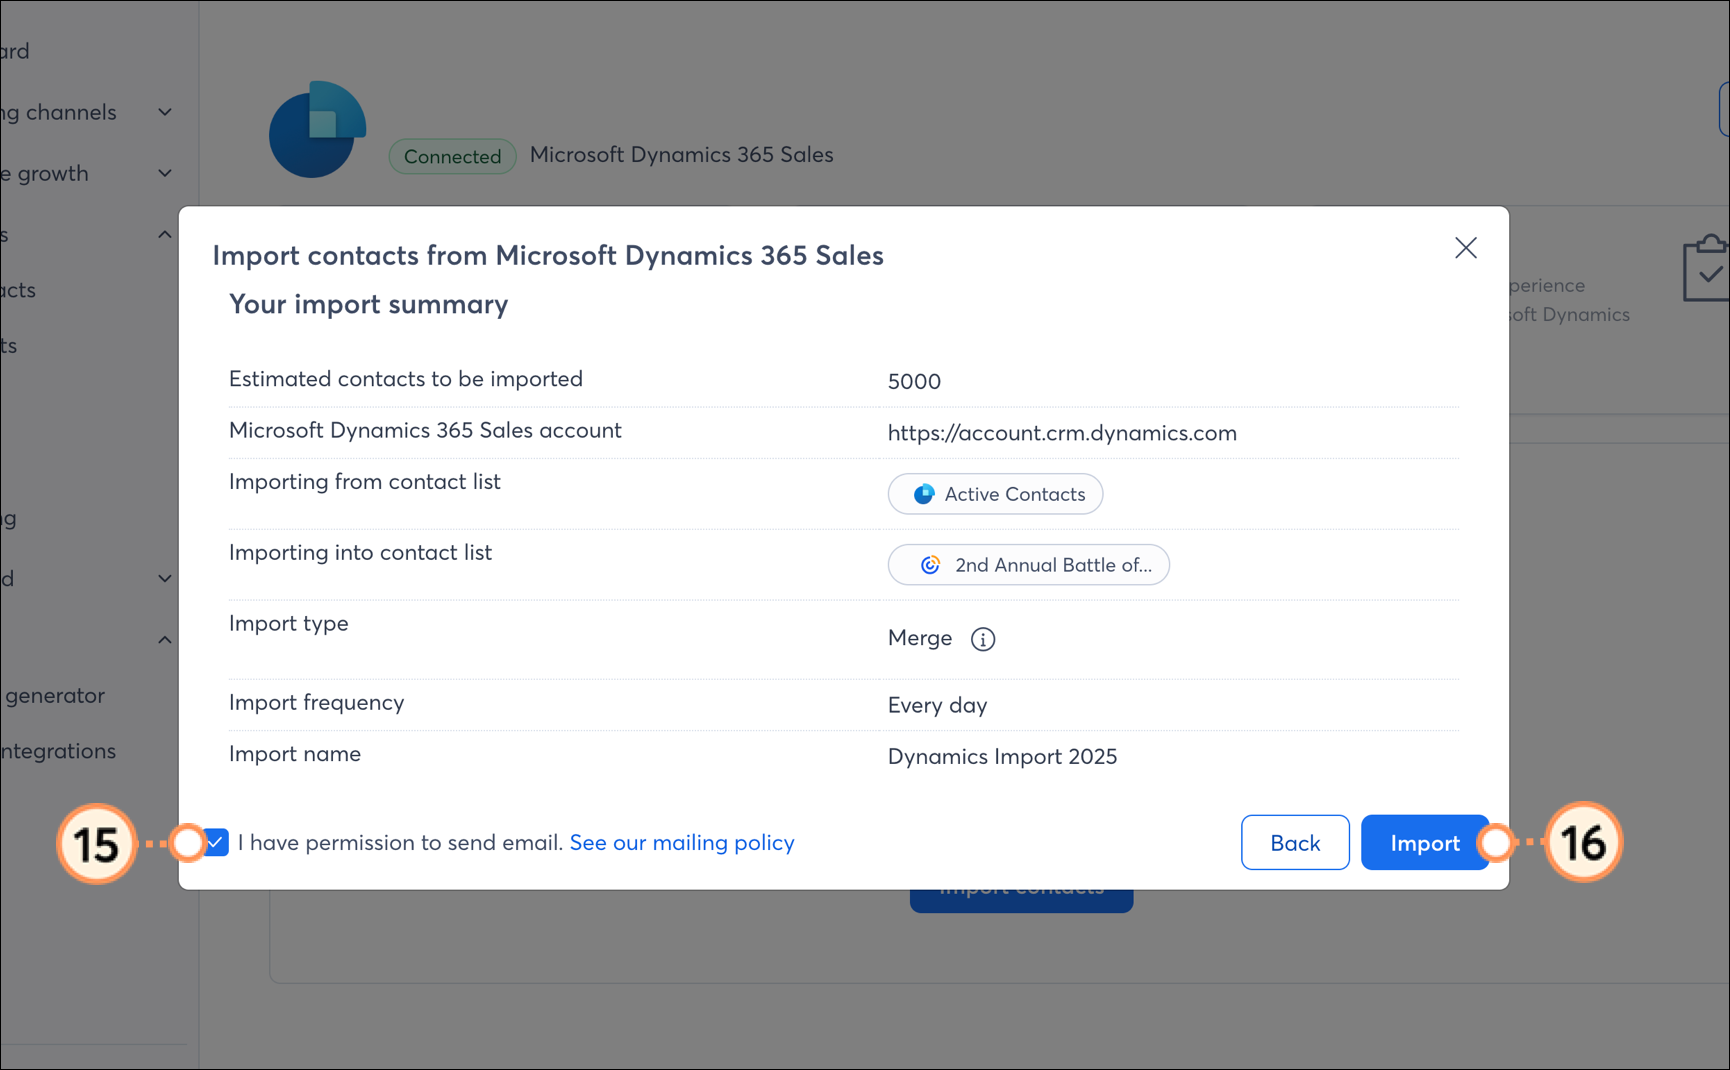
You can have multiple scheduled imports. If necessary, to create additional imports and segment your contacts, repeat steps 6 to 16.

You'll then be brought to your Microsoft Dynamics integration dashboard, where you can see a list of all your imports, along with the status and details of each. When you create a new import, it will initially be listed in an In Process status.

Once the import is complete, the status will update to Success.

Note: If you see the import status, Success, but you do not have all of your newly imported contacts, please wait another 5 minutes and then refresh the page to see if your import has fully finished processing. Check the list you selected during the import process to see if your contacts have been added to it. 


Note: To build a campaign targeting contacts or leads in Microsoft Dynamics, you must have at least one contact in the Contacts or the Leads area. 


Where did my imported contacts go?

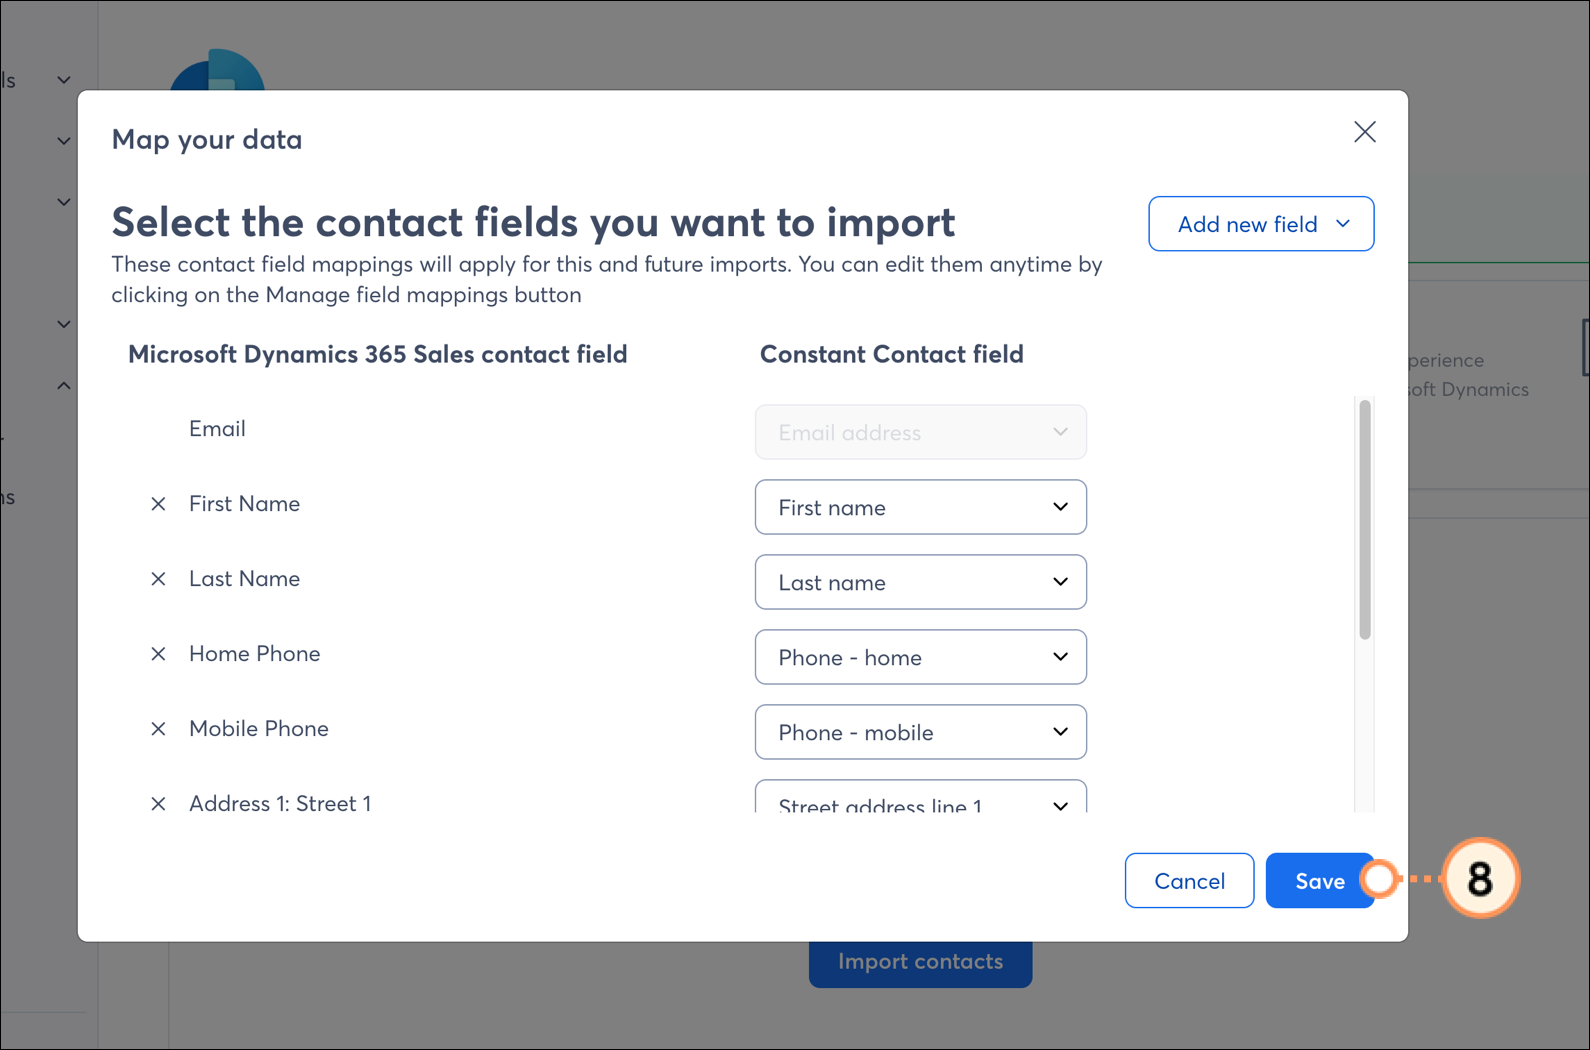
When you import contacts, you're asked to select a Constant Contact list to import them into. After the import is complete, go to the list you've selected to view your newly imported contacts. 

  1. Click on Contacts > Lists
  2. Locate the list in the table, that you selected during the import. 


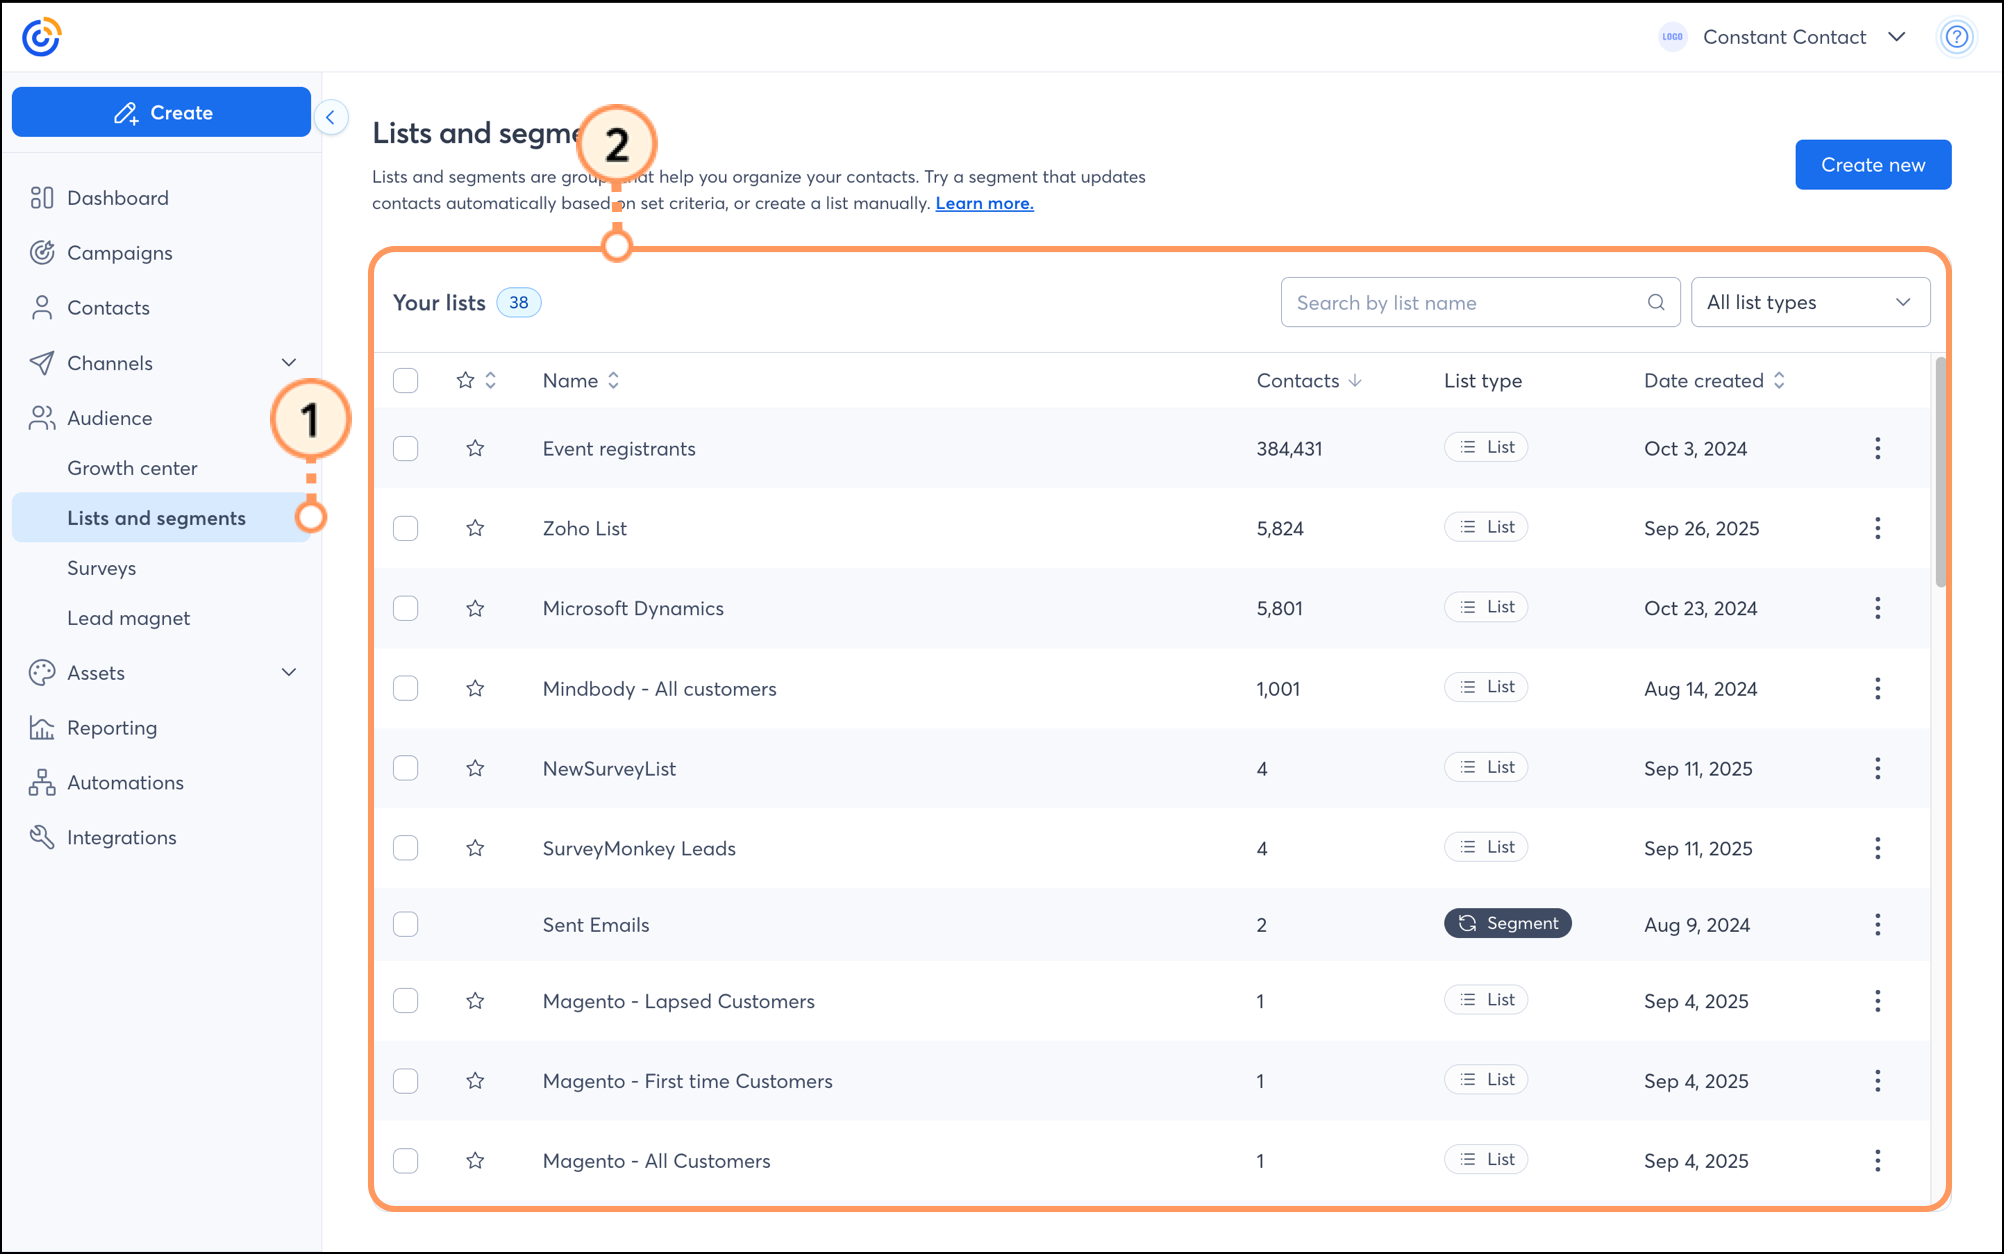
Click the list to view and manage your imported contacts.


Locate Your Sales Hub Web Address

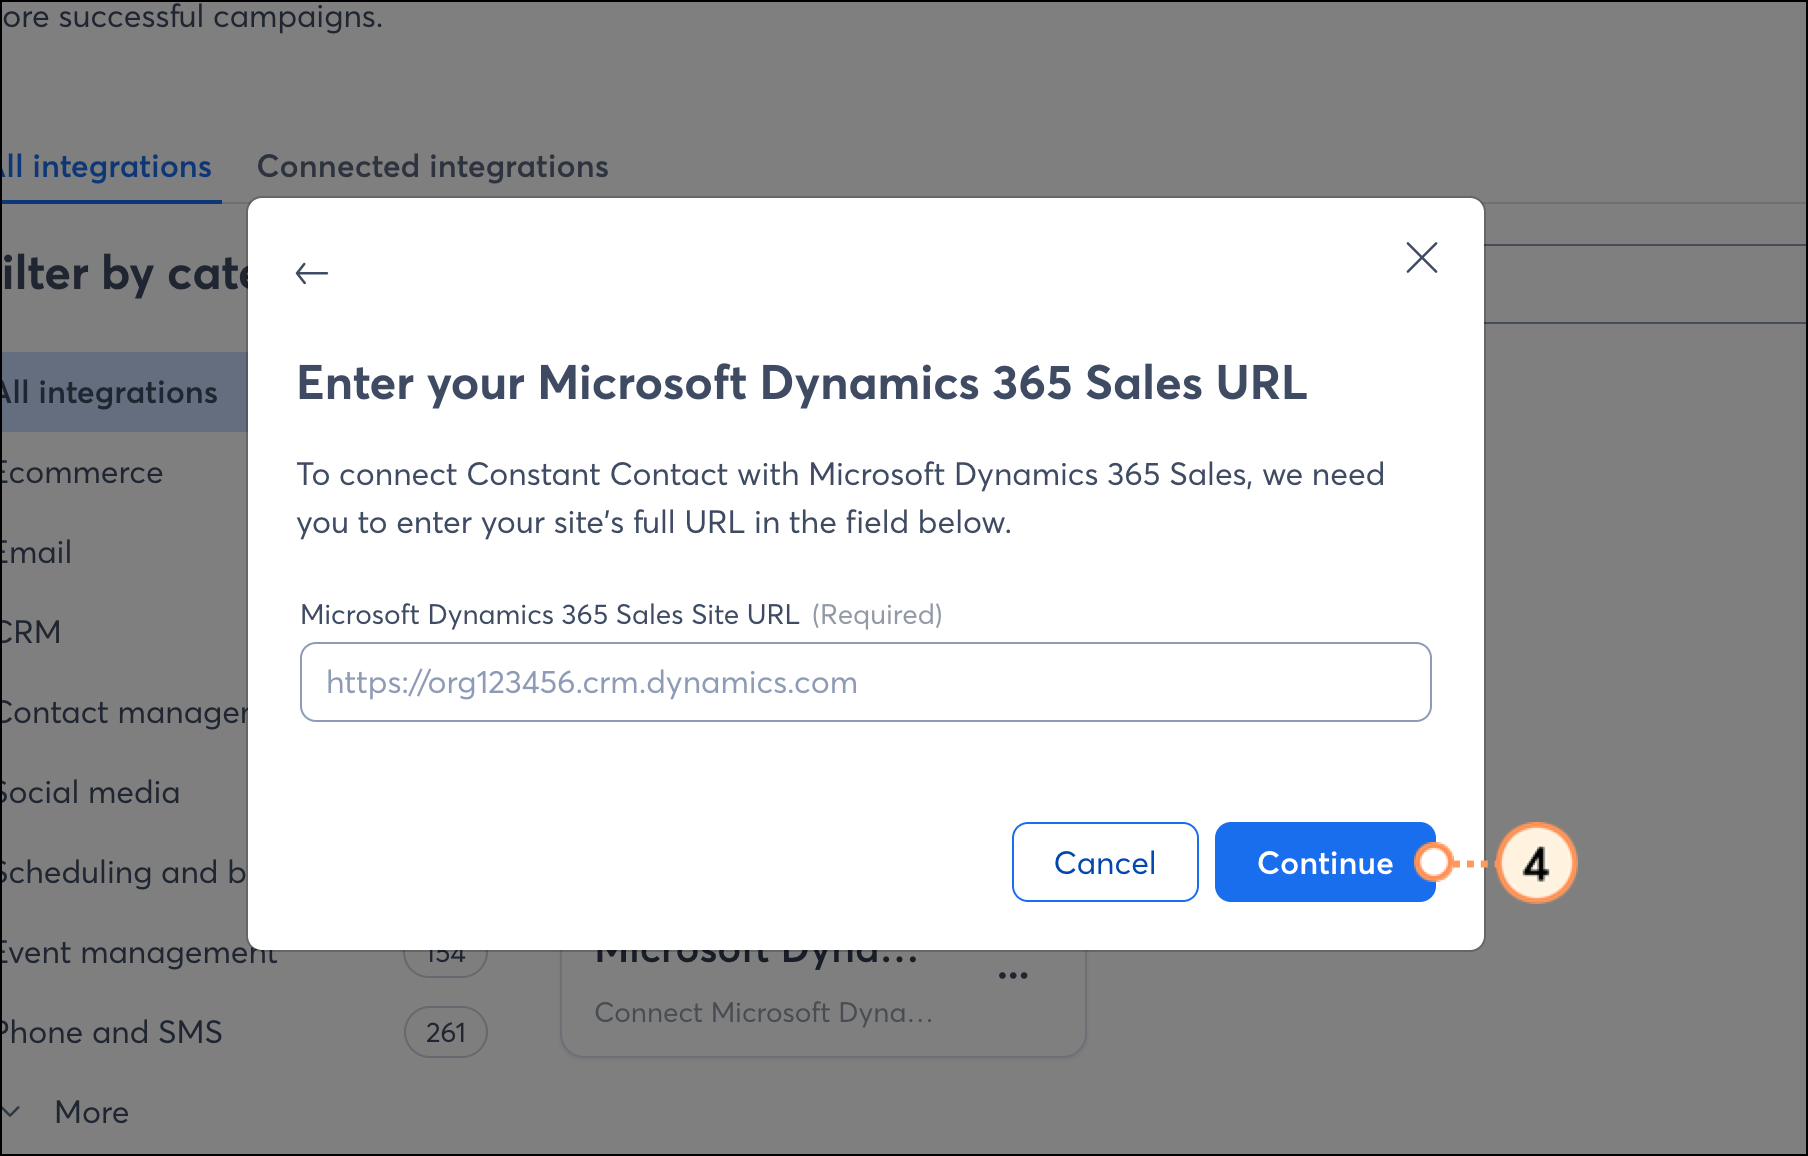
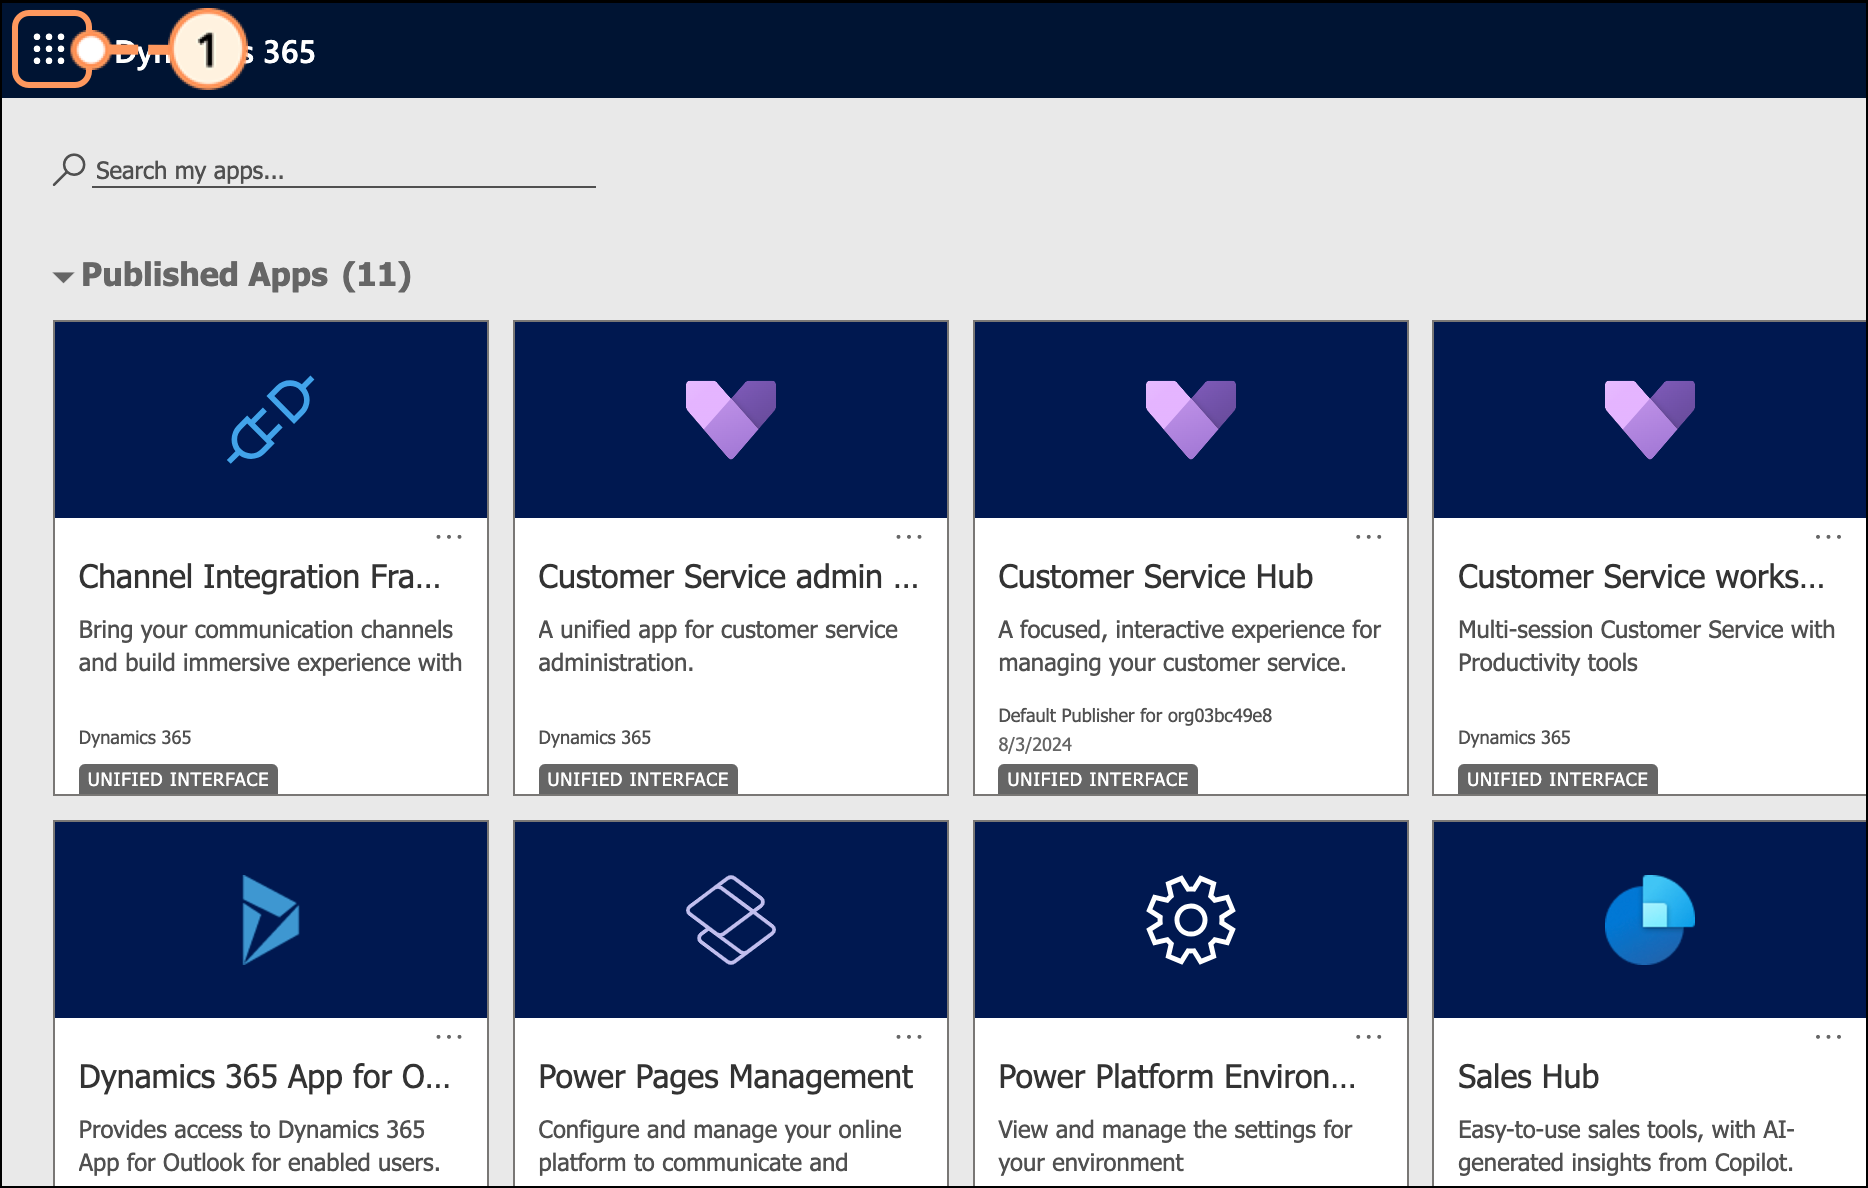
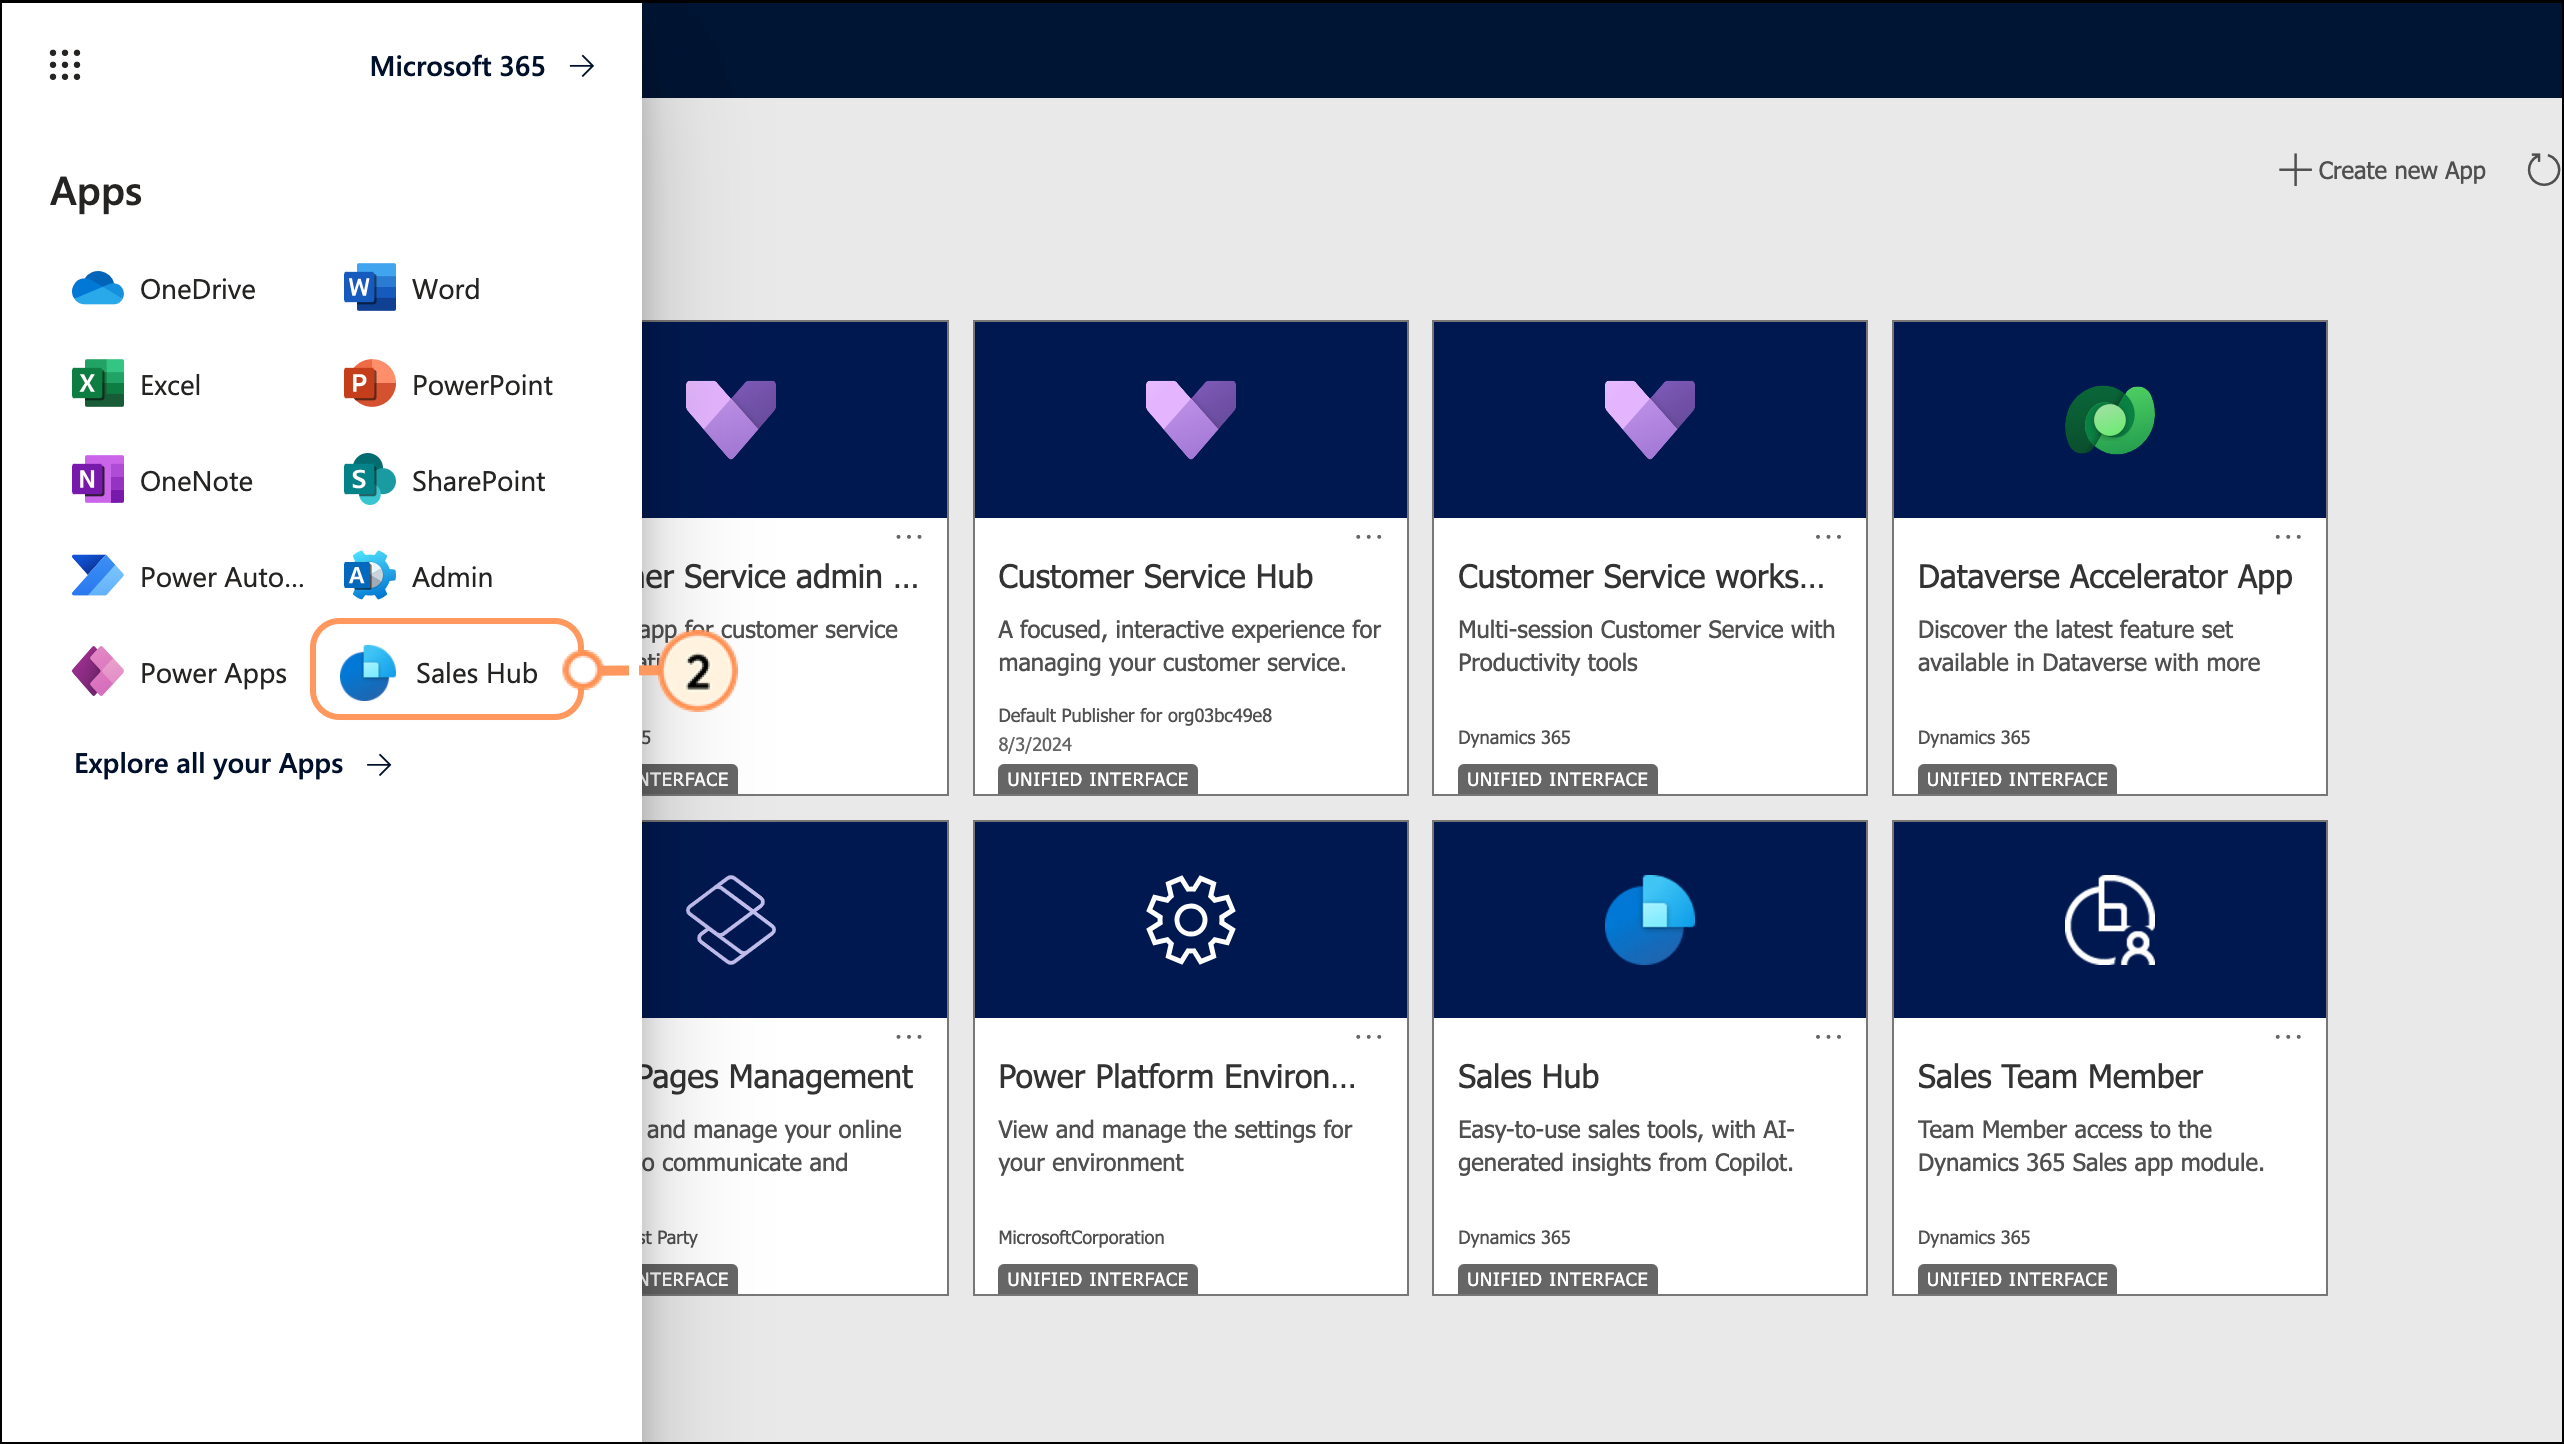
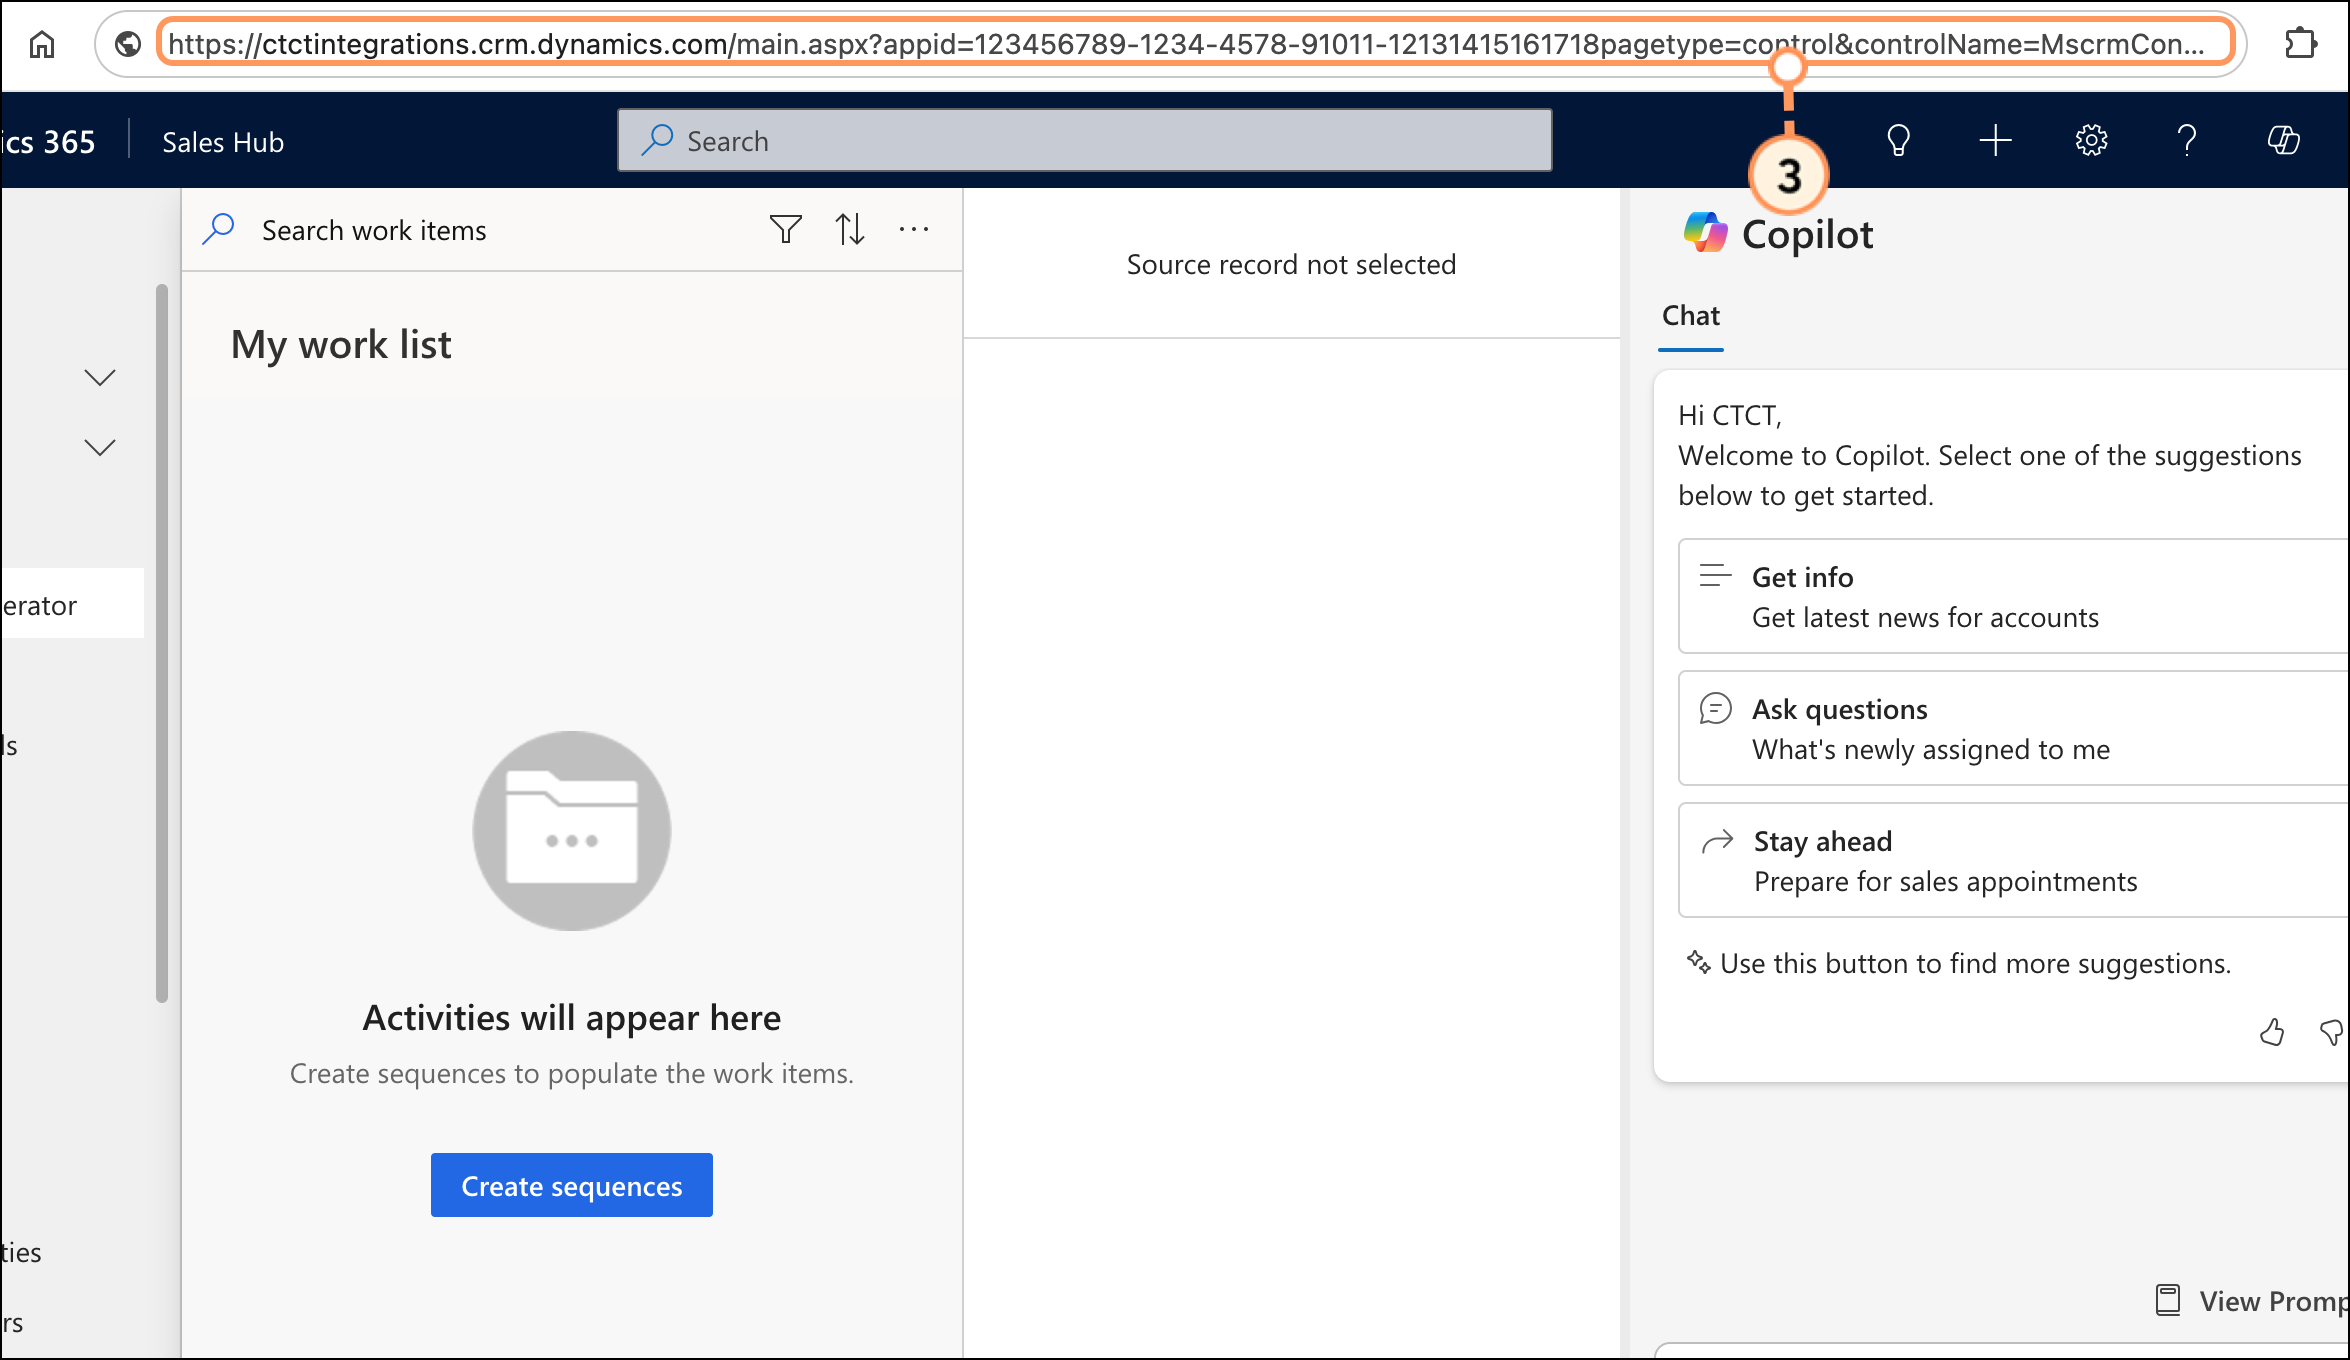
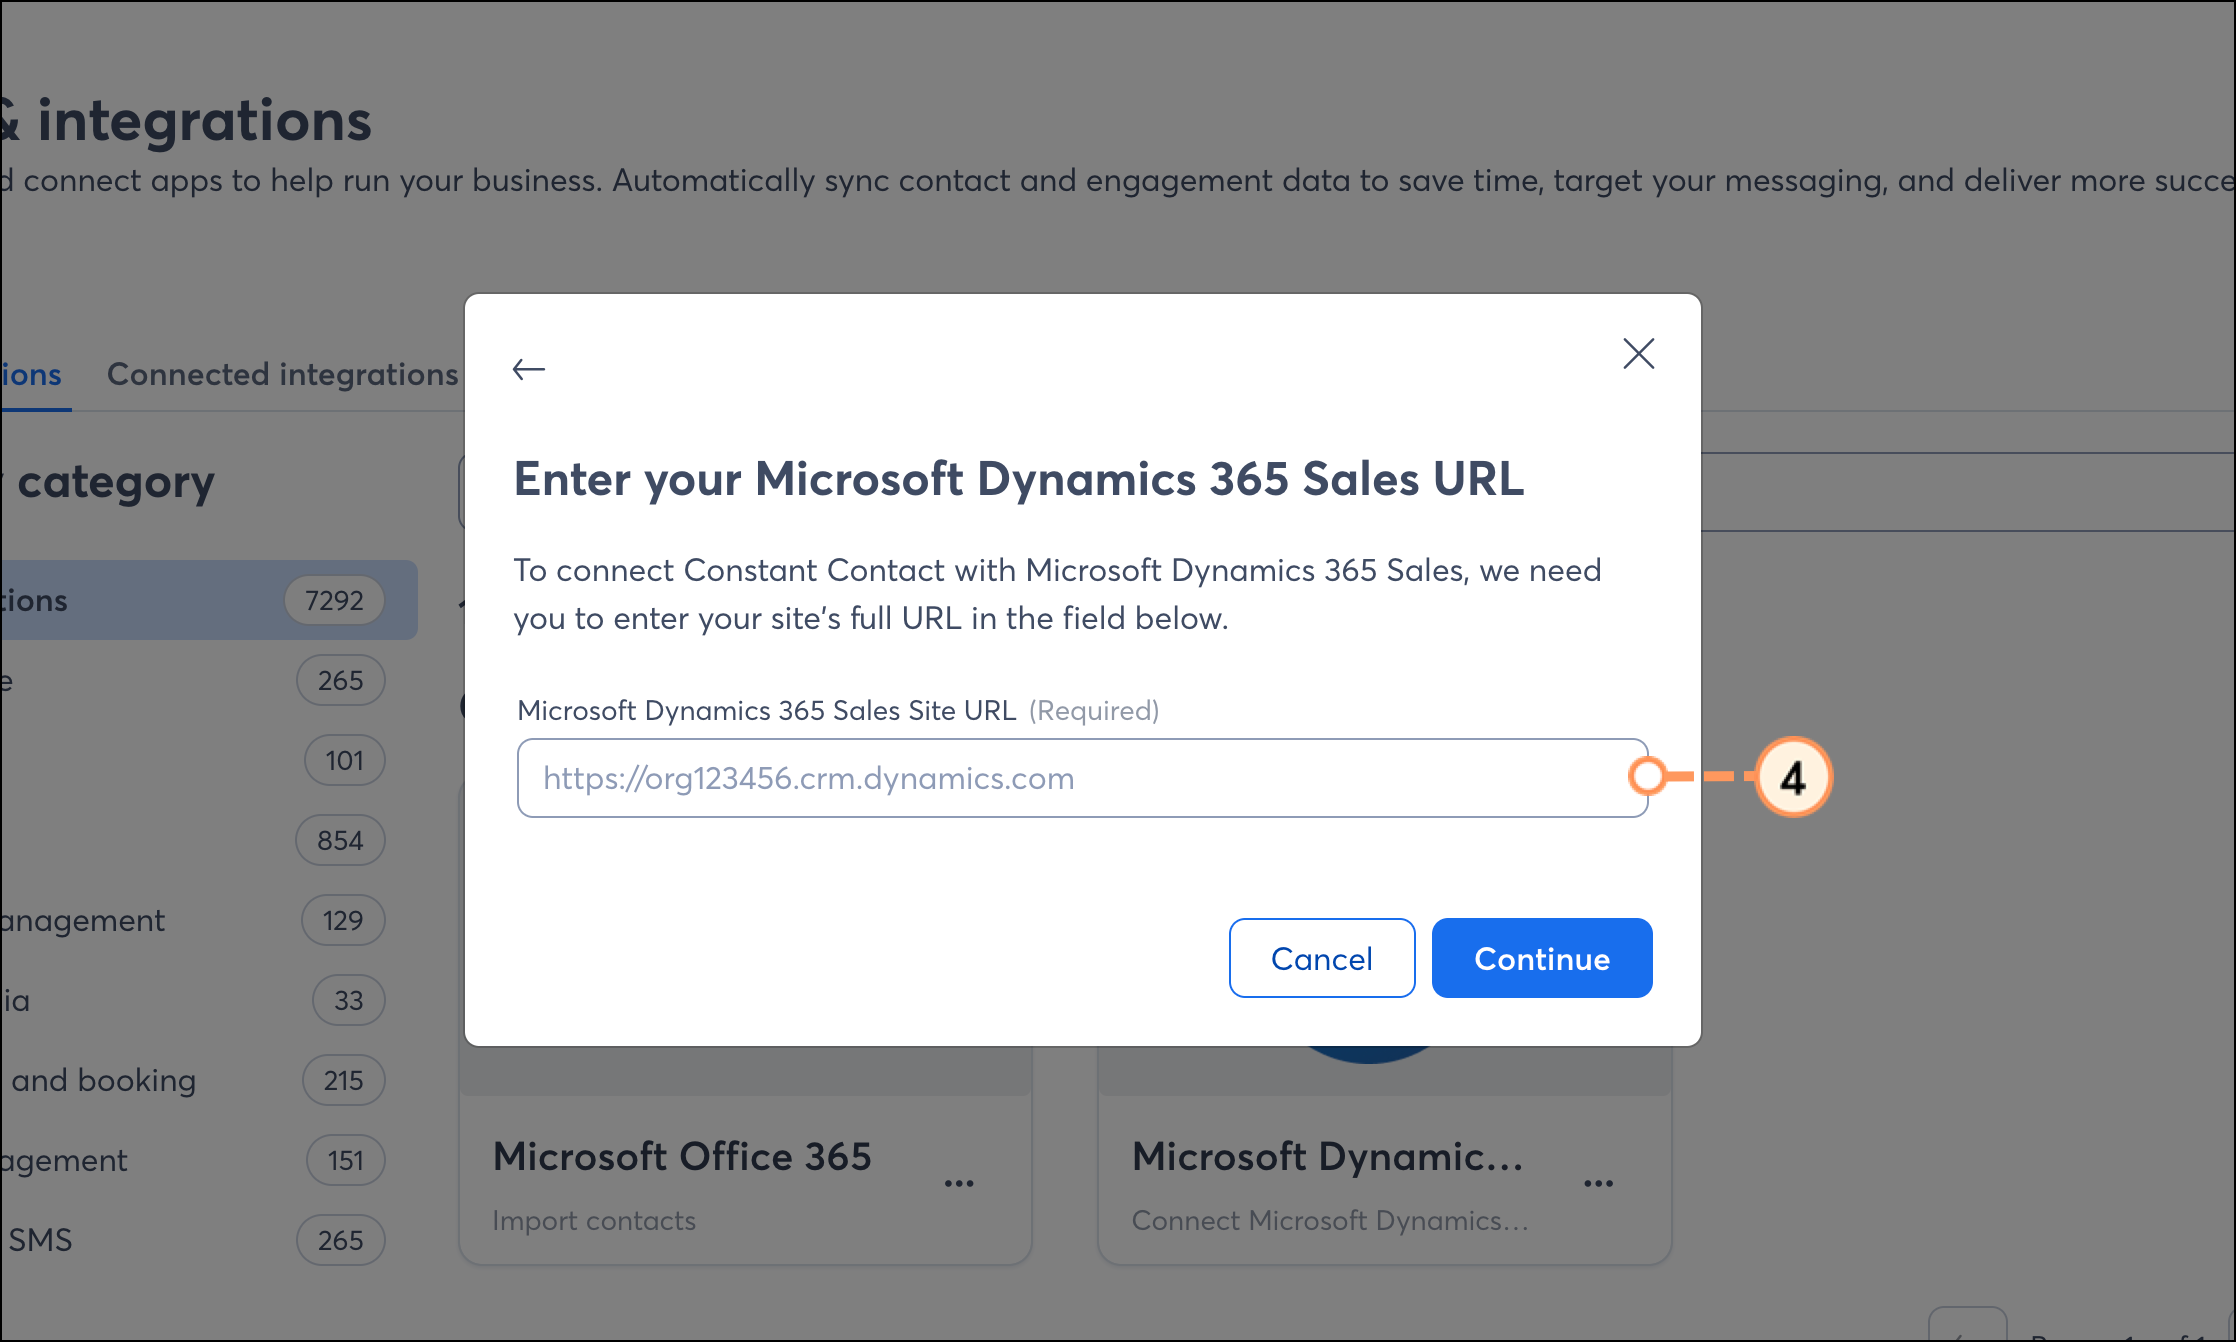
To locate the URL needed to connect your Microsoft Dynamics account with Constant Contact, complete the following steps: 

  1. Login to your Microsoft Dynamics account and click on the menu icon. 


  2. Select Sales Hub from the menu. 


  3. Within the Sales Hub, copy the URL from the address bar. 


  4. Paste that URL into the Dynamics Sales Hub URL field during the integration process. 


Boost your marketing with the Microsoft Dynamics integration

Once you’ve set up your imports and your Microsoft Dynamics contacts are syncing into Constant Contact, there are many ways to send personalized messages to those contacts.


Create a customized contact segment

When importing from Microsoft Dynamics, you have the flexibility to choose which contact or lead list you'd like to sync into a Constant Contact list. But maybe you want to segment these contacts even further, to send specific, targeted messaging. You can do so by creating a custom segment of contacts.


Send automated communications

Create personalized automated communications via email and SMS for your customers based on their actions, including welcome emails, thank you series, requests for review, and more.

Any links we provide from non-Constant Contact sites or information about non-Constant Contact products or services are provided as a courtesy and should not be construed as an endorsement by Constant Contact.


Disconnecting Your Microsoft Dynamics Integration

If you want to disconnect your Microsoft Dynamics Integration, do the following:

  1.  Search for Microsoft Dynamics or scroll through the list to locate it.
  2. Click the   Options button. 
  3. Click Disconnect

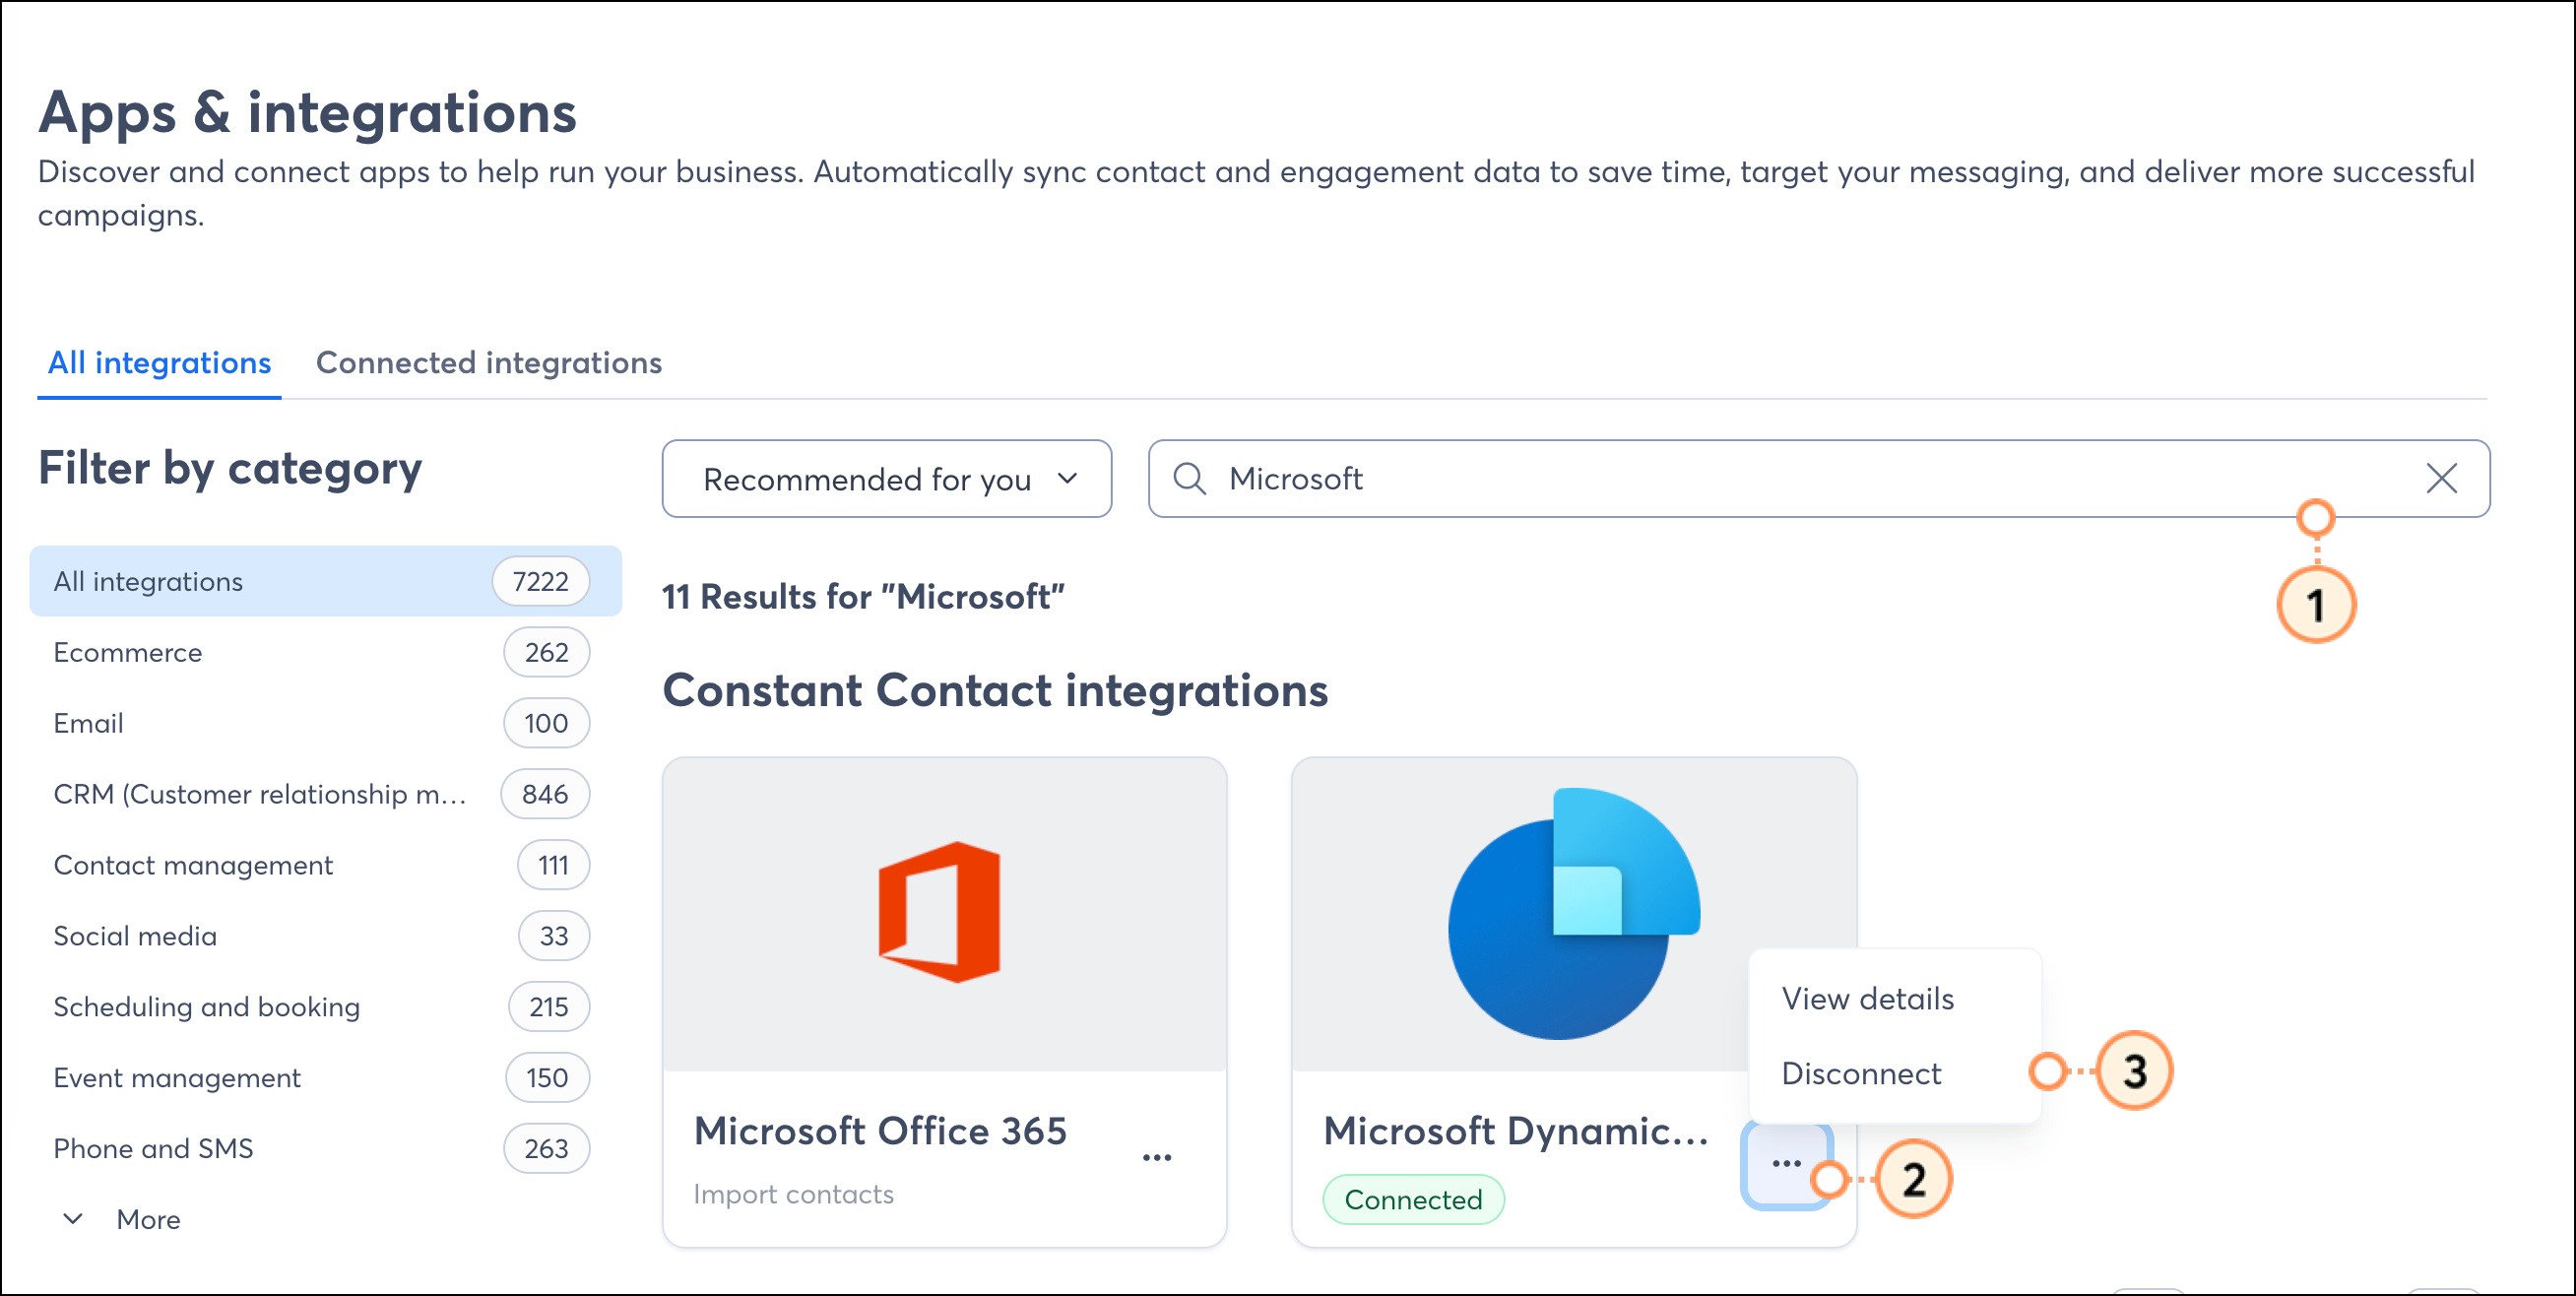
After disconnecting the integration, your Microsoft Dynamics 365 Sales contacts will no longer sync to Constant Contact. Any contacts that have already been synced and added to your Constant Contact account will remain. Disconnecting the Microsoft Dynamics integration does not delete previously imported contacts. 


Questions?

Ask the Community

Did this article answer your question?


Constant Contact Logo

Copyright © 2025 · All Rights Reserved · Constant Contact · Privacy Center