Create automation paths in your primary account and share them with your sub-accounts. The sub-accounts are unable to make changes to shared paths. If you want to give sub-accounts the option to edit and customize the path, then you can copy it to their account instead.
Create a shareable automation path
Shared paths are limited to sending a series of emails and setting the timing between the emails.
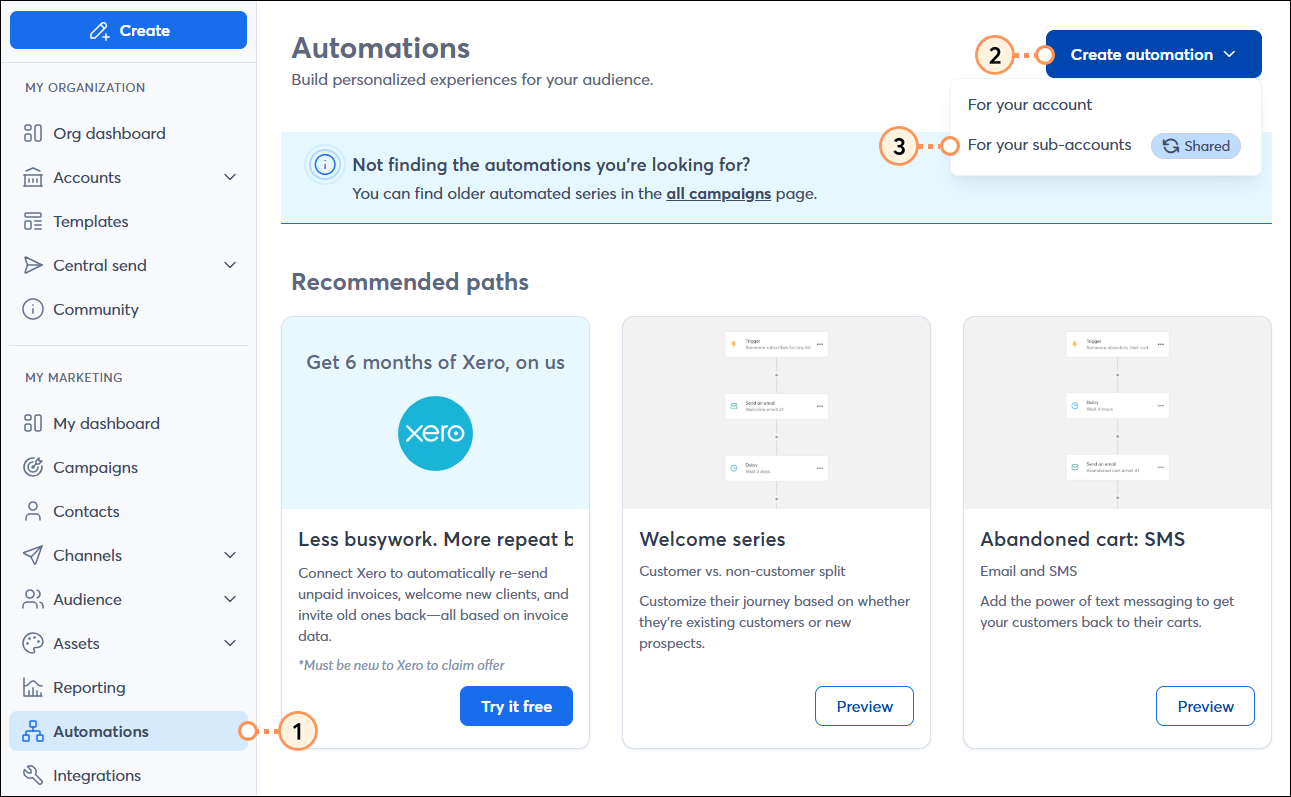
- In the "My Marketing" section of the left-hand menu, click Automations.
- Click Create automation.
- Select the "For your sub-accounts" option from the drop-down menu.
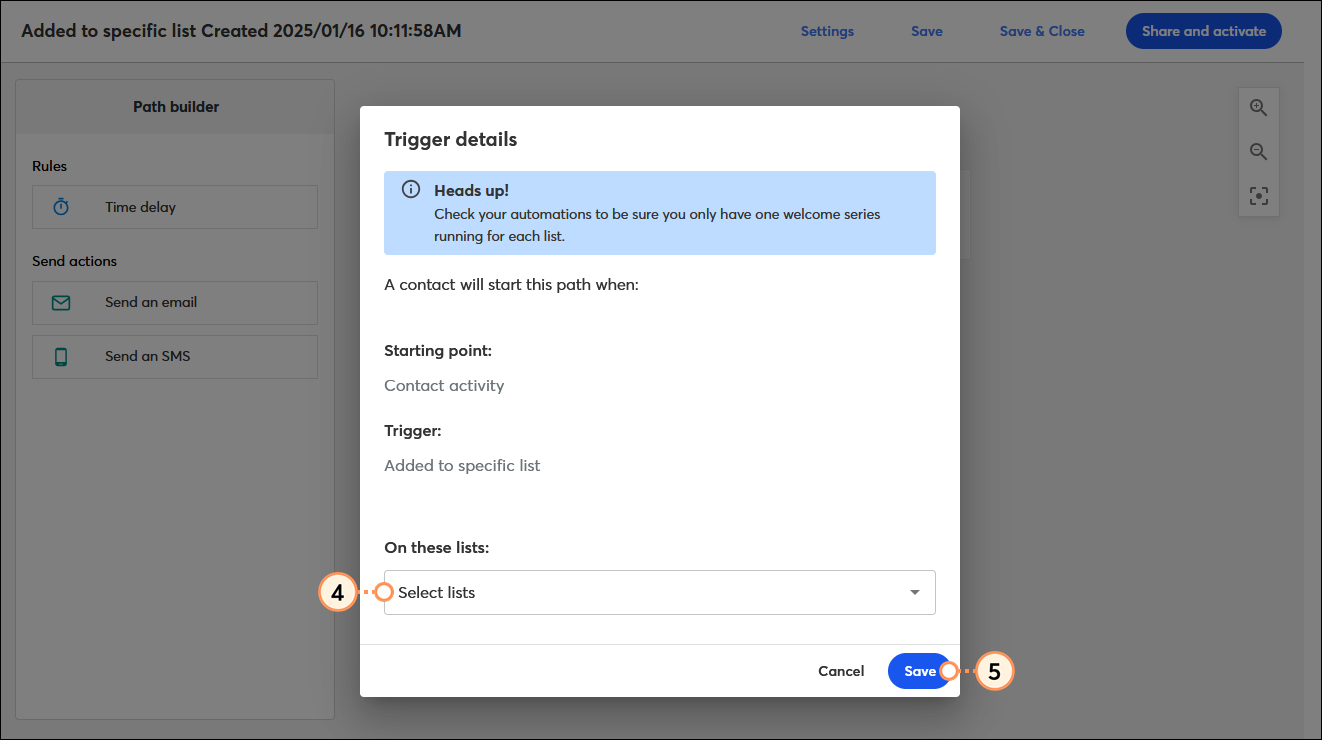
- Update the trigger information for your path:
- Added to specific list - Select a list or several lists from the drop-down menu. If the list doesn't already exist, you must first create a new list from the Contacts tab. Since the list is shared, the name you use should clearly indicate that it’s a shared list. It should also specify what it’s being used for to make sure people don’t get confused in the sub-accounts. Each list you select is automatically created in the sub-account when you share the path. If a list with the same name already exists within a sub-account, it’s automatically assigned to the shared path.
- Click Save.
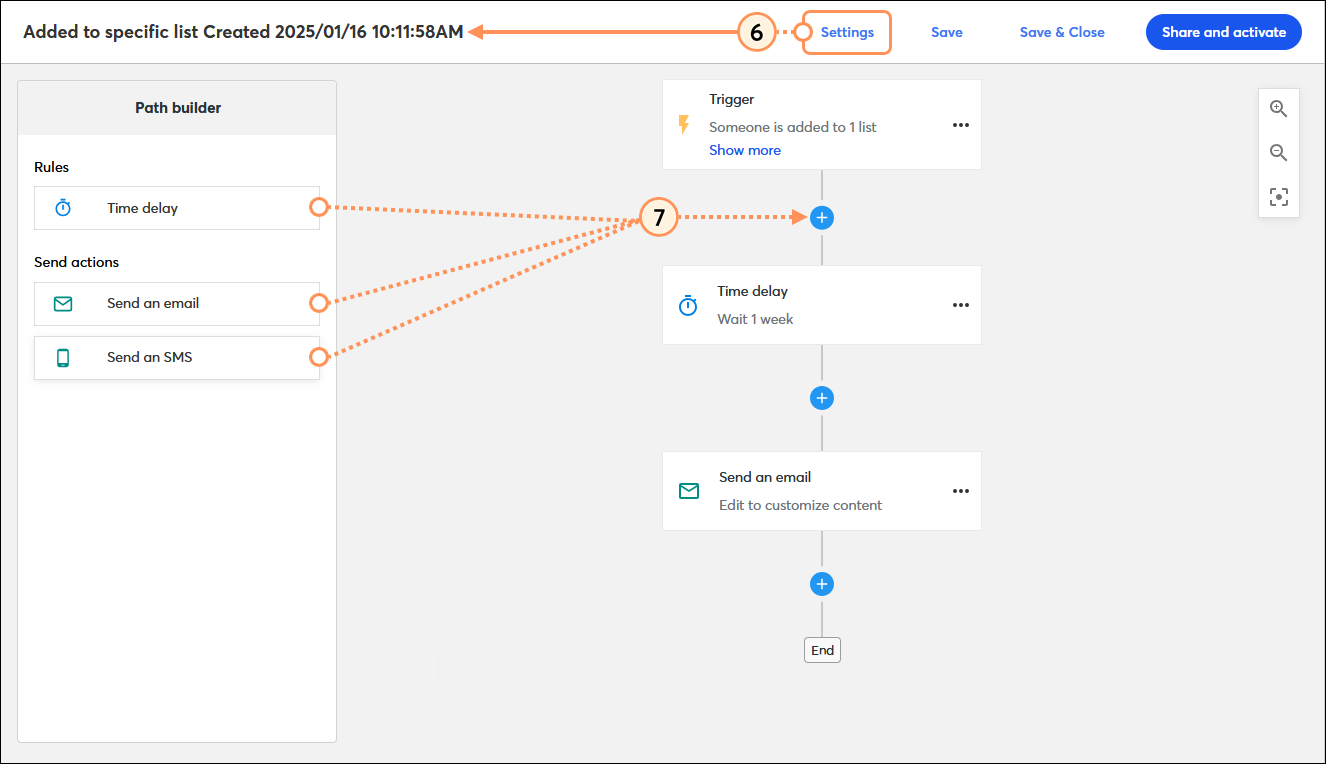
- Click "Settings" to assign a unique name to your path that you and your sub-accounts can easily identify later. Your contacts never see this name.
- There are three types of steps you can add to your path, and you can drag-and-drop them anywhere in the path where you see a plus sign:
- Send an email - Add this step to your path, then click the three dots and select "Edit" to create a new email or copy an existing one. Regardless of your choice, give the email a unique name so that you can easily identify it later. When creating a new email, you can choose from one of our predesigned templates or create your own, and then use the email editor to customize your branding and content.
- Send an SMS - Add this step into your path, then click the three dots and select "Edit" to create a new SMS message. Your message can include a single URL.
- Time Delay - Add this step to your path before any email step to specify the amount of time to wait before sending the email. Click the three dots and select "Edit" to choose from minutes to months.
Share the path with sub-accounts
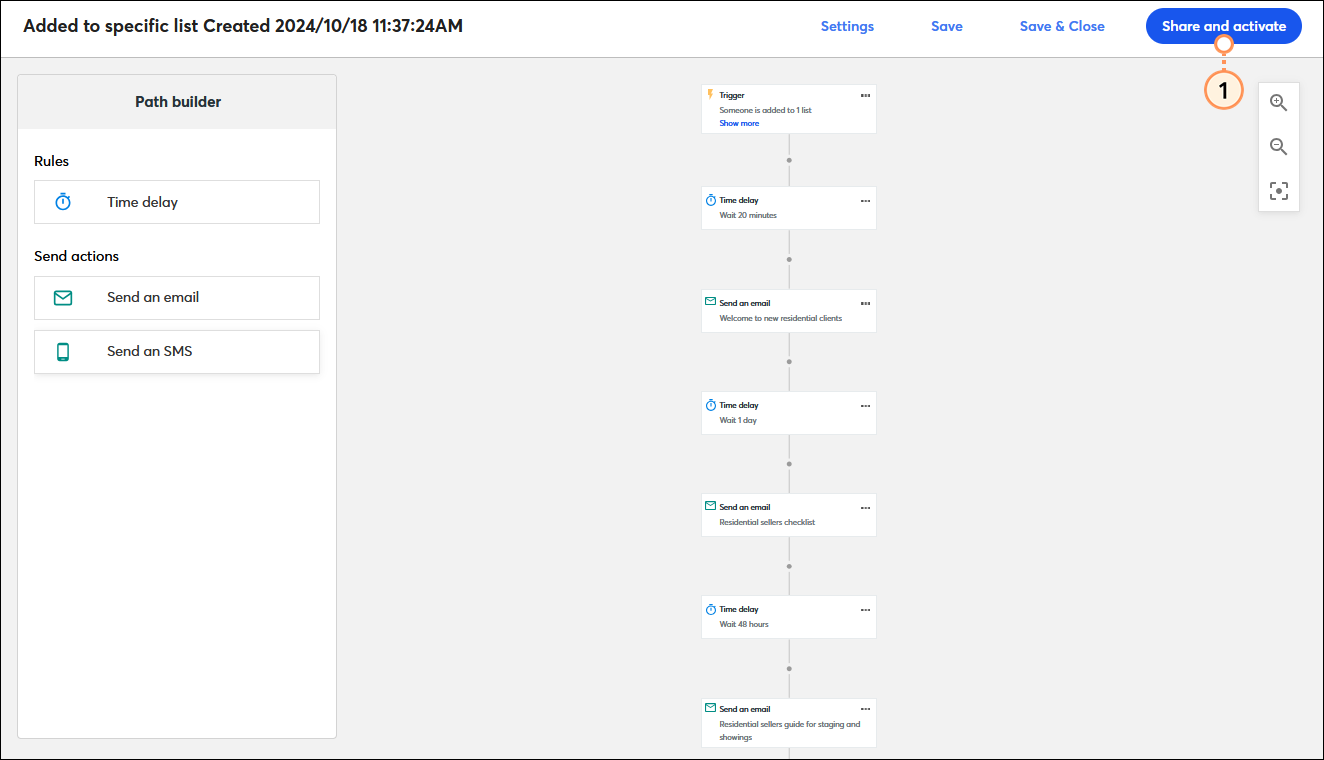
Your path needs to be activated before it can be shared. Once the path is shared, the sub-accounts are unable to edit the trigger, change the list, or make changes to the path and its email content. To grant edit access to sub-accounts, you should copy the path to them.
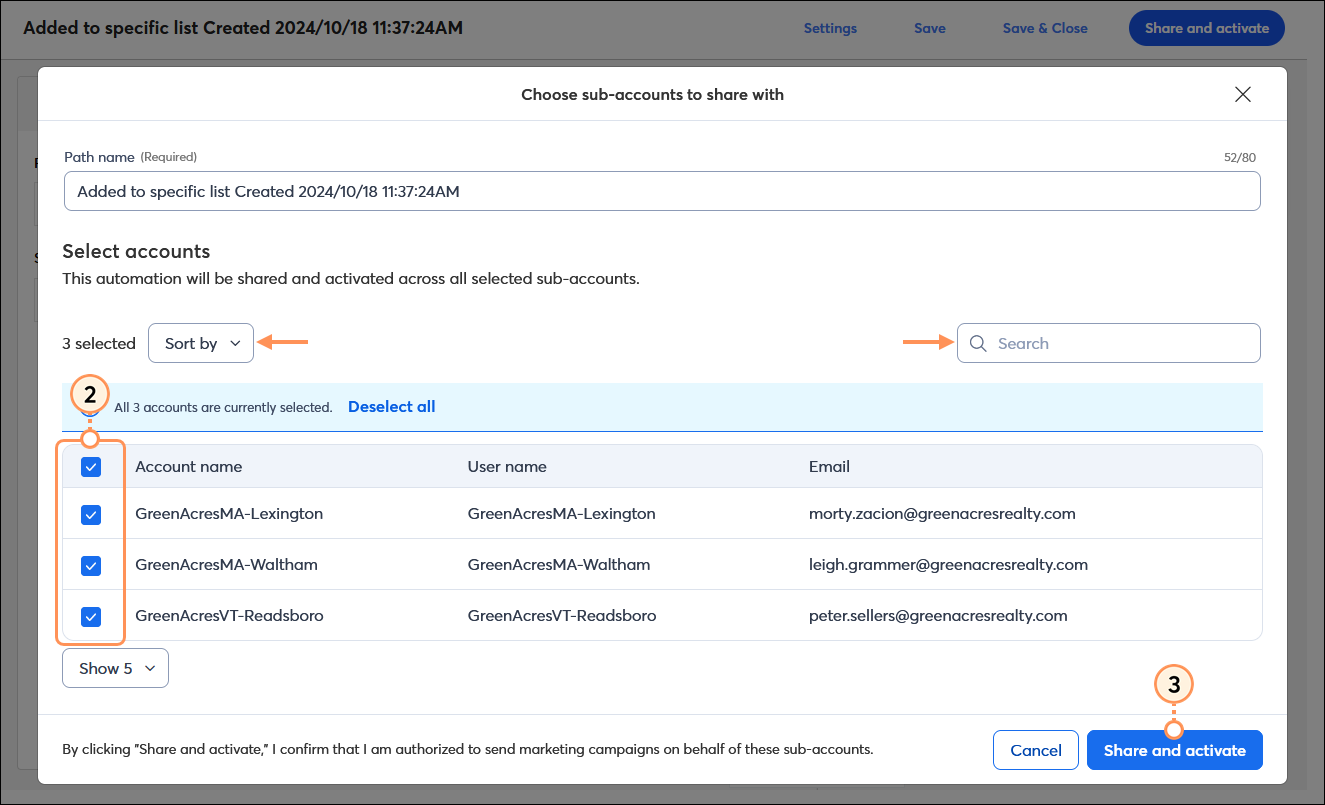
- Click the Share and activate button in the upper right-hand corner of the path editor.
- Select the sub-accounts you want to receive the path. You can sort your sub-accounts alphabetically, and the Search field can help you find specific accounts, too.
- Click the Share and activate button.
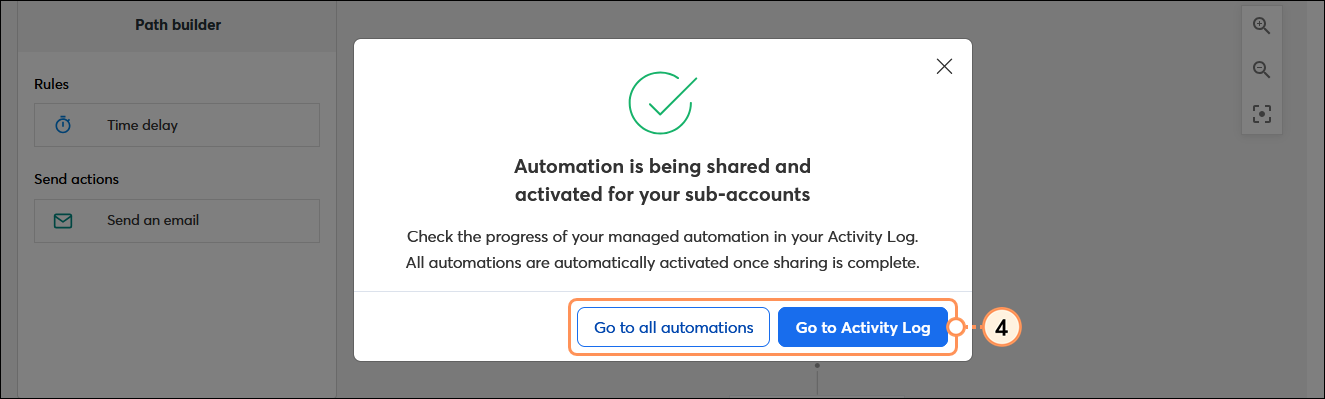
- Click the:
- Go to all automations button - This takes you to the Automation dashboard, where you can view, edit, and manage your paths.
- Go to Activity Log button - This takes you to the Activity Log, where you can view a table of your recent sharing activity. Clicking 'View errors" next to your shared path downloads a CSV file, so that you can see the specific reason why a path couldn’t be shared with a sub-account. (See examples below.)
View the Activity Log for a shared path
When you share a path, there may be errors that prevent it from being shared with a sub-account. For example, sub-accounts that:
- Are in trial status. The path can be shared only when a plan is purchased.
- Exceed the activation allowances based on their email plan. The path can be shared if the sub-account upgrades its plan to increase its path allowance.
- Haven't verified their email address to send emails. The path can be shared after the sub-account verifies an email address for its account.
- Lack a physical address in their account settings. The path can be shared after the sub-account adds a physical address.
If you have errors after sharing a path, or you just want to see a list of the paths you’ve shared, you can find them in the Activity Log.
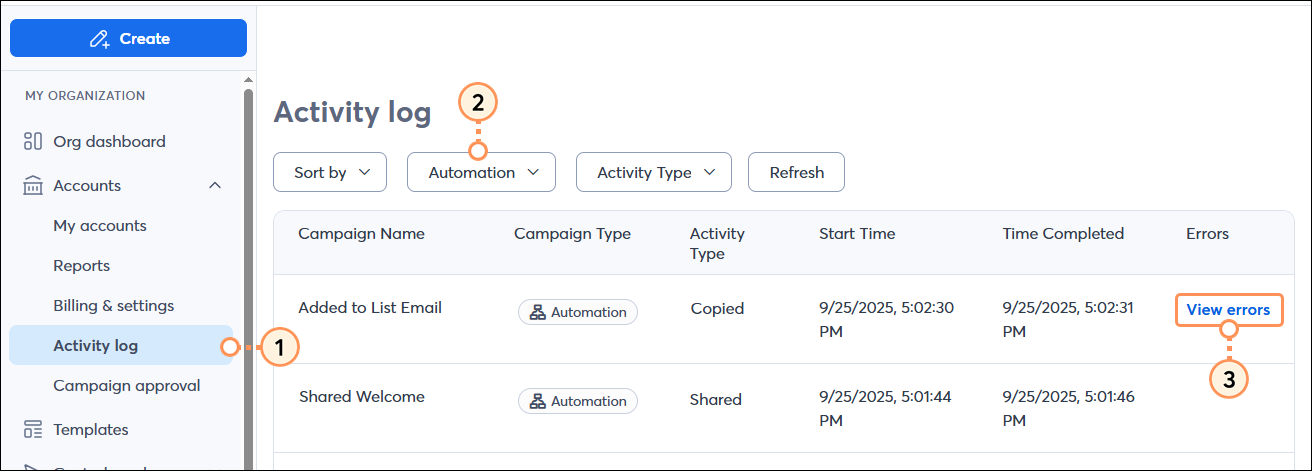
- In the "My Marketing" section of the left-hand menu, click the Accounts > Activity Log.
- (Optional) Click Campaign Type > Automation to help narrow your search.
- Next to the shared path, click "View errors" on the right-hand side of the table.
Manage a shared path
After an automation path is shared with sub-accounts, you can still change the path as needed. Please note that when you make changes to an active path, contacts who have already completed the step won't see the updates. If contacts are already on a time delay step and you change or remove the time delay, they continue on the path based on the original time delay settings.
- Click Marketing channels > Automations.
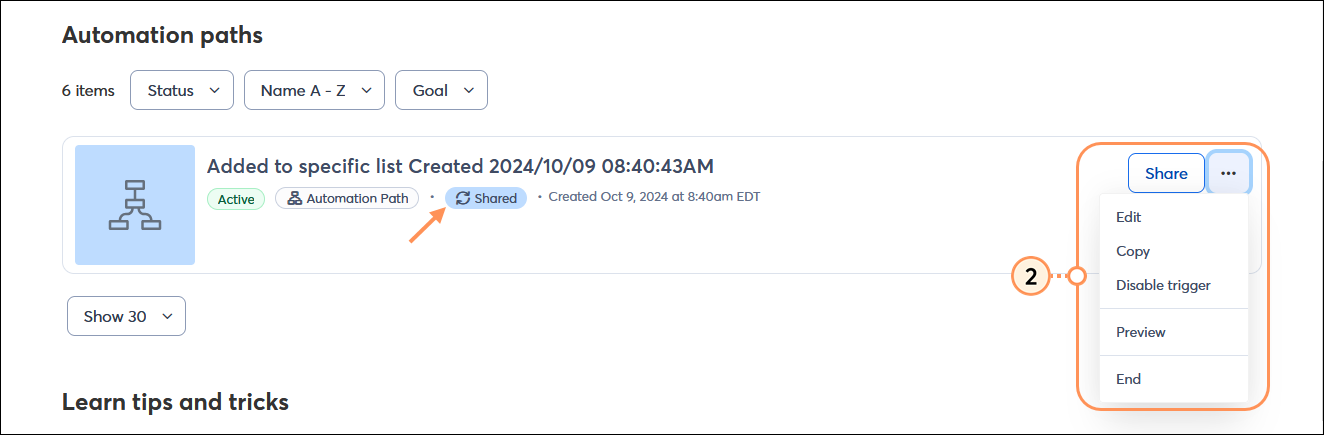
- In the Automation paths section, click the Share button to select additional sub-accounts to receive the path, or click three dots (. . .) next to the shared path and select:
- Edit - This lets you edit the path by adding, removing, or editing the email and time delay steps in your path.
- Copy - This lets you copy the path, and then you can give it a unique name and modify the email and time delay steps.
- Disable trigger - This prevents contacts from starting the path, but allows any contact currently on the path to finish it in each of the sub-accounts it's shared with. If you want to restart the path, you can copy it, and then the copied path can be activated and shared.
- Preview - This lets you preview all the steps in your path.
- End - This both prevents contacts from starting the path and stops the path for all the contacts that are currently on it in each of the sub-accounts it's shared with. If you want to restart the path, you can copy it, and then the copied path can be activated and shared.
Copy a shared path
 | Review your plan: This feature is not available in all Constant Contact plans. If you don't have full access, you may need to upgrade your email plan. For more information about what's available in your current email plan, please see the Plans & Pricing page in your account. |
After creating a shared automation path with your sub-accounts, you can copy it at any time to all or select sub-accounts. Copying is not the same as sharing - when you copy the shared automation, each sub-account it has been copied to gets complete control to tweak, tailor, and launch it as they wish:
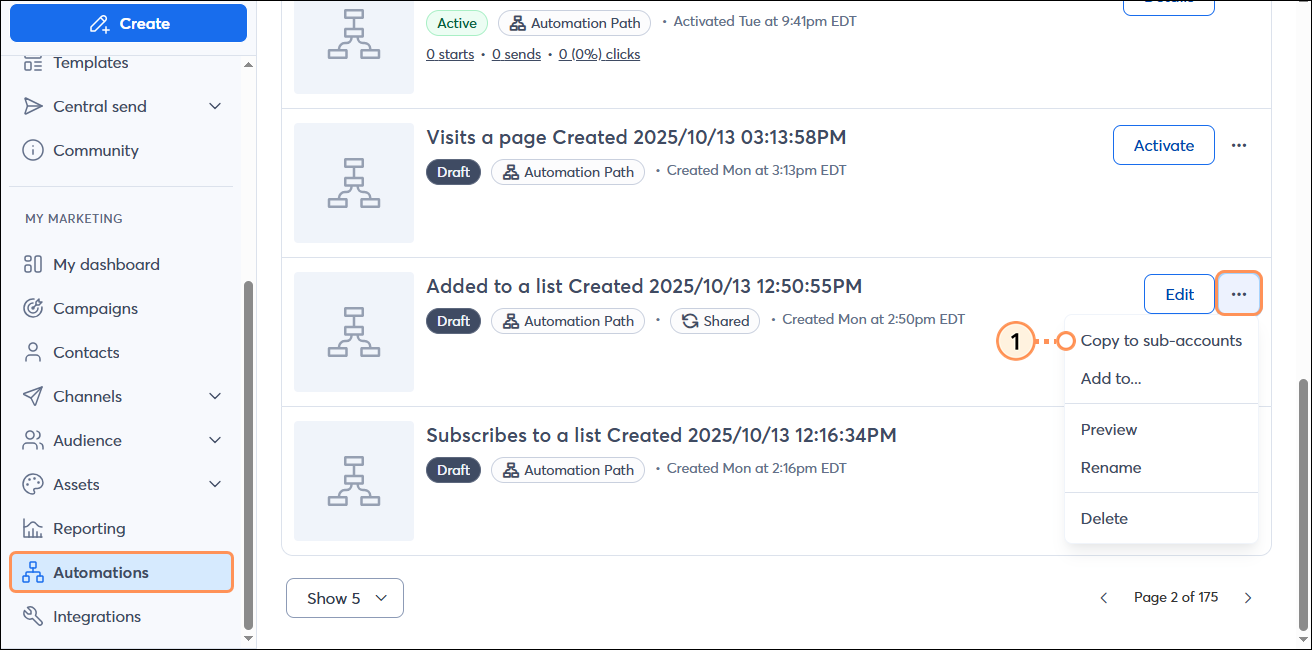
- In the "My Marketing" section of the left-hand menu, click Automations. Locate your shared draft, active, or ended Automation path. Click the three dots and then select 'Copy to sub-accounts'.
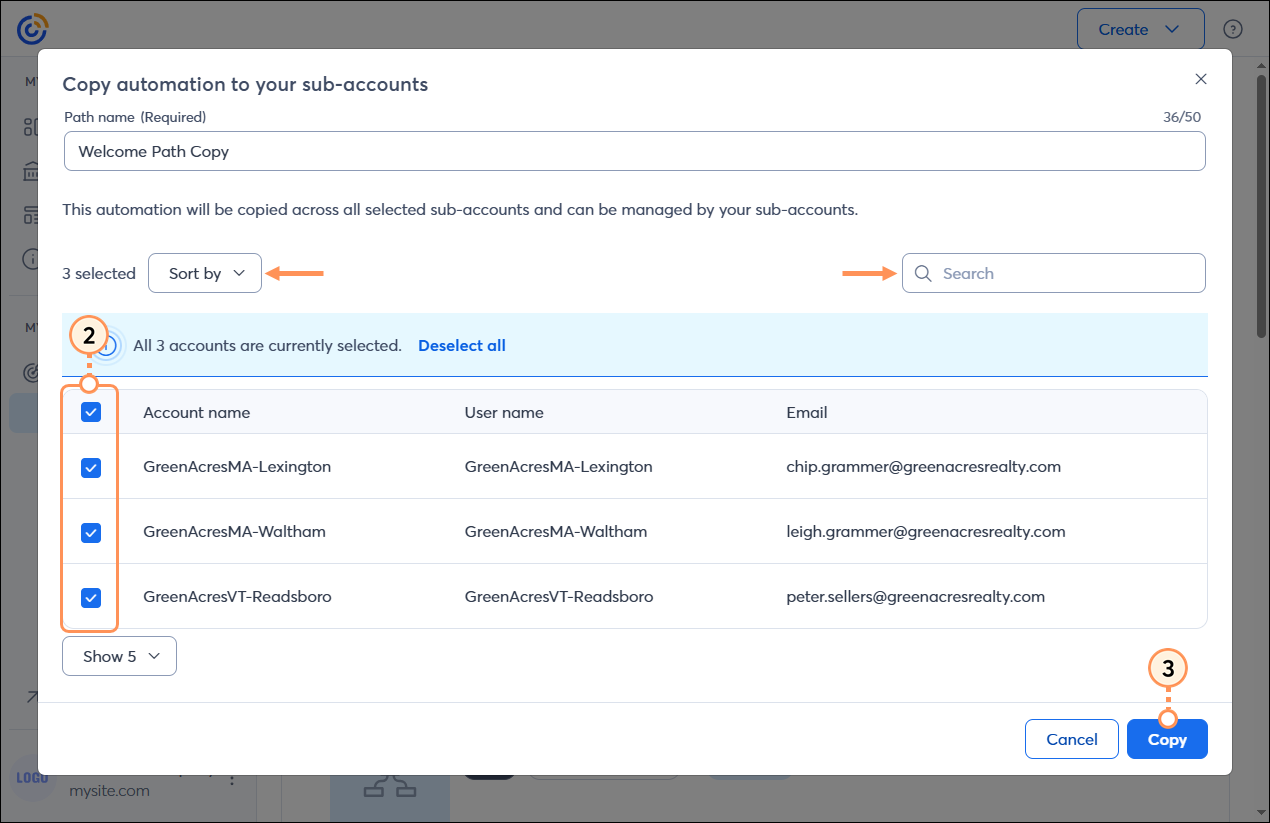
- Select the sub-accounts you want to copy the path to. You can sort your sub-accounts alphabetically, and the Search field can help you find specific accounts too.
- Click the Copy button.
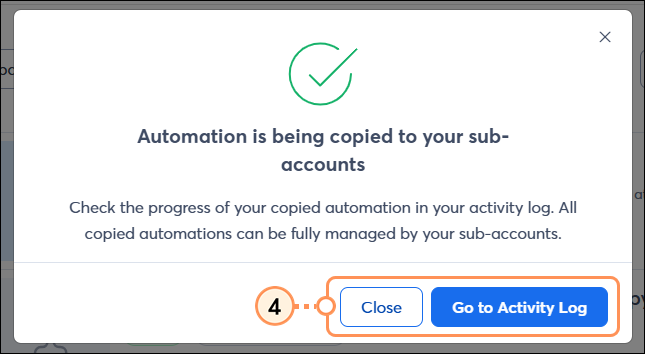
- Click the:
- Close button - Takes you back to the All Campaigns page.
- Go to Activity Log button - This takes you to Activity Log, where you can see the status of your copy.
Copied automation paths will display with the Activity Type of "Copied":
