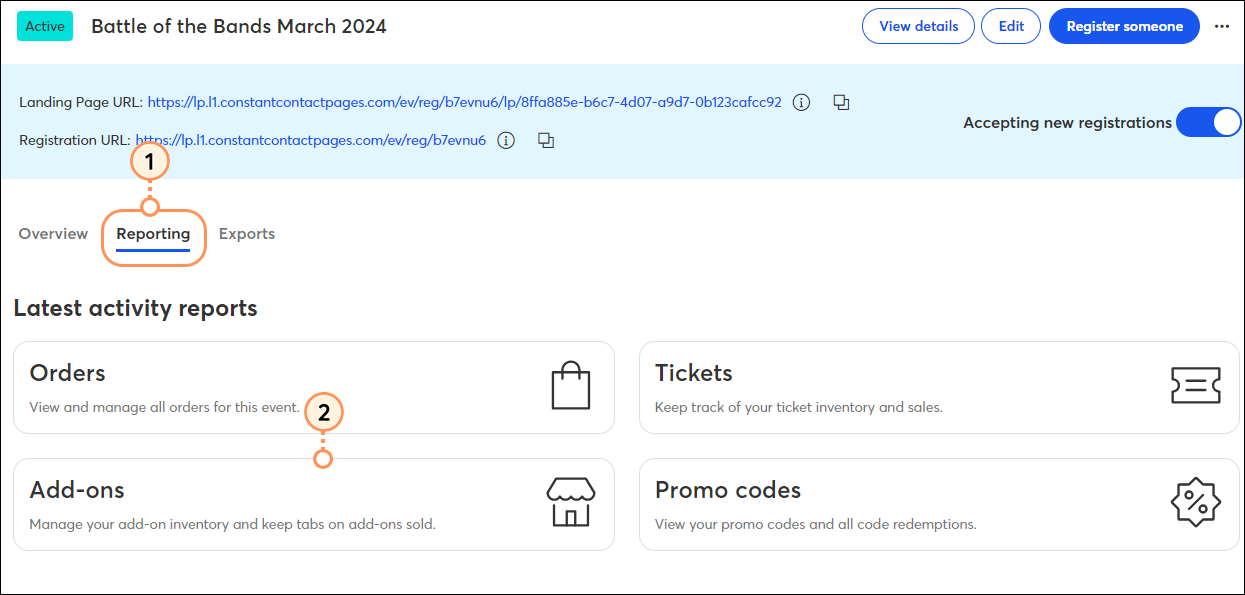
Track the activity associated with your event in real-time by accessing your event reporting. The easy-to-navigate reporting tab on the event dashboard helps you be prepared for your current event and provides insight into how you can reach even greater success when hosting future events. Additionally, you can export a full registrant report, which contains detailed information from your event, including tickets purchased and responses to registration form fields, a custom report with the details and filters of your choosing, or an attendee report, which displays a simplified list of all your event attendees.
Orders/Registrations
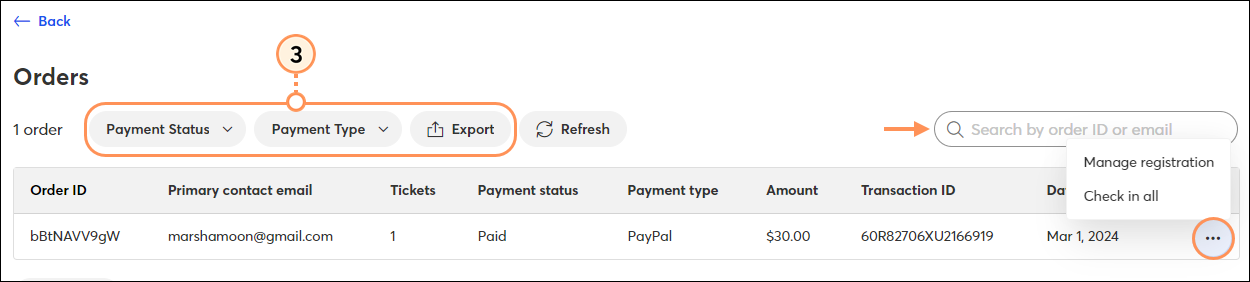
View registrants of an event listed by order id and registrant email. To access this report:
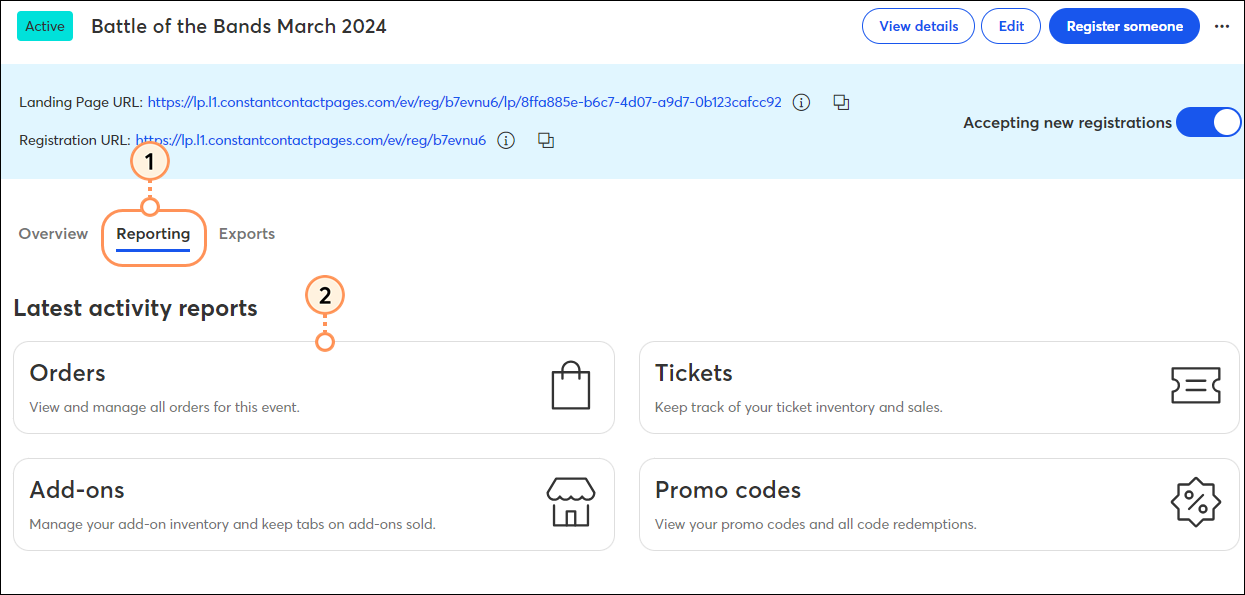
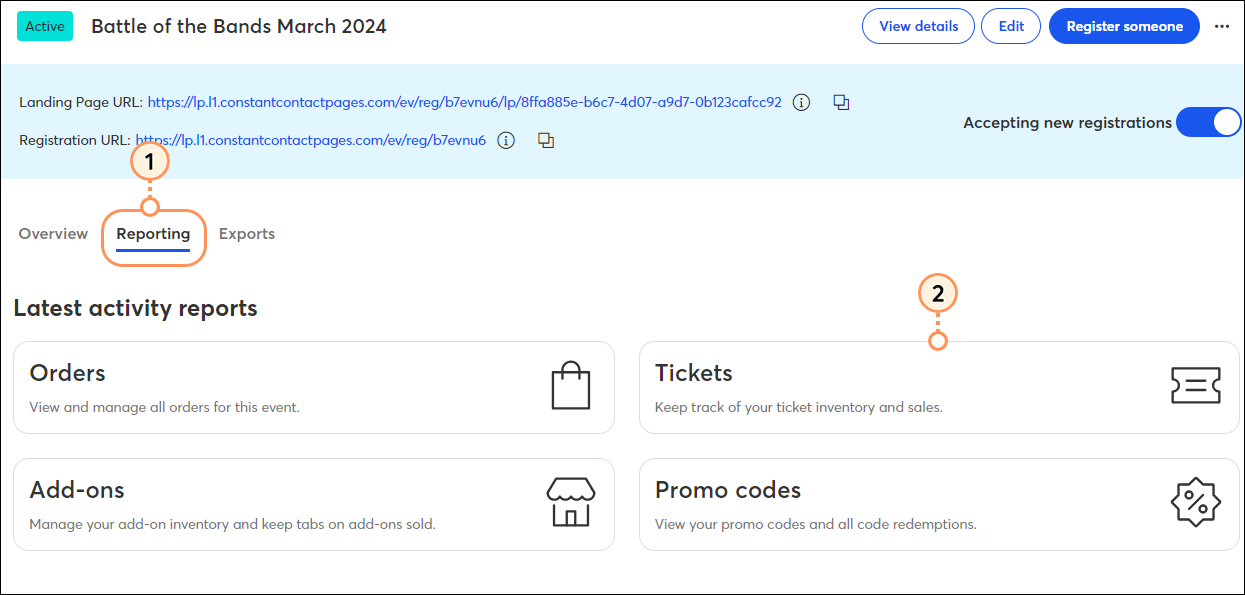
- In the event dashboard, click the Reporting tab.
- Click Orders. Note that if you are hosting a free event, this block will appear as Registrations.
- Your orders/registrations will appear in a dashboard along with relevant order/registrant details. Optionally:
- Filter orders by payment status and/or payment type if you're hosting a paid event or registrant status if you're holding a free event.
- Search for a particular order/registration by email address.
- Export the list. Your export will adhere to any filters that are applied.
- Click the three dots on the right to access additional options.
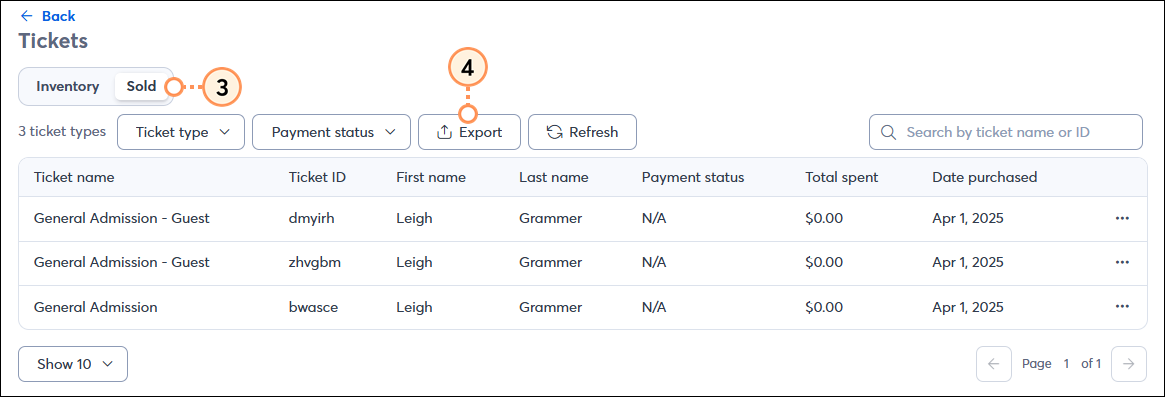
Tickets
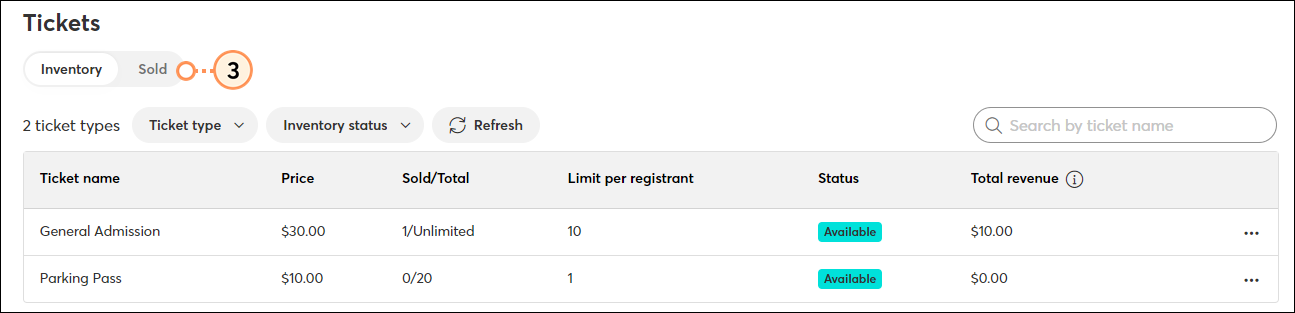
Review the current inventory of configured tickets, and review a break down of all sold tickets by switching to the "Sold" tab". If you're hosting a free event, you will see a tab for "Registered" tickets instead of "Sold" tickets.
- In the event dashboard, click the Reporting tab.
- Click Tickets.
- Select to view your ticket inventory or your sold tickets. Note that if you are hosting a free event, you will see a "Registered" tab instead of "Sold".
- When viewing:
- Ticket Inventory - Your tickets will appear in a dashboard along with relevant ticket details. Optionally, filter tickets by ticket type and/or inventory status, or search for a particular ticket by ticket name. Click the three dots on the right to quickly edit, copy, or pause a ticket.
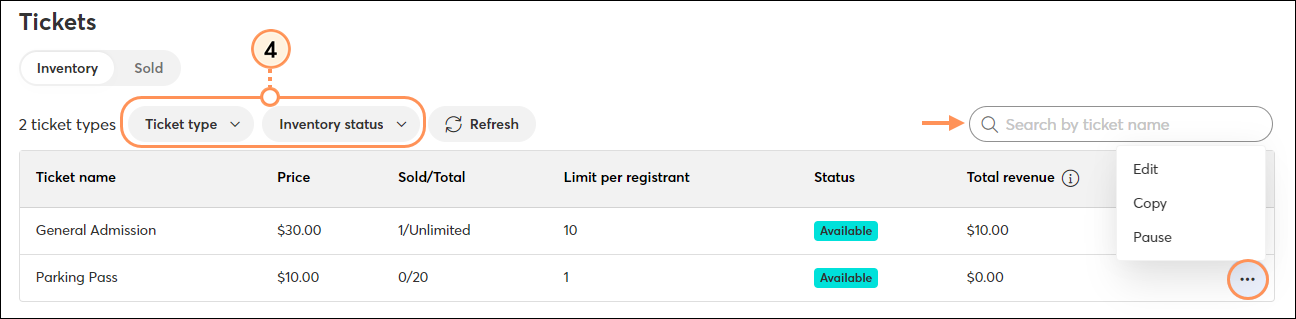
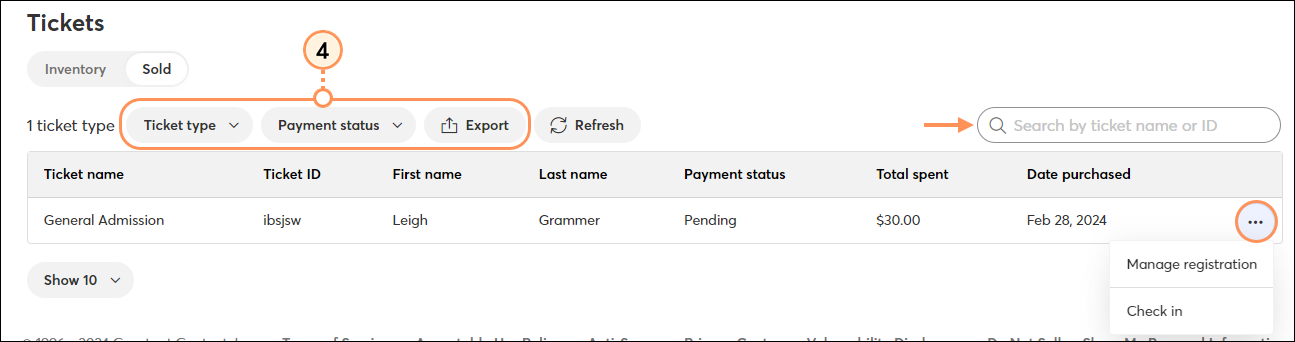
- Sold/Registered Tickets - For paid events, all of your sold tickets will appear in a dashboard, along with relevant ticket and registrant information. For free events, all of your registered tickets will appear in the dashboard, along with the registrant's name and the date registered. Optionally:
- Filter sold tickets by ticket type and/or payment status.
- Search for a particular ticket by ticket name/ID.
- Export the list. Your export will adhere to any filters that are applied.
- Click the three dots on the right to access additional options.
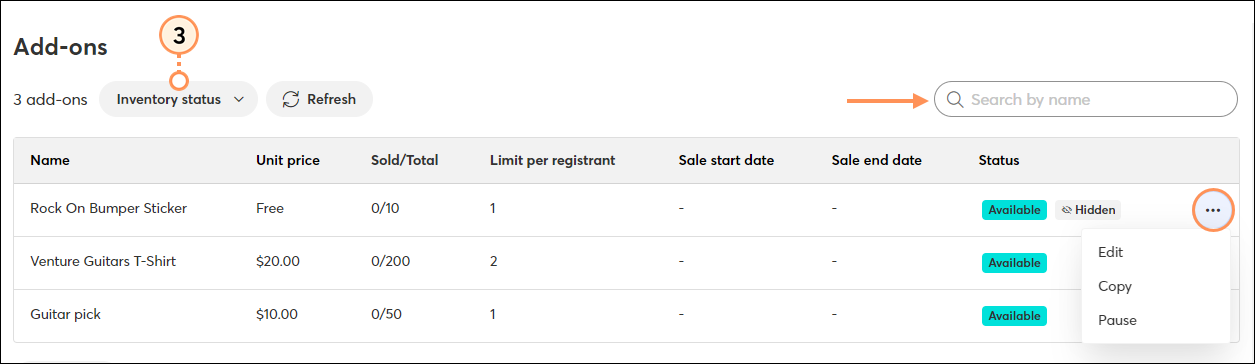
Add-ons
Review and manage the current inventory of free & paid add-ons.
- In the event dashboard, click the Reporting tab.
- Click Add-ons.
- Your add-ons will appear in a dashboard along with relevant item/sale details. Optionally, filter your add-ons by inventory status or search for a particular add-on by name. Click the three dots on the right to quickly edit, copy, or a pause an add-on.
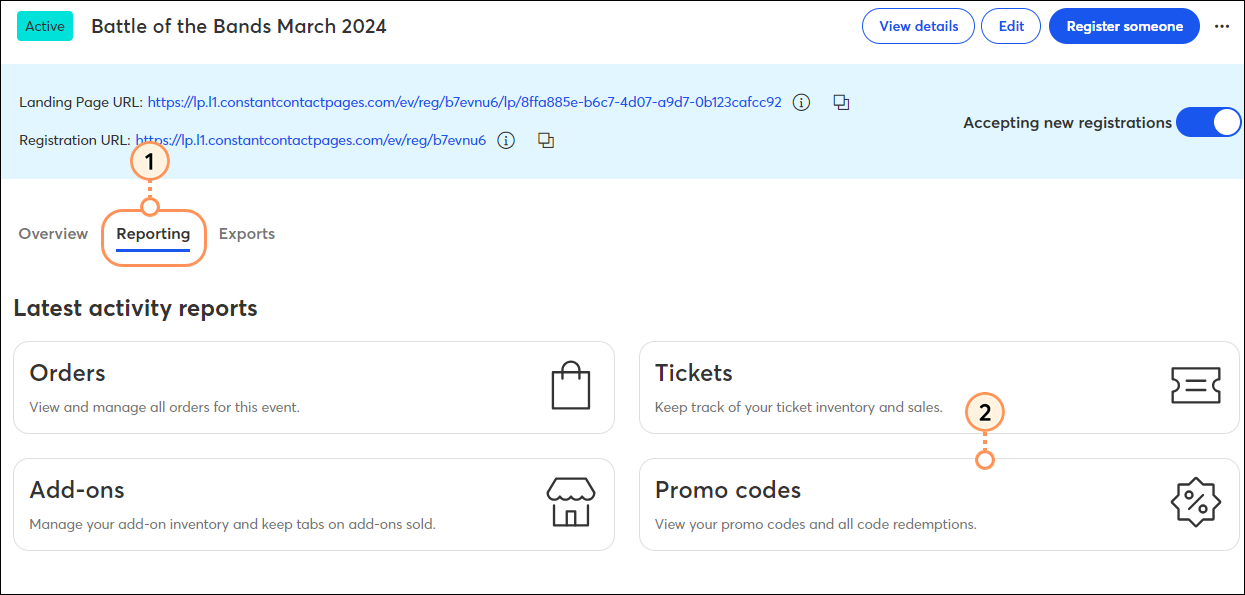
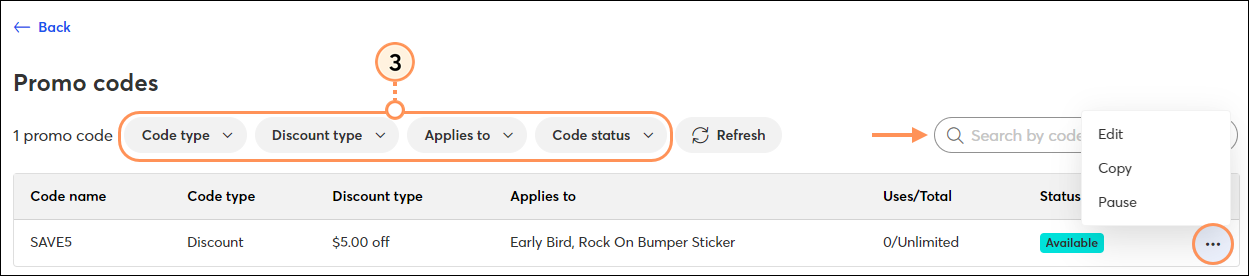
Promo codes
Review and manage the current inventory of discount and access codes.
- In the event dashboard, click the Reporting tab.
- Click Promo codes. If you are holding a free event, you'll simply see "Codes" on the dashboard.
- Your promo codes will appear in a dashboard along with relevant code details. Optionally, filter codes by code type, discount type, how the code is applied, and/or code status, or search for a particular code by code name. Click the three dots on the right to quickly edit, copy, or pause a code.
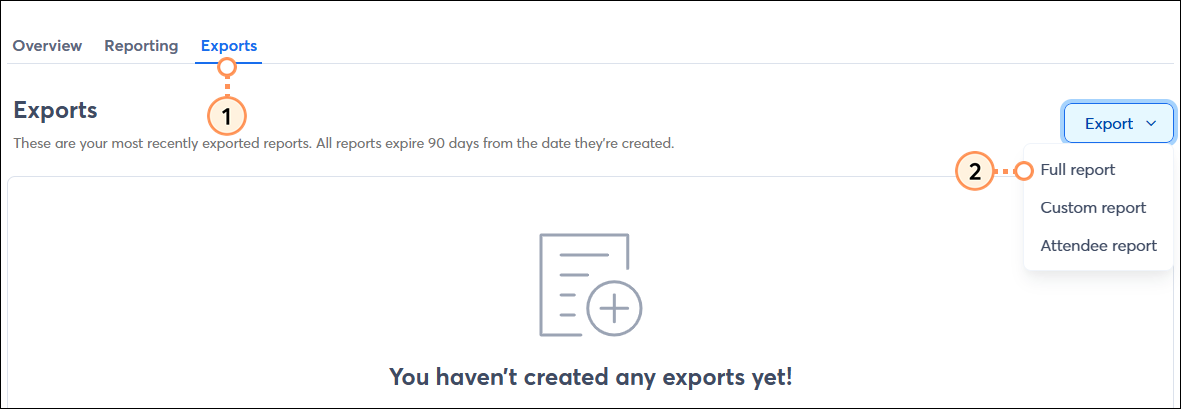
Export full registrant report
You have the option to export a detailed registrant report that contains information from your event, including tickets purchased and responses to registration form fields.
 | Important: When exporting your full data, the fields will be grouped by the primary contact information. If a registrant (primary contact) purchases 10 tickets during registration, you’ll see their information repeated 10 times, with each line displaying information for each ticket purchased. |
To export this report:
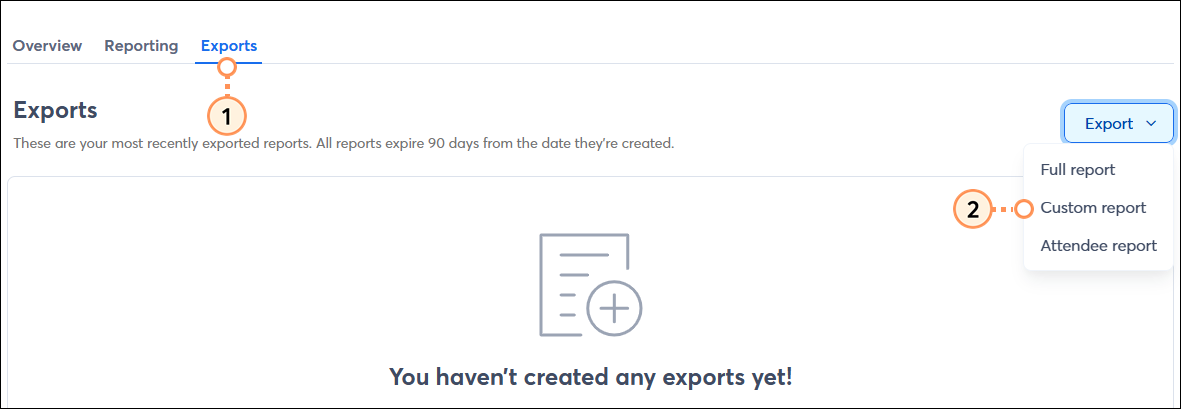
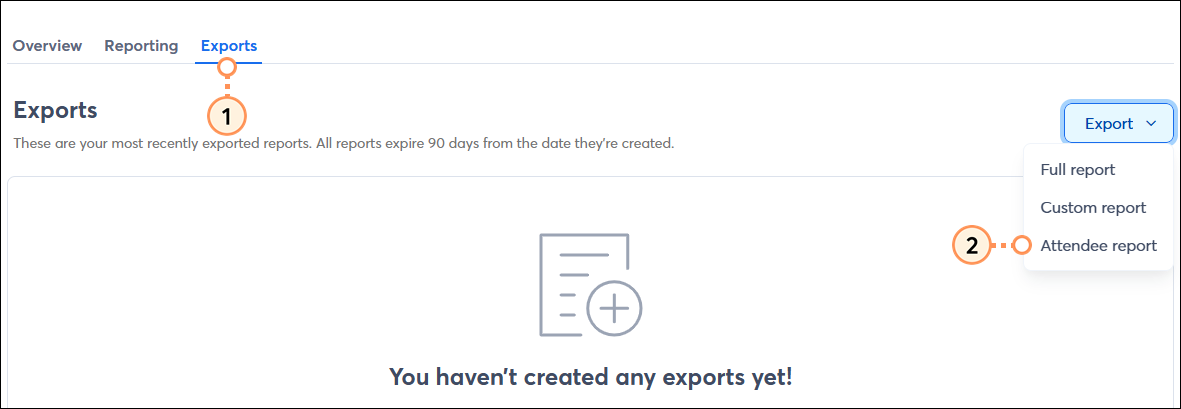
- In the event dashboard, click the Exports tab.
- Click Export > Full report.
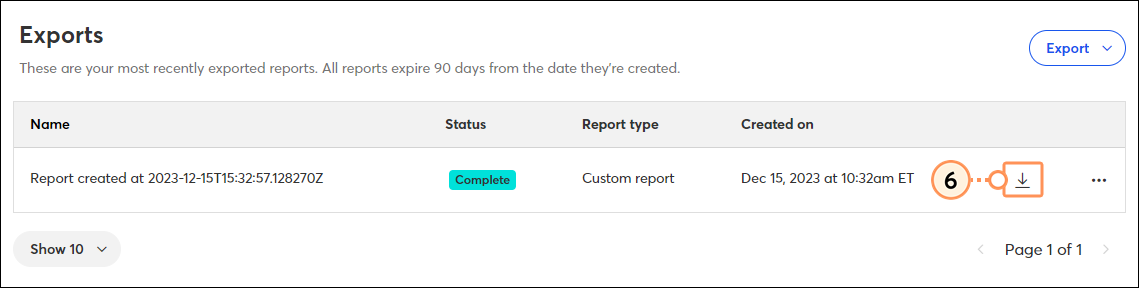
- The report will appear on the Exports table. Once the status updates to Complete, click the download icon.

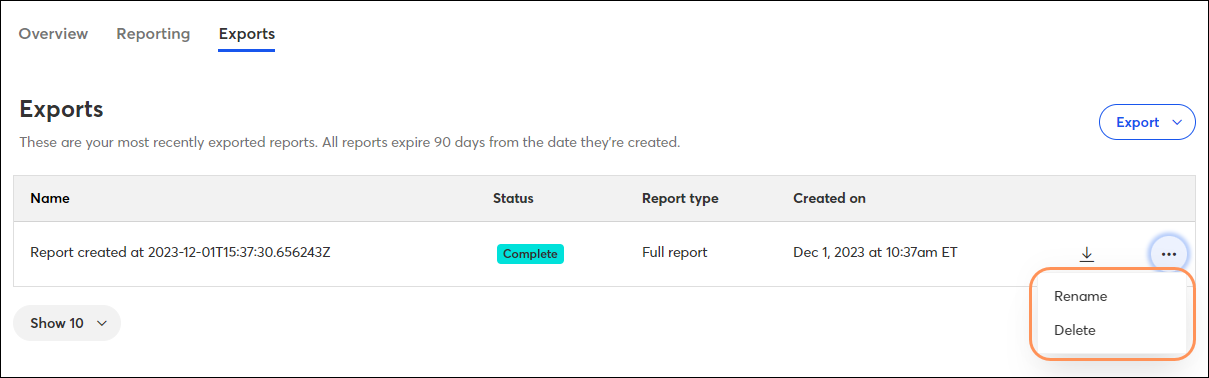
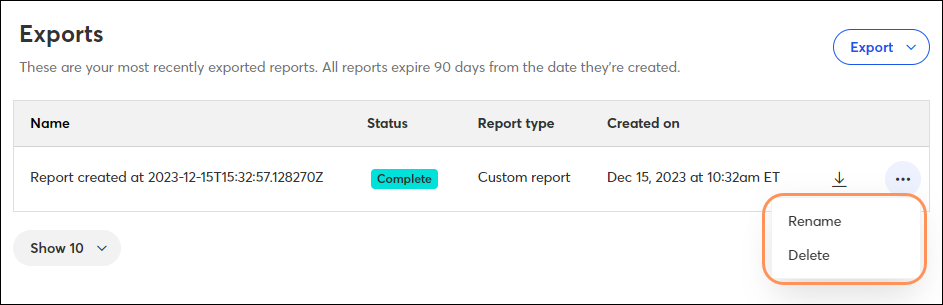
Exports expire 90 days from the date they're created. You can download an exported report at any time by clicking the download icon. Click the three dots on the right to rename a report or delete it.
Are you seeing a registrant marked as "Expired" on your exported report? A registrant has 25 minutes to complete the registration flow. If they fill out their contact information, but then they leave the window open and it times out before they complete registration, they will be marked as "Expired" on your reports.
Export a custom report
Creating a custom report allows you to pick the information you want to include in your report. To export a new custom report:
- In the event dashboard, click the Exports tab.
- Click Export > Custom reports.
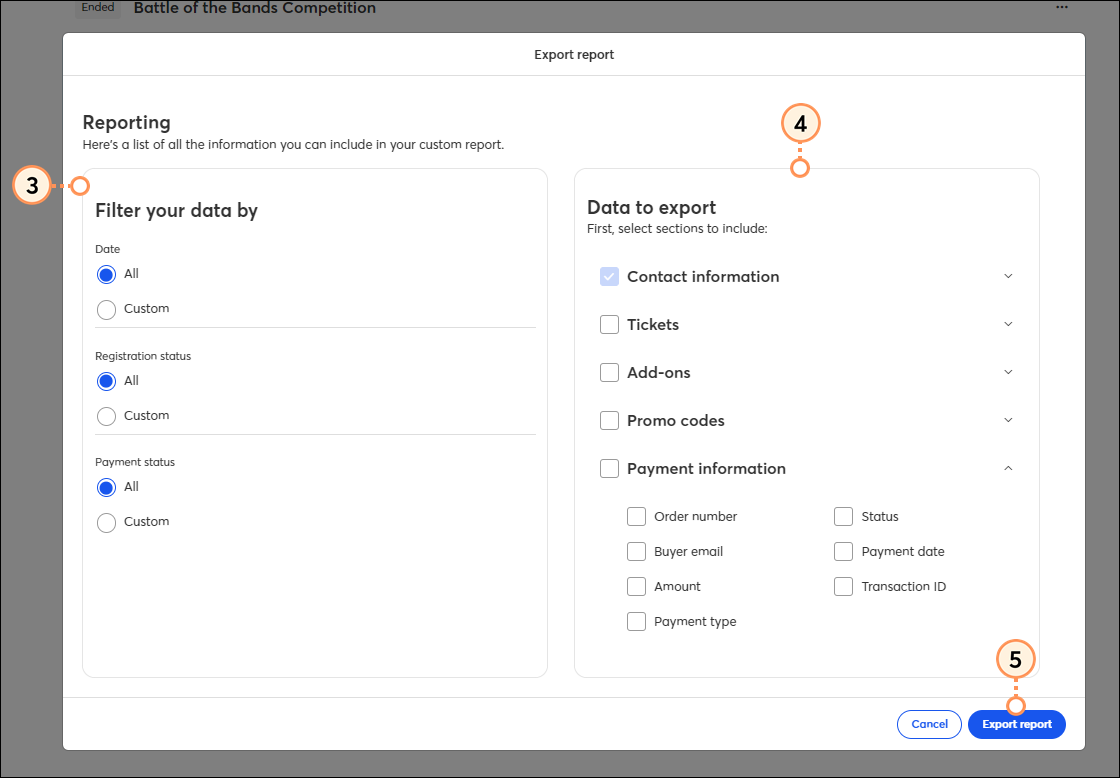
- Select the filters you want to apply to your report. Filter options are:
- Date
- Registration Status
- Payment Status
- Select the data you'd like to export. Checkmark an entire section, or click the dropdown to select certain data options within a section.
- Click Export report.
- The report will appear on the Exports table. Once the status updates to Complete, click the download icon.
Exports expire 90 days from the date they're created. You can download an exported report at any time by clicking the download icon. Click the three dots on the right to rename a report export or delete it.
Are you seeing a registrant marked as "Expired" on your exported report? A registrant has 25 minutes to complete the registration flow. If they fill out their contact information, but then they leave the window open and it times out before they complete registration, they will be marked as "Expired" on your reports.
Export an attendee report
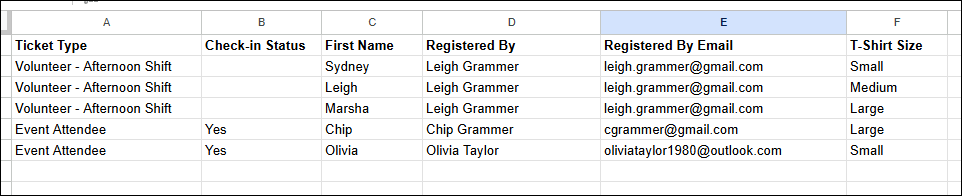
Easily monitor and track your attendance with this simplified version of the full/custom reports. See a list of all your event attendees, including a column indicating who the attendee was registered by, for registrants who are not the primary registrant:
To export a new attendee report:
- In the event dashboard, click the Exports tab.
- Click Export > Attendee report.
- The report will appear on the Exports table. Once the status updates to Complete, click the download icon.

Exports expire 90 days from the date they're created. You can download an exported report at any time by clicking the download icon. Click the three dots on the right to rename a report export or delete it.

Export the Sold Tickets report to see Checked-In registrants
To see a list of which registrants/tickets have been marked as checked-in, export the Tickets report:
- In the event dashboard, click the Reporting tab.
- Click Tickets.
- Click the Sold tab. If you are hosting a free event, the tab will say Registered instead.
- Click Export.