Email and Digital Marketing
How can we help you?
Search our help articles, video tutorials, and quickstart guides

You've got this. You've got us. Search our Knowledge Base to quickly find answers to your questions.

Save your brand colors and logo in your account

Article: 000047342
Updated: May 1, 2026

Add your brand assets to the BrandKit to easily apply them to your email templates


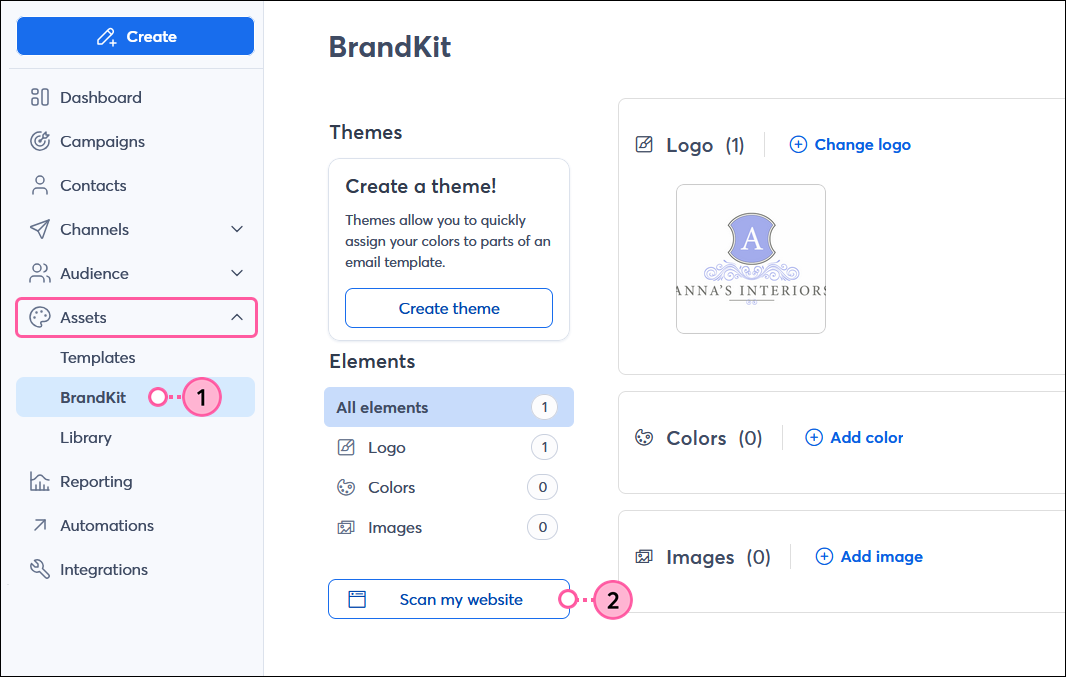
Save time and make sure the design of all your campaigns is consistent and professional by adding your brand colors and logo to the BrandKit in your account. If you have a website, you can quickly scan it to import your brand assets, or you can choose to manually add them.

Desktop instructions:

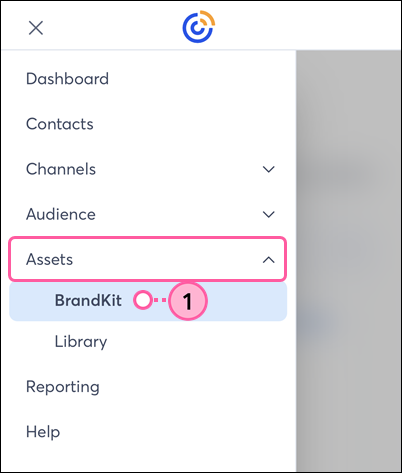
Mobile web instructions:


With your colors added to the BrandKit, you can then create a theme to have them applied to certain templates when creating a new email. Additionally, your logo will automatically display in newly created campaigns, and your colors will be readily available to choose from when customizing the design.  


Automatically add your brand elements from your website

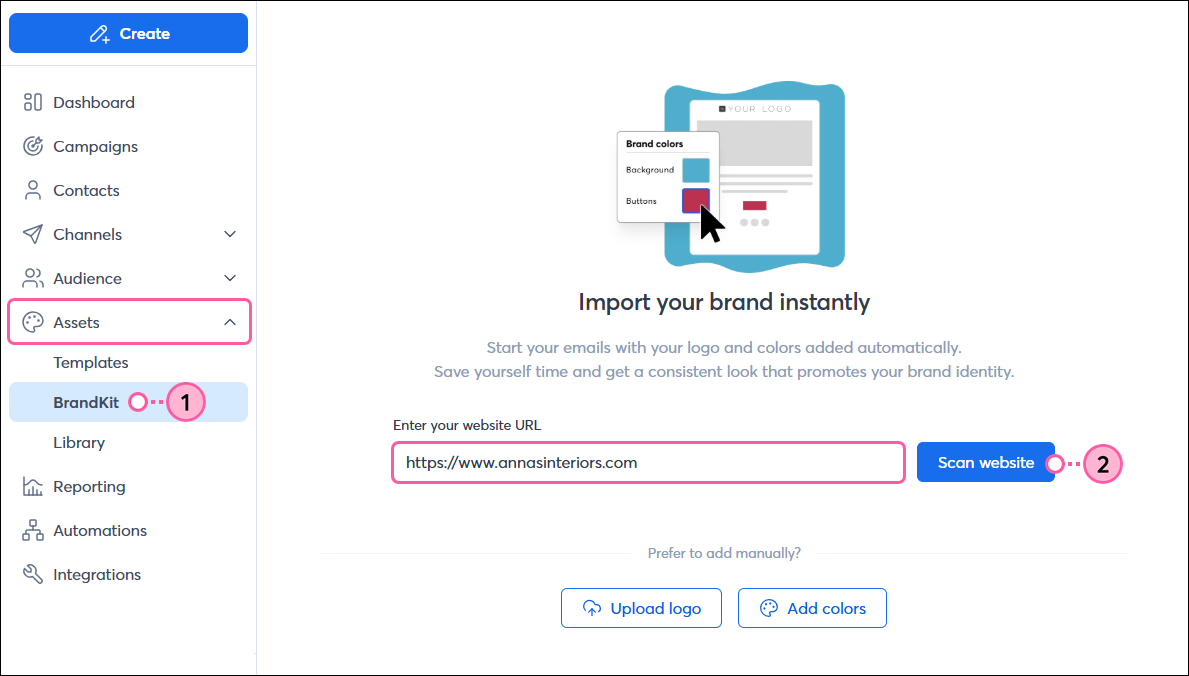
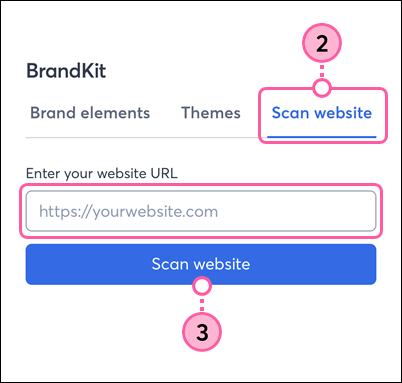
If you have a website, you can easily scan it to automatically import your logo and colors into your BrandKit. You have the choice of which assets you want to import, and you can always add new assets later. 

  1. In the left-hand menu, click AssetsBrandKit.
  2. If you already added your logo to your account settings, it's automatically added to the BrandKit. Click Scan my website and continue to step 3. If you haven’t added your logo yet, enter your website’s URL in the field. Then click Scan website and skip to step 5.

    Left navigation, Assets menu expanded and BrandKit option selected, BrandKit dashboard with Scan my website buttonLeft navigation, Assets menu expanded and BrandKit option selected, BrandKit dashboard with Website URL field and Scan website button


  3. Enter your website's URL into the field.
  4. Click the Scan for branding button.

    Scan my website overlay with URL field and Scan for branding button

  5. Your logo, colors, and images are automatically pulled from your website and added to your BrandKit. You can click + Change logo to choose a different logo, click + Add color to enter more colors manually, or click the X to remove any colors. 

    Brand assets added with Change Logo, Add Color, and remove color options


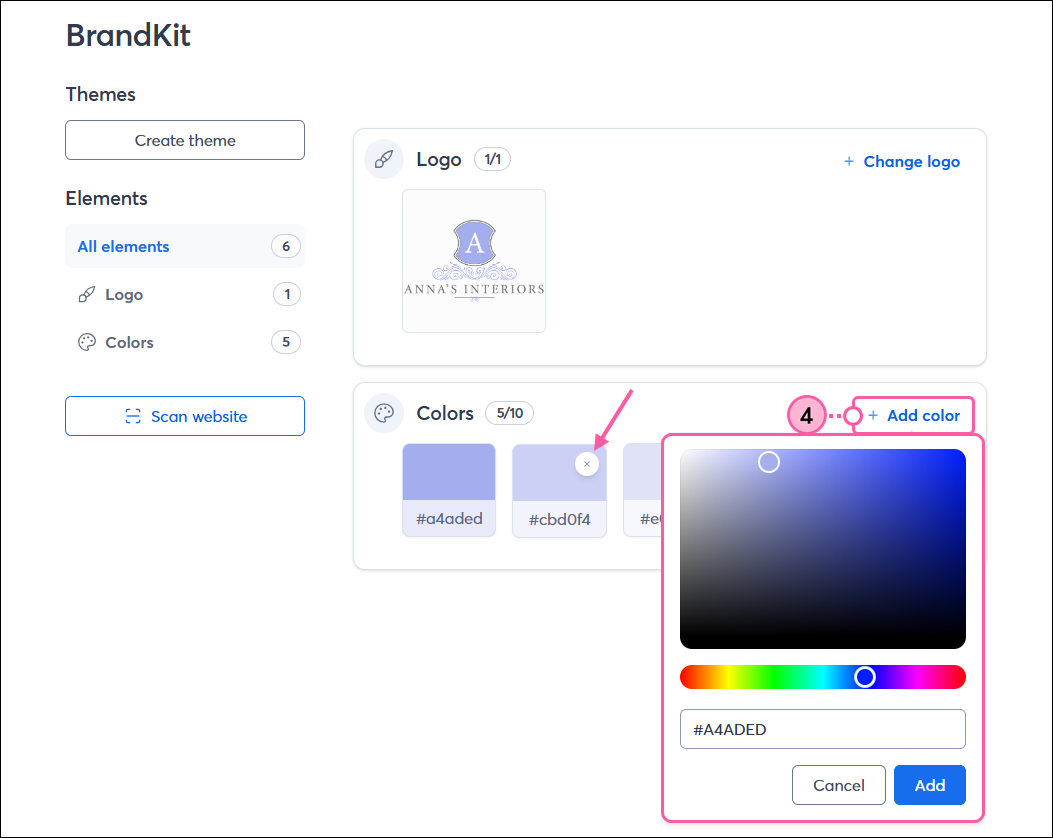
With your brand assets added, you can now manually add additional brand colors and images or make changes to your theme.


Manually add your brand elements 

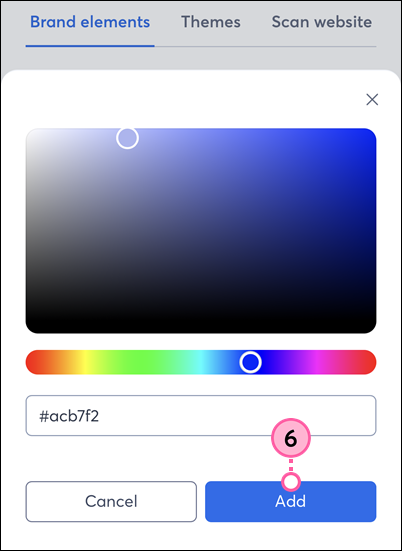
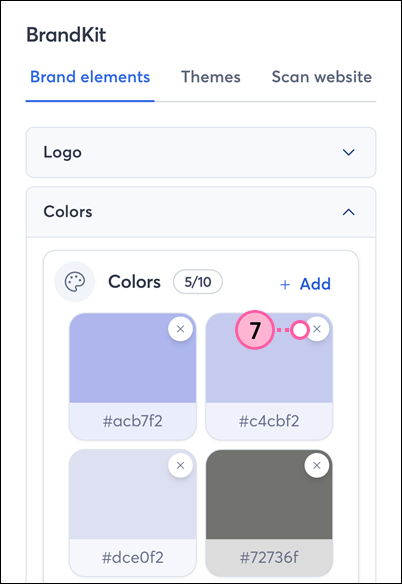
If you don’t have a website or prefer to choose the specific brand assets you want to use in your BrandKit, you can add them manually.

  1. In the left-hand menu, click Assets BrandKit.
  2. Click Upload logo. If you already added your logo to your account, it’s automatically added to the BrandKit for you. If you want to change the logo used, click + Change logo.

    BrandKit with Upload Logo buttonBrandKit with Change Logo option
     
  3. Select from the images already in your Library,  or click Upload image to add a new logo. Alternatively, you can add the URL for your logo if it's hosted elsewhere online.

    Change Logo pop-up with From URL field or Upload File tab and Save button

  4. In the Colors section, click + Add color to add your brand colors. You can save up to 10 colors in your BrandKit. If you change your mind about a color, place your cursor over its swatch and click the X to delete it.

    Light bulb iconTip: If you aren't sure of the hex values for your brand colors, you can use a color picker, such as Color Cop or Color Schemer Online, to find them.


    BrandKit dashboard with Colors section, + Add color option, Color palette expanded, and color swatch with X (delete option) displayed
     

With your brand assets added, you can now create a theme to apply to your templates the next time you go to create an email.


Access your brand colors when editing a campaign

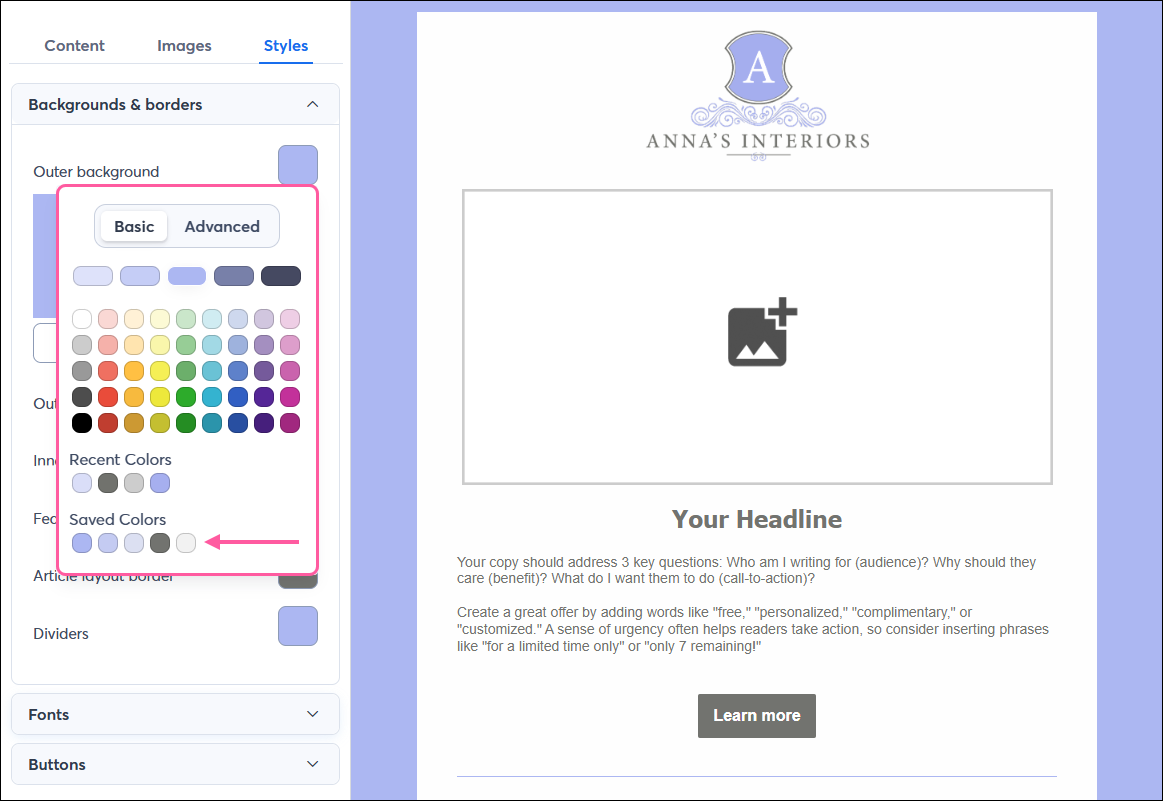
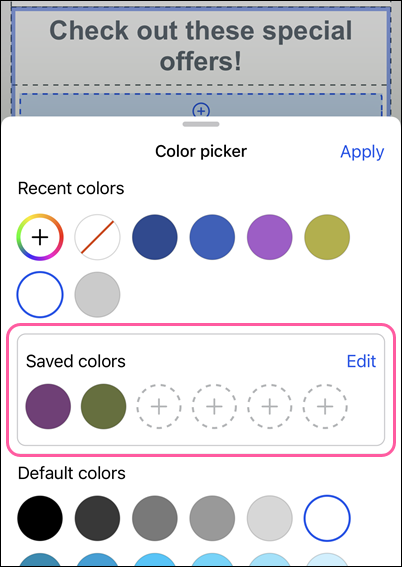
Once you’ve added your brand colors to your BrandKit, they’ll be easily accessible when editing your campaigns. When you go to change the colors, your brand colors will be available under the Saved Colors section of the color picker. You can edit your brand colors within your BrandKit or while editing an email in the Constant Contact mobile app at any time.


Saved Colors when editing on a desktopSaved Colors when editing on the mobile app
Email editor with Styles tab selected and Backgrounds & borders section expanded, background and border options and color palette visible with Basic tab selected and Saved Colors optionsMobile app color picker with Saved Colors


Automatically add your brand elements from your website (mobile web)

If you’re using Constant Contact on your mobile device's web browser (versus your desktop computer or Constant Contact's mobile app), it’s easy to automatically add your brand elements: 

  1. From the menu, tap Assets > BrandKit.

    Mobile web menu expanded, Assets section expanded, and BrandKit option selected

  2. If needed, tap the Scan website tab.
  3. Enter your website’s URL and tap Scan website.

    Scan website tab, website URL field, and Scan Website button

  4. Your logo, colors, and images are automatically pulled from your website and added to your BrandKit. You can tap + Change to choose a different logo, tap + Add to enter more colors manually, or tap the X to remove any colors.

    BrandKit elements added, Change and Add links, and X to remove color

With your brand assets added, you can now create a theme to apply to your templates the next time you go to create an email.


Manually add your brand elements (mobile web)

If you’re using Constant Contact on your mobile device's web browser (versus your desktop computer or Constant Contact's mobile app), you can manually add your brand elements to your BrandKit: 

  1. From the menu, tap Assets > BrandKit.

    Mobile web menu expanded, Assets section expanded, and BrandKit option selected

  2. If needed, tap the Brand elements tab.
  3. In the Logo section, tap +Add or + Change.

    Brand Elements tab, Logos section, and Add link

  4. Select a photo from your Library or tap Upload image to choose a photo saved on your device or take a new photo.

    Select logo screen with Library photos and Upload Image button

  5. In the Colors section, tap +Add.

    Brandkit with logo added and empty Colors section with Add link

  6. Enter a hex value and tap Add.

    BrandKit Color palette, hex value field, and Add button

  7. You can save up to 10 colors in your BrandKit. If you change your mind about a color, tap the X to delete it.

    Brandkit with Colors added and X to remove a color

With your brand assets added, you can now create a theme to apply to your templates the next time you go to create an email.


Any links we provide from non-Constant Contact sites or information about non-Constant Contact products or services are provided as a courtesy and should not be construed as an endorsement by Constant Contact.


Questions?

Ask the Community

Did this article answer your question?


Constant Contact Logo

Copyright © 2026 · All Rights Reserved · Constant Contact · Privacy Center