| Not a Partner? This article pertains specifically to our Partner customers. If you're looking for non-Partner details for account user roles, please see our article on adding and managing users. |
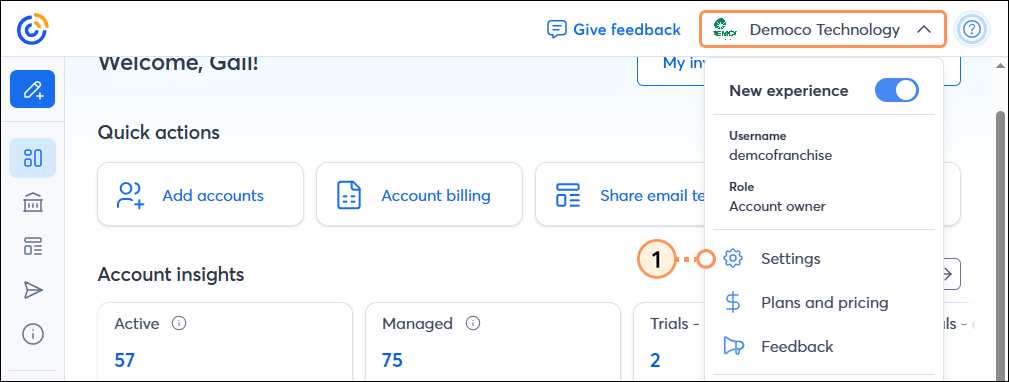
As the Account Owner, you can allow multiple people to work in your Constant Contact account as an Account Manager, Partner Manager, or Campaign Creator, each with their own unique username and password. By assigning users a specific role, you limit the actions they can take within your account and restrict their access to more sensitive information, like your billing and account settings. You can add, edit, and remove users as needed to help manage your account in a way that works best for your organization.
| Important: Sharing your username and password is a security risk. Make sure to always set up additional users so that they can have their own login information. There is no limit to the number of users you can add. We also encourage you to set up Multi-Factor Authentication (MFA) as an extra layer of security for your account. In addition to your password, MFA requires a secondary factor to verify your identity when logging in from a device we don't recognize. |
|
Category
|
Activity
| User Roles | |||
| Campaign Creator | Account Manager | Account Owner | Partner Manager | ||
| Account Settings | Add new user roles or manage existing user roles | ✓ | Client account only | ||
| Manage account settings | ✓ | ✓ | Client account only | ||
| View and manage billing |
Single Bill only | ✓ | Single Bill only | ||
| Partner Settings | Access to Accounts Tab | ✓ | ✓ | ✓ | ✓ |
| Access to Resources Tab (Reseller Partners Only) | ✓ | ✓ | ✓ | ✓ | |
| Approve Campaigns from Child Accounts | ✓ | ✓ | ✓ | ✓ | |
| Ecommerce | Create and manage Online Stores | ✓ | ✓ | Client account only | |
| Create Automated Email Series | ✓ | ✓ | ✓ | Client account only | |
| Delete or remove campaigns | ✓ | ✓ | Client account only | ||
| Edit or activate an Automated Email Series | ✓ | ✓ | Client account only | ||
| Send test emails | ✓ | ✓ | ✓ | Client account only | |
| Send, schedule, publish, or share email campaigns | ✓ | ✓ | Client account only | ||
| View, add, export, and delete contacts | ✓ | ✓ | Client account only | ||
| Events | Edit published campaigns or running Events | ✓ | ✓ | Client account only | |
| Images | Create and manage logos | ✓ | ✓ | Client account only | |
| Purchase stock images or Plus Campaigns | ✓ | Client account only | |||
| Upload and edit images in the Library | ✓ | ✓ | ✓ | Client account only | |
| Delete images in the Library | ✓ | ✓ | Client account only | ||
| Landing Pages | Create, edit, publish, and unpublish Landing Pages | ✓ | ✓ | ✓ | Client account only |
| Reporting | Access campaign reporting through the Reporting tab | ✓ | ✓ | ✓ | Client account only |
| Click to view deeper reporting through the Details page for a campaign | ✓ | ✓ | Client account only | ||
| Create segments | ✓ | ✓ | Client account only | ||
| Social | Create social posts | ✓ | ✓ | ✓ | Client account only |
| Schedule or publish social posts | ✓ | ✓ | Client account only | ||
| View and respond to comments on social posts | ✓ | ✓ | Client account only | ||
| Create, publish, edit, or unpublish Google Ads | ✓ | ✓ | Client account only | ||
| Create Facebook Lookalike Audiences | ✓ | ✓ | Client account only | ||
| Create, publish, edit, or unpublish Facebook and Instagram Ads | ✓ | ✓ | Client account only | ||
| Create, publish, edit, or unpublish Facebook Lead Ads | ✓ | ✓ | Client account only | ||
| View Facebook and Instagram Ads | ✓ | ✓ | ✓ | Client account only | |
| View Facebook Lead Ads | ✓ | ✓ | ✓ | Client account only | |
| Did you know? To add Account Manager or Campaign Creator roles to a specific child/client account, access the account through the Accounts tab within your Partner account, and then follow these steps to add and manage user roles. The number of user roles you can add to an account you manage is limited based on the email plan. See the Plans and Pricing page in the child/client account for more information. |
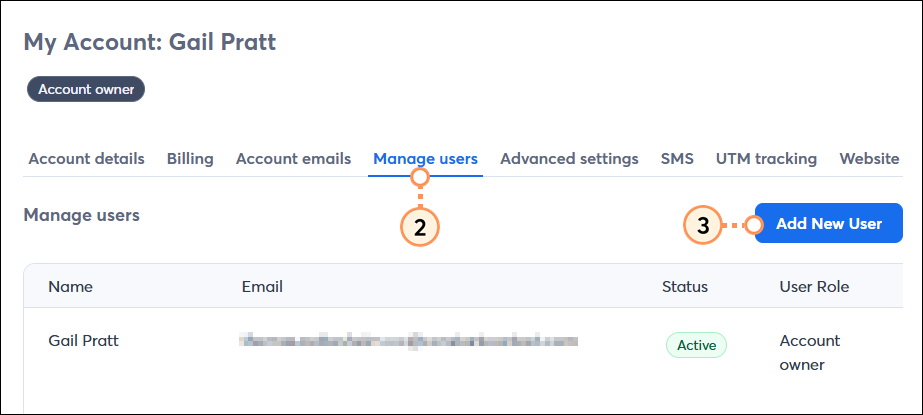
You can add as many users as you need to your Partner account.
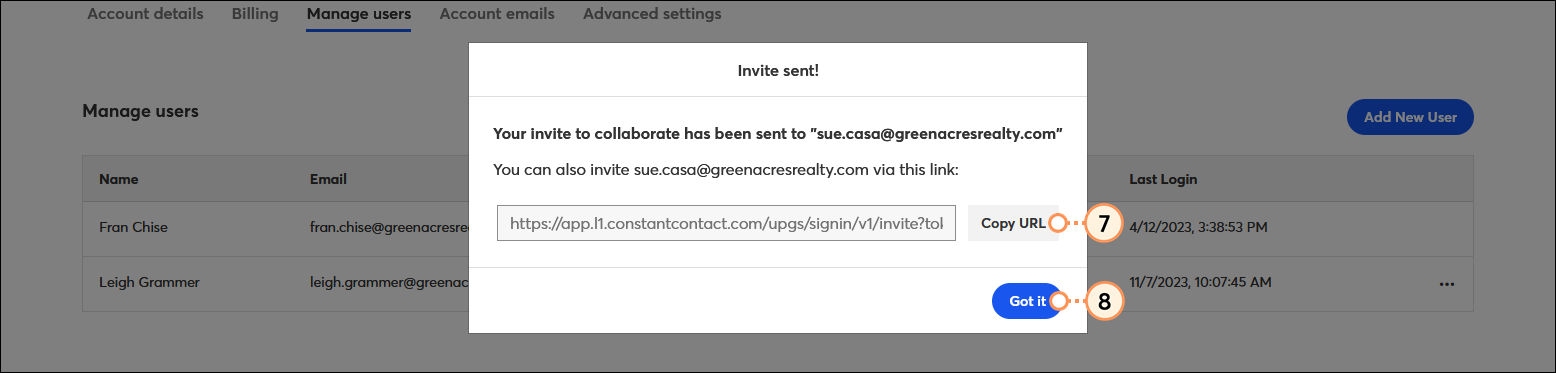
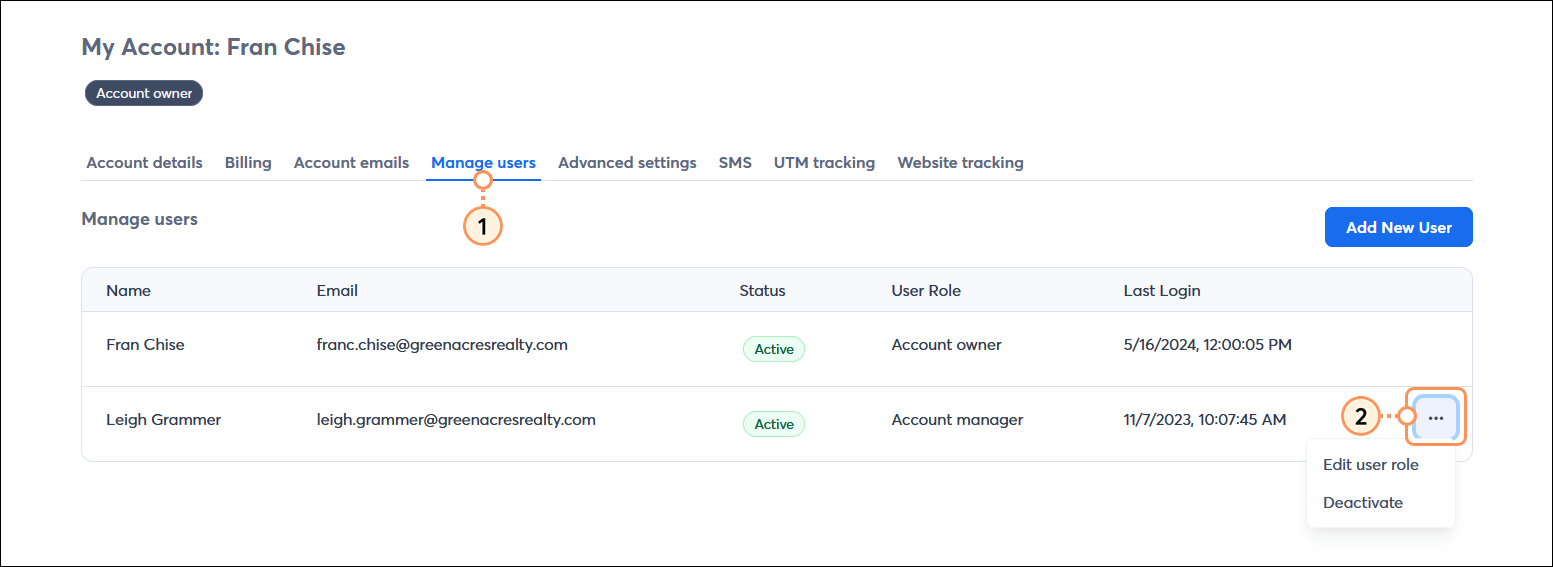
The new user shows as "Pending" in the Manage users table until they receive and accept the invitation. If you need to resend the invitation, find the row with the new user and then click the three dots at the end of the row. Select "Resend invite."
At times, when you try to add a user, you may get a message that states, "You already have a pending invitation to [email address]. Sending it again will revoke all previous invitations. Would you like to proceed?"
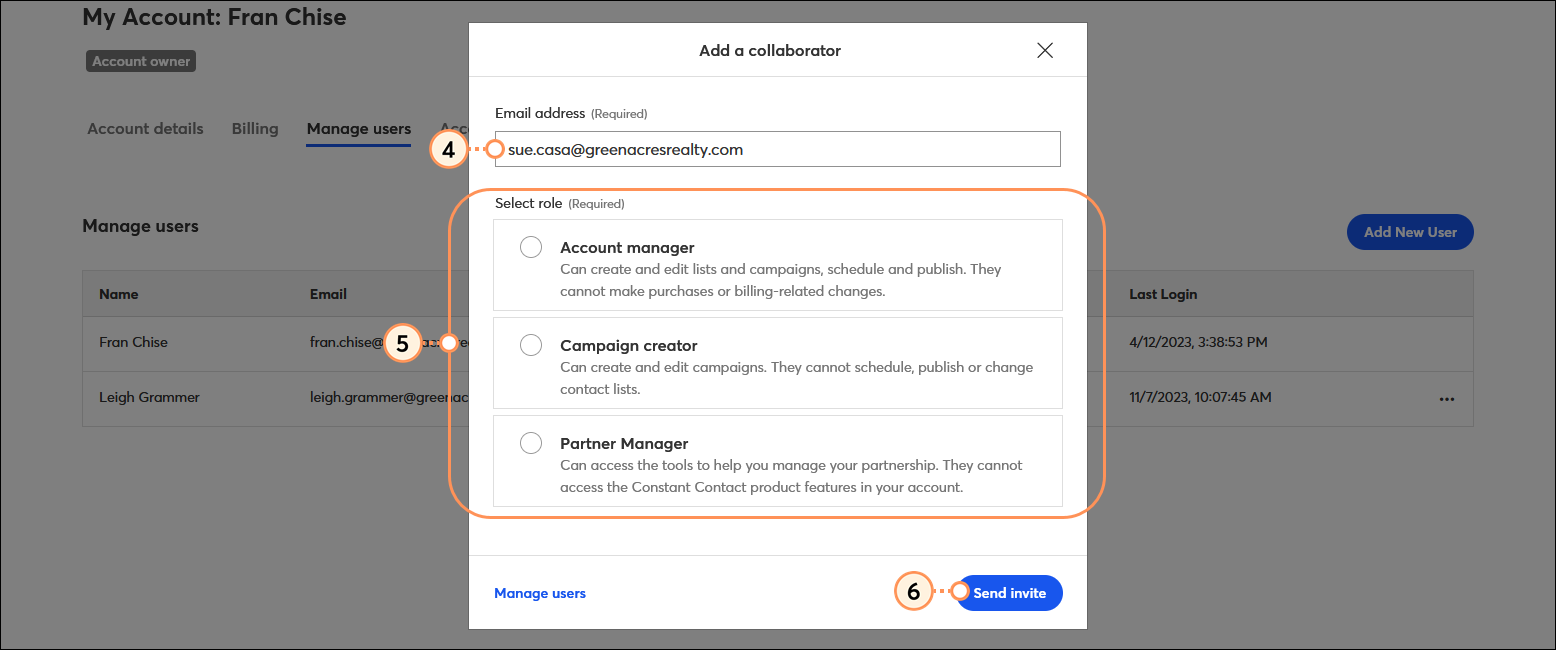
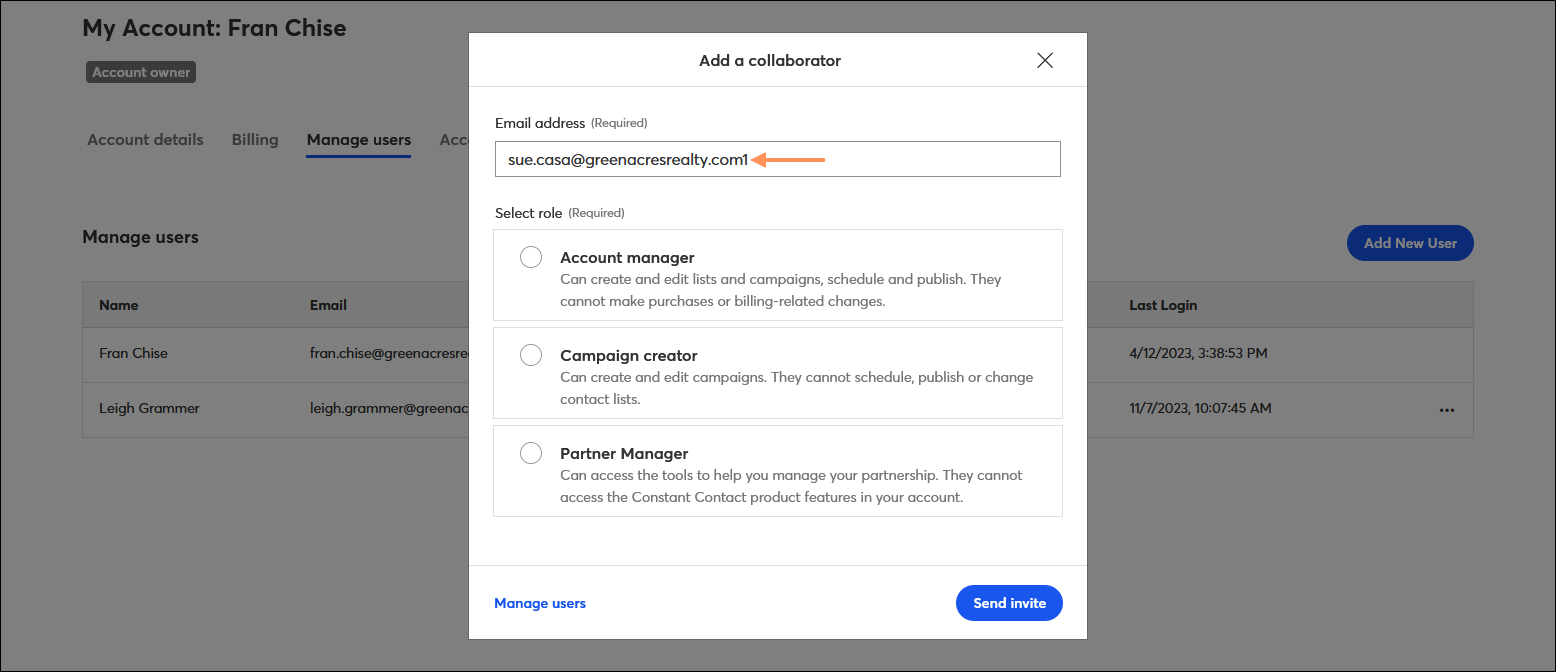
Since every username must be unique, you can add an identifier to their email address to complete the username creation. This can be done by adding a number after the domain at the end of the email address, or you can add a "+1" after the username portion of the email address instead. The numbers are unlimited, so if a 1 was already used, you can move on to 2, etc. The user must remember to sign in with the email address that includes the identifier.
sue.casa@greenacresrealty.com1
sue.casa+1@greenacresrealty.com
When you need to make changes, you have different options depending on what status the user is in:
Copyright © 2026 · All Rights Reserved · Constant Contact · Privacy Center