After you've installed the Constant Contact Forms plugin for WordPress and synced your contact lists, you can create a form for capturing feedback and questions, or for adding new sign-ups to your list, from the visitors that view your website.
Create a new form
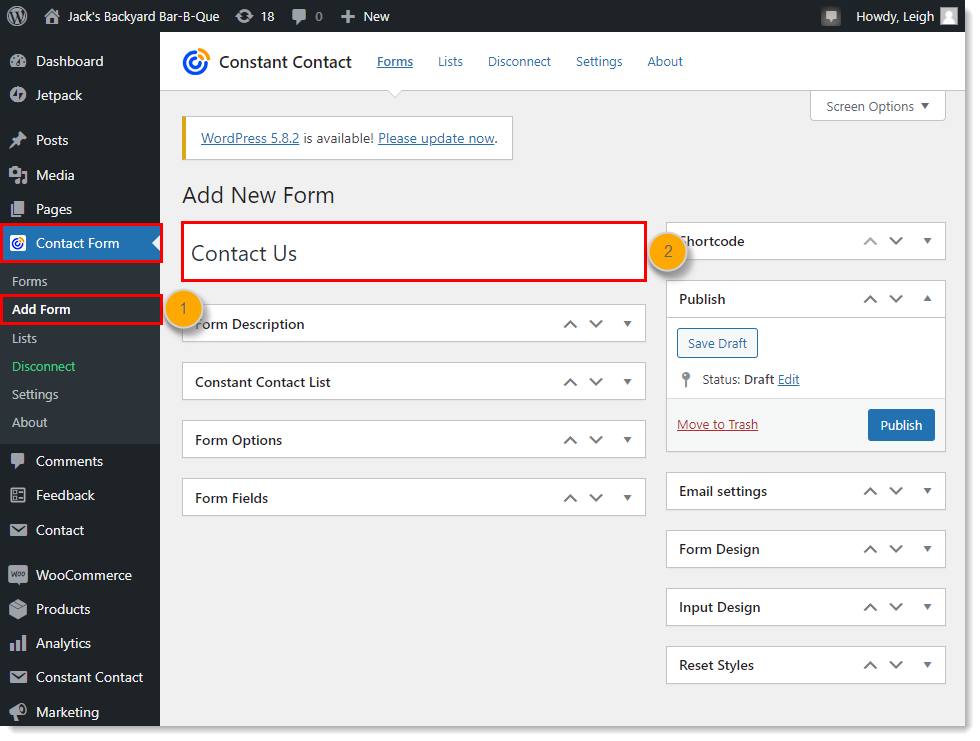
- From your WordPress dashboard, click Contact Form > Add New Form.
- Give your form a name. You can decide if you want the form name to be visible when you add it to a Post or Page.
Enter the form's description
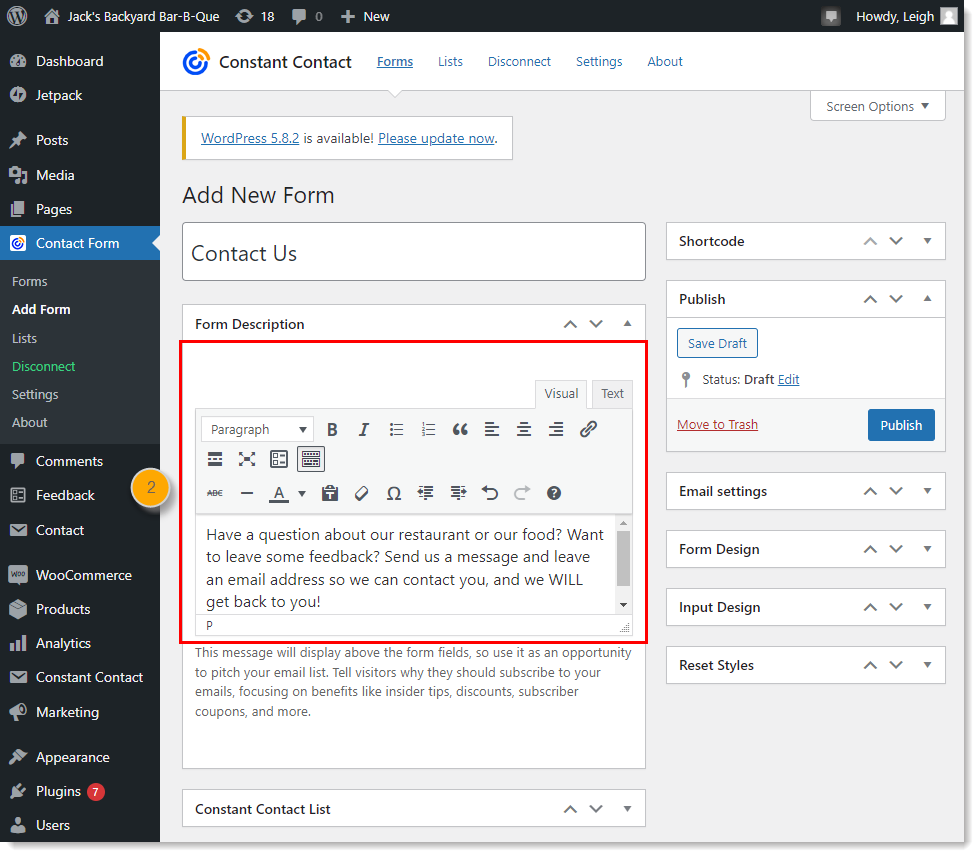
Ask your website visitors for questions or feedback. This is a good place to provide a turn-around time for answers or explain what you do with feedback. If you plan on adding respondents to your mailing list, make it clear here too!
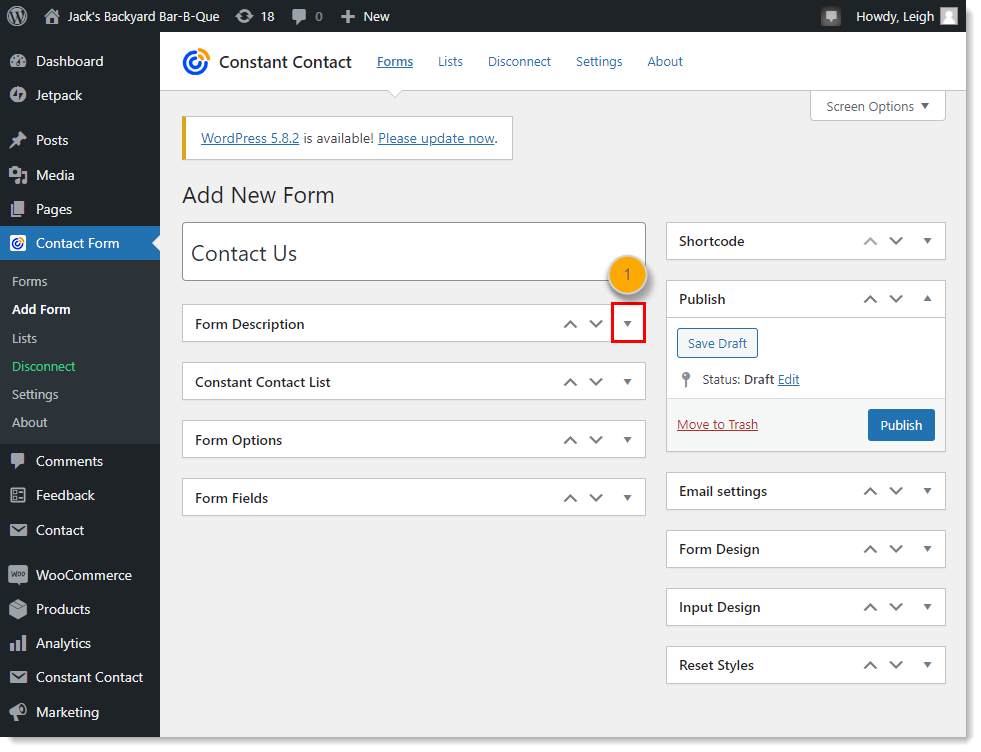
- Expand the Form Description section.
- Enter a description for your form and use the editor to style it.
Select a contact list
If you want to add the people who submit your form to your mailing list, you can select a list from your Constant Contact account to add them to.
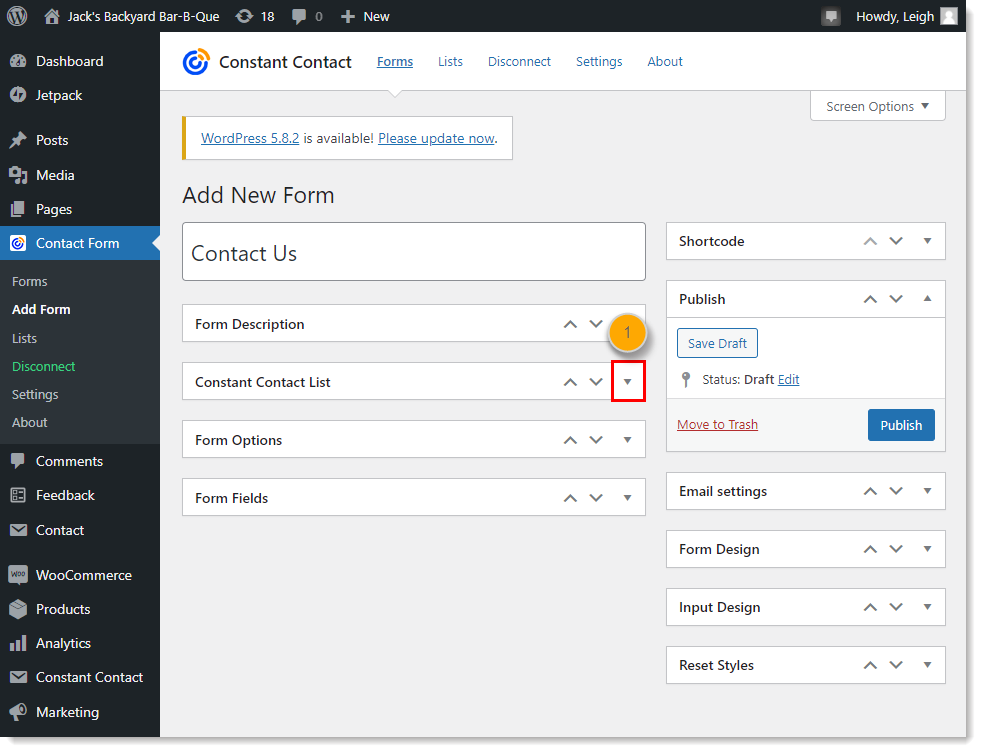
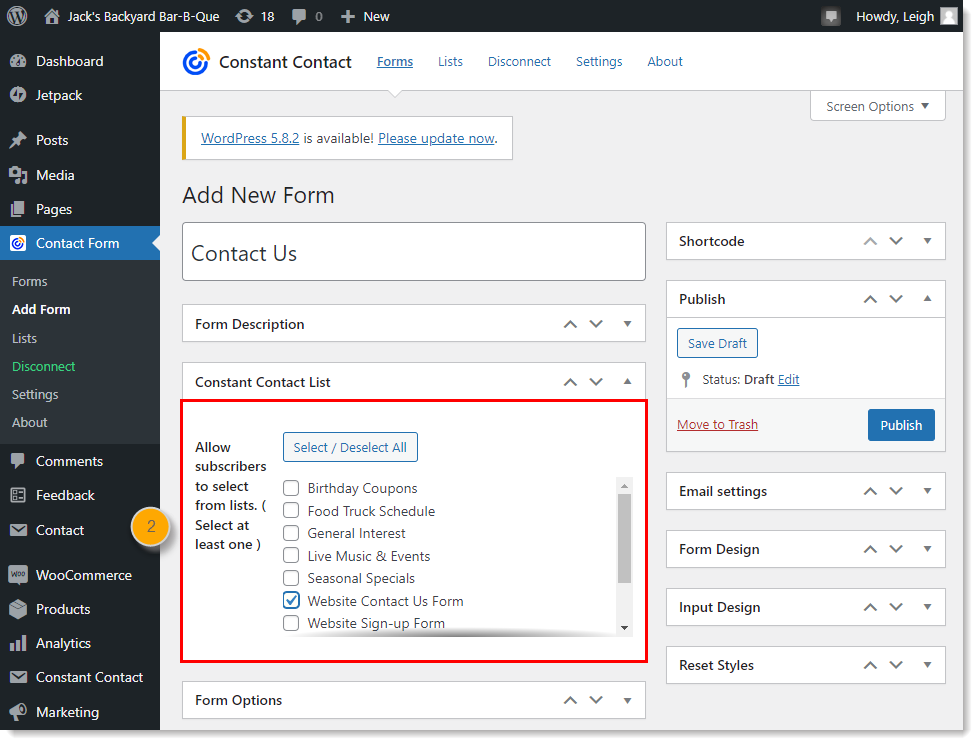
- Expand the Constant Contact List section.
- Select the list or lists you want to add those who submit your Contact Us form to. Selecting more than one lists allows your website visitors to choose which lists they want to be a part of.
 | Design tip: For the best experience for your newest contacts, when their engagement is at its highest, make sure to set up a Welcome Path for the list you select! You can greet your new contacts with a simple welcome email, or create a series of several emails to go out over time. |
Set up the form's options
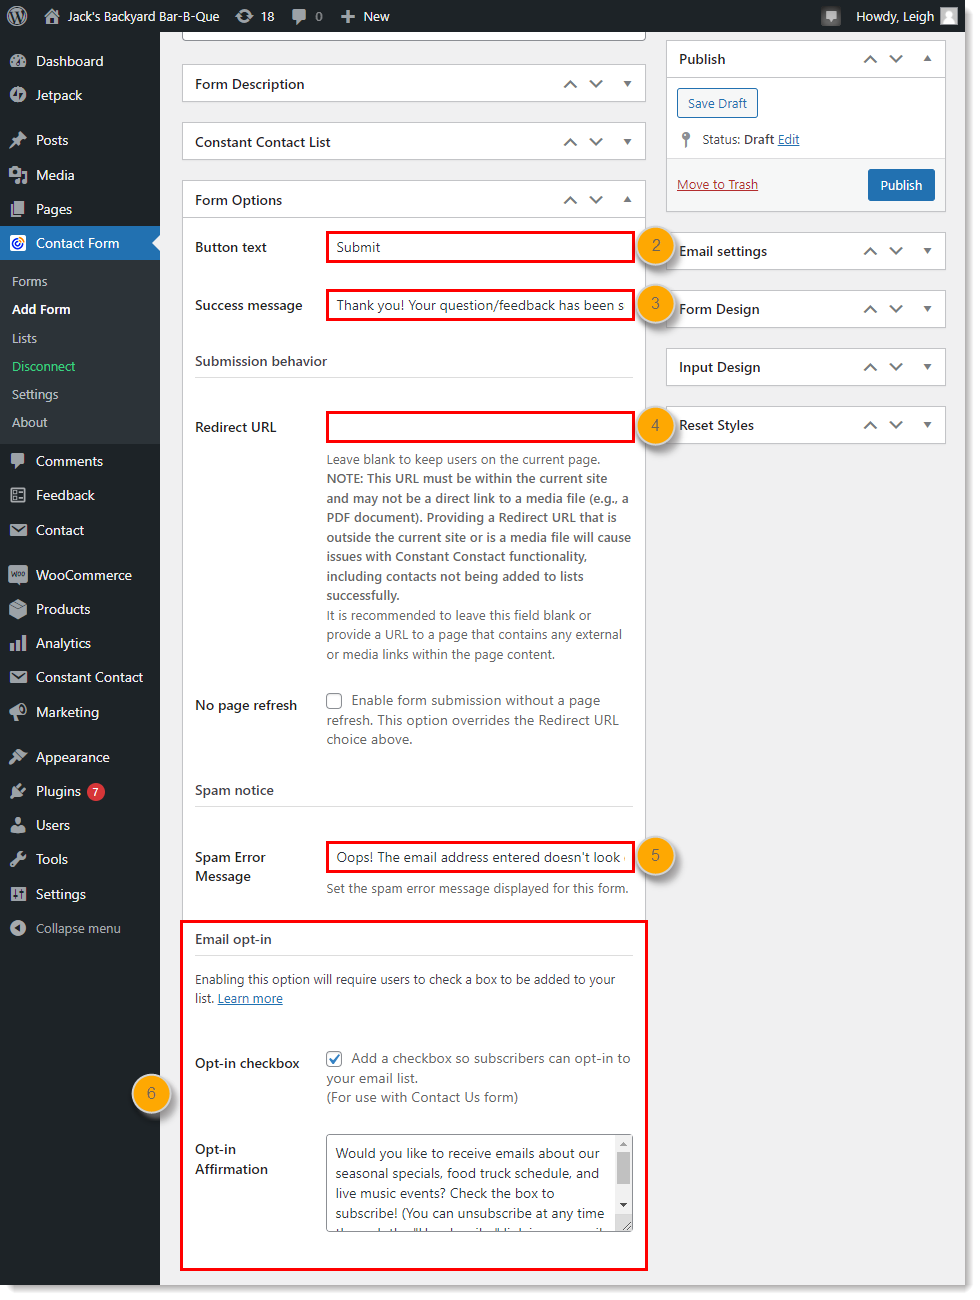
Form options include the button text and success message for submitting your form, a redirect URL, spam error message, and email opt-in.
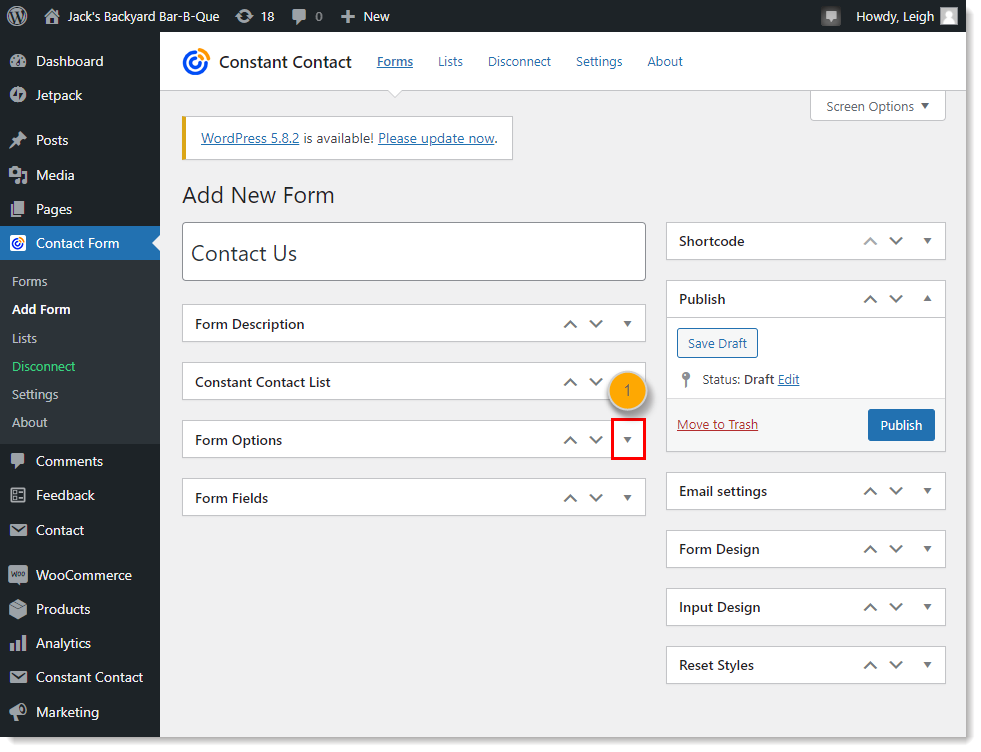
- Expand the Form Options section.
- Customize the button text to submit your form.
- Personalize the message your visitors see when they successfully submit the form.
- If you want to send your new sign-ups to a specific webpage after they've submitted the form, add a URL to the field. Form best results, link to a page within your WordPress site. If you want those who submit comments to go to a webpage outside of your WordPress site.
- Enter a message to display for when the reCaptcha system doesn't approve the email address submitted. This could triggered by a bot sign-up or by a simple typo in the email address.
Example: Oops! The email address entered doesn't look quite right. - Check the box to require your new sign-ups to confirm that they want to join your list. This option only displays if you choose a Constant Contact List. If the box isn't checked when the form is submitted, the submitter isn't added to your contact list, but you can still receive an email with their feedback or question.
Create the form's fields
The form fields are the contact information you want to collect from your sign-ups. An email address is required, but whatever information you collect beyond that is up to you.
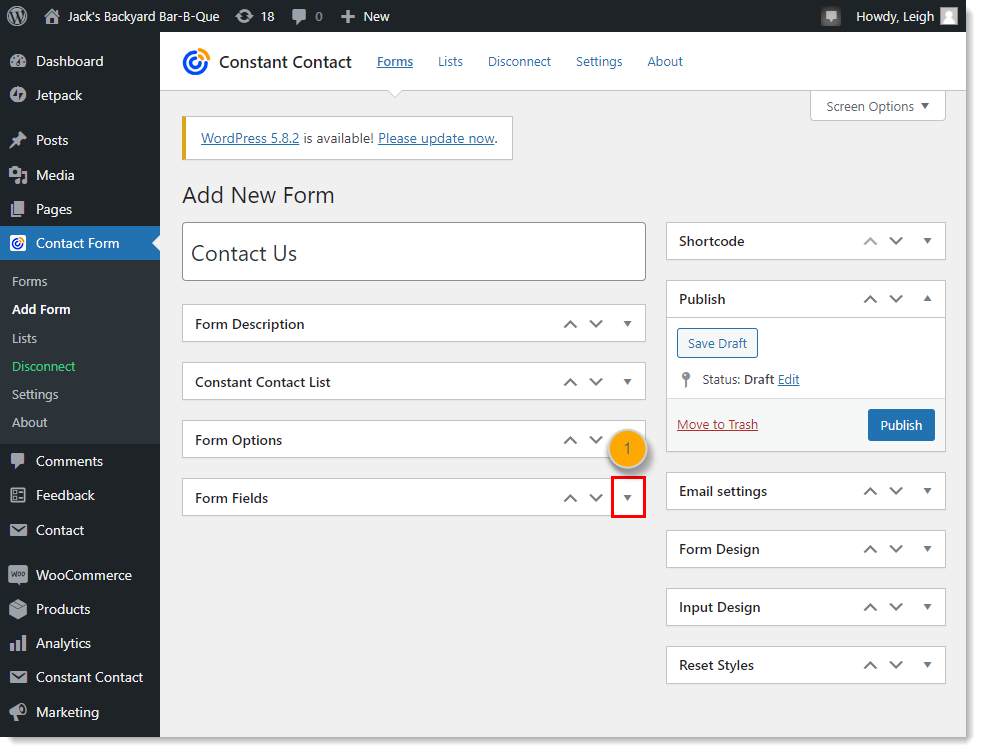
- Expand the Form Fields section.
- Click Add Another Field to create the fields you want to include on your form.
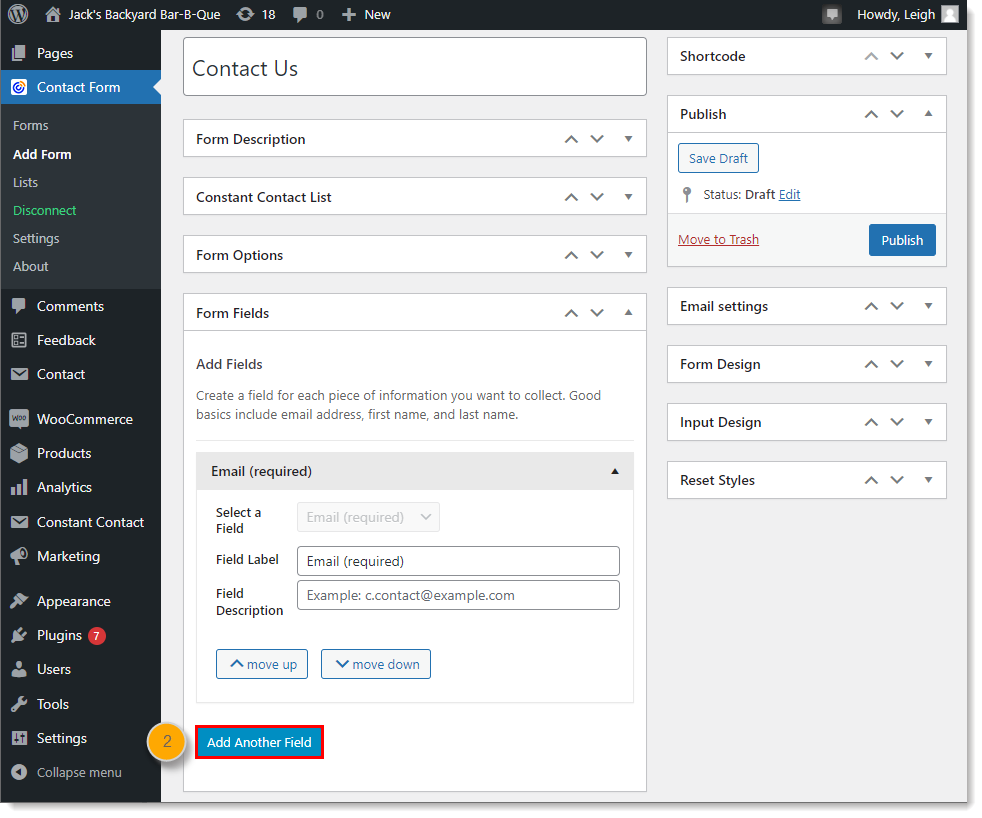
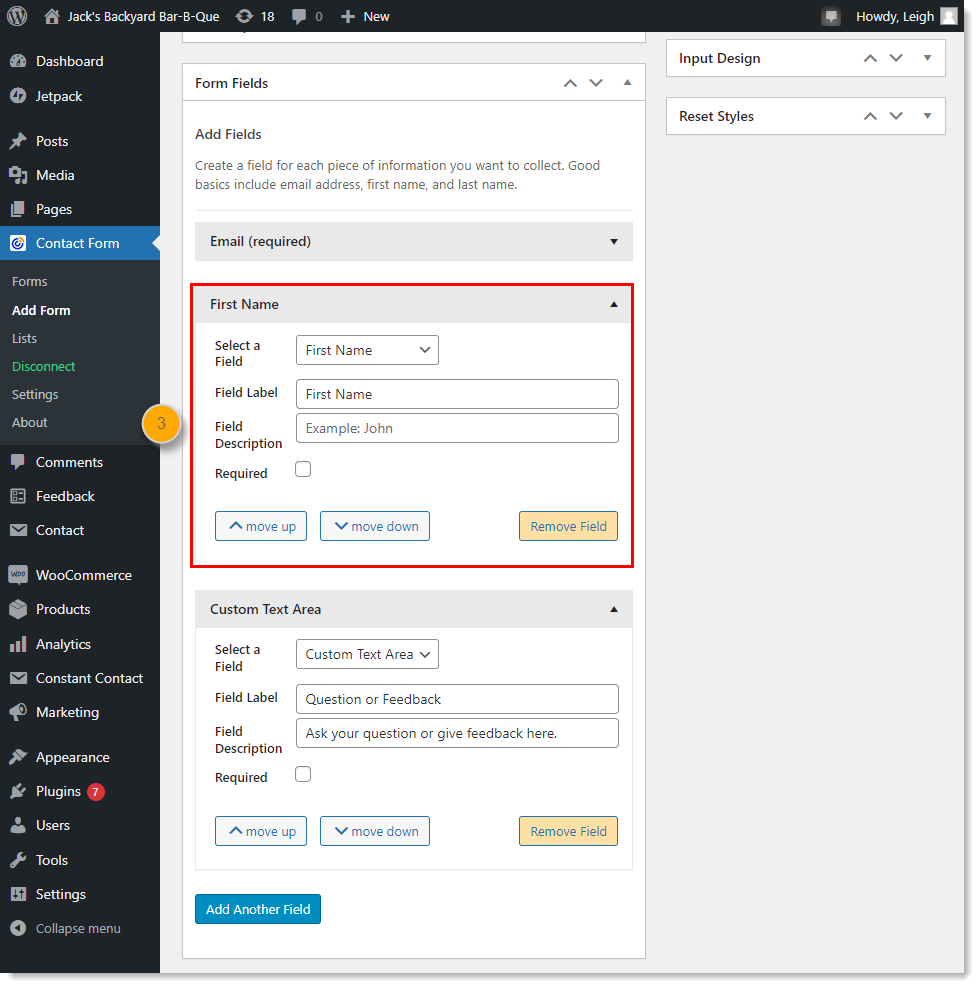
- Each field includes a Field Label that tells your visitors what the field is for, a Field Description that you can use to give an example of the kind of content you want entered into the field, and an option to make the field required. An email address is always included by default and set as a required field. Additional fields include:
- First and Last Name - Maps directly to the First and Last Name contact fields in your Constant Contact account.
- Address - Maps directly to the Address contact fields in your Constant Contact account.
- Job Title and Company - Maps directly to the Job Title and Company fields in your Constant Contact account.
- Website - Because of a limitation with the API the plugin uses, the Website Field doesn't map into your Constant Contact account directly. If you use the Website Field, your WordPress administrator can set up email notifications so that every time your form is submitted you receive an email with the information in the Website Field. You can then manually update your contact record with the information. Alternatively, you can use a Custom Text Field to collect the website information, which creates a Custom Field in your Constant Contact account.
- Custom Text Field - This type of field acts as a Custom Field in your Constant Contact account. The custom fields are labeled as "Custom Field 1," "Custom Field 2," "Custom Field 3," etc.
- Custom Text Area - This type of field doesn't import into Constant Contact. Information from these fields is included in the email sent when you include an email address in the Form settings section.
Select the form's email settings
 | Important: With the help of your WordPress administrator, you can set up your WordPress server to receive an email each time someone submits your form. If you're having issues receiving a general email about sign-ups, check your WordPress email address by clicking Settings > General. Your WordPress admin must set up your WordPress server to use this notification feature; we cannot troubleshoot this functionality on the Constant Contact side. |
You can receive an email notification at an address of your choosing every time someone submits your form.
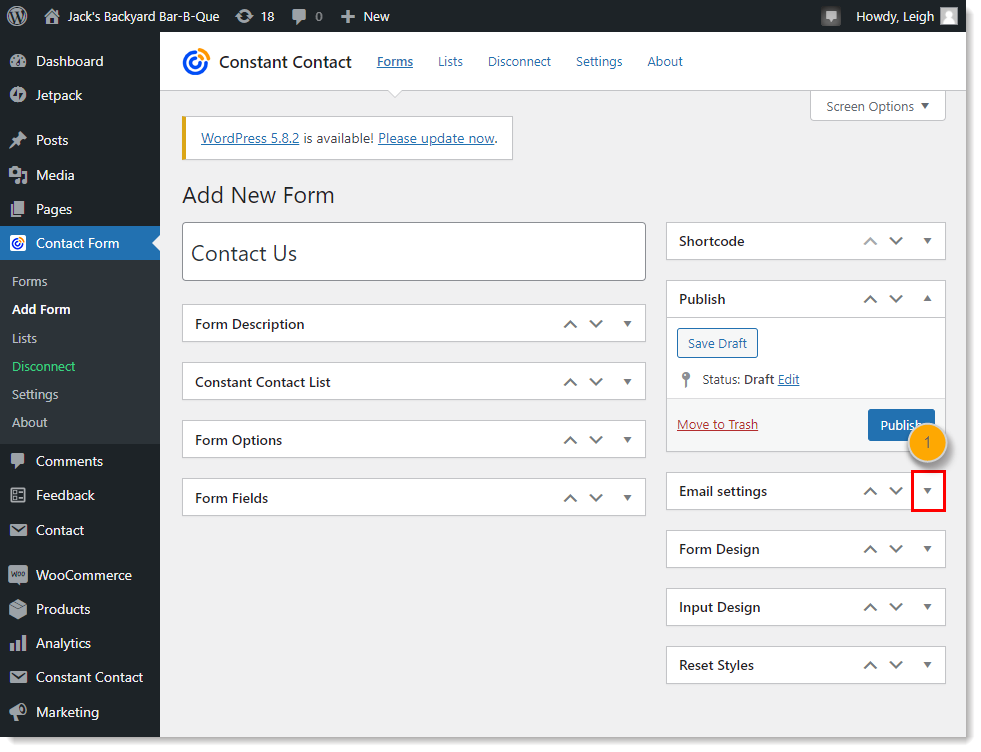
- Expand the Email Settings section.
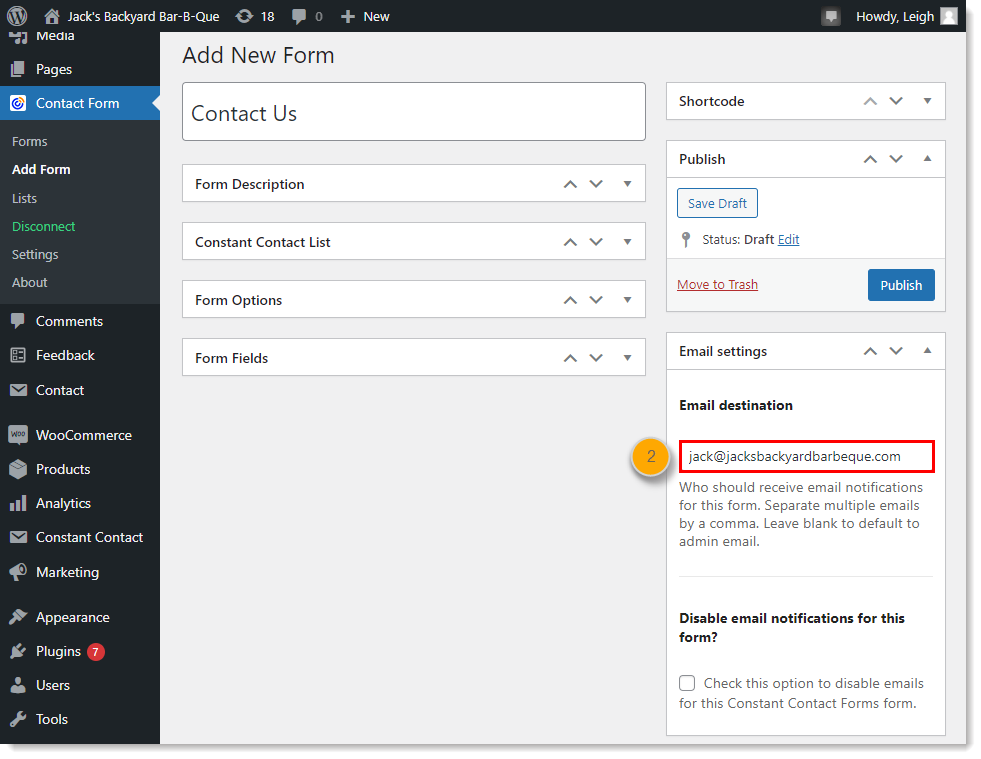
- Enter an email address in the Email destination field. Multiple email addresses must be separated by a comma.
Customize the form's design
The form allows for minimal styling, but inherits as much as it can from the WordPress theme you're using on your website. If you don't like the look of your form, a front-end developer with CSS knowledge can look over your site to determine if there are any style rules that are interfering with the form.
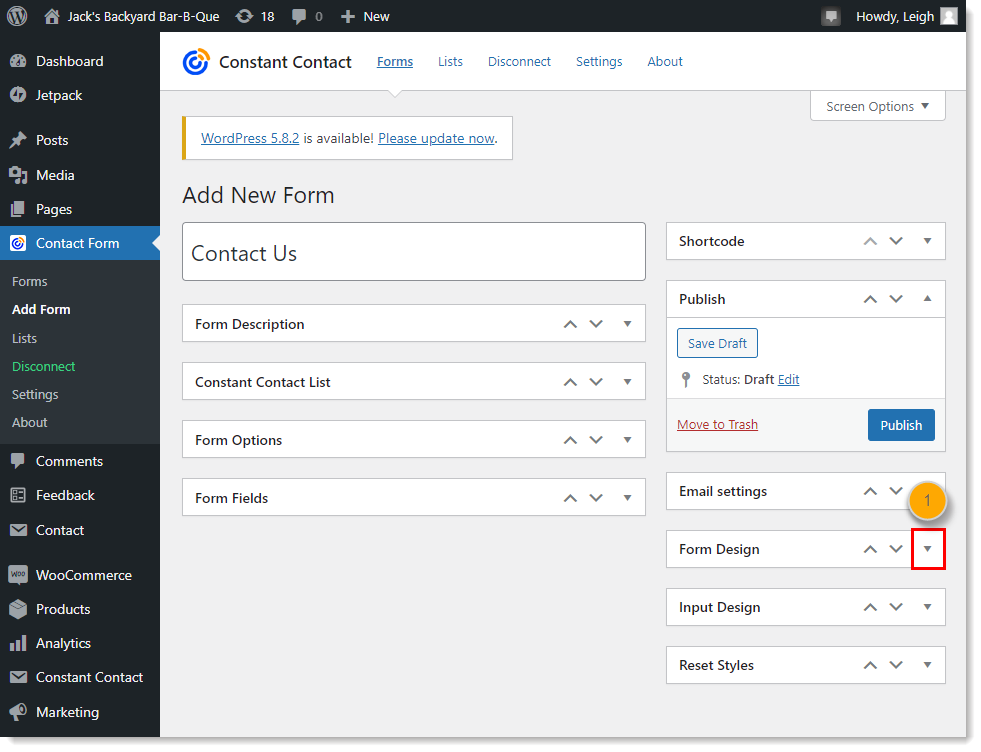
- Expand the Form Design section.
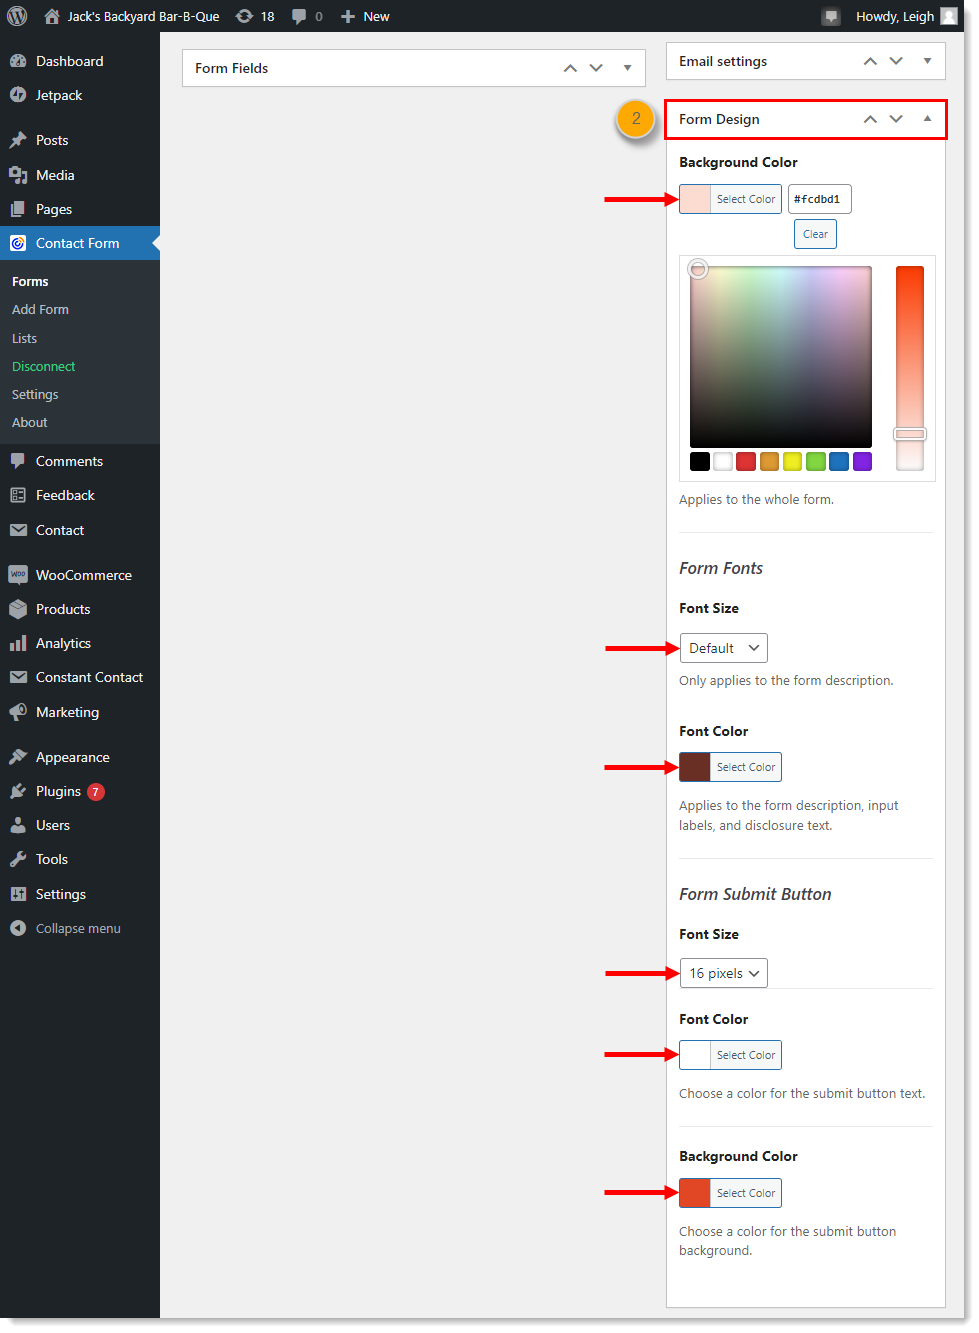
- Choose the background and button colors and font sizes for the form. The font type and "Default" font size are determined by your WordPress theme.
Customize the form's input design
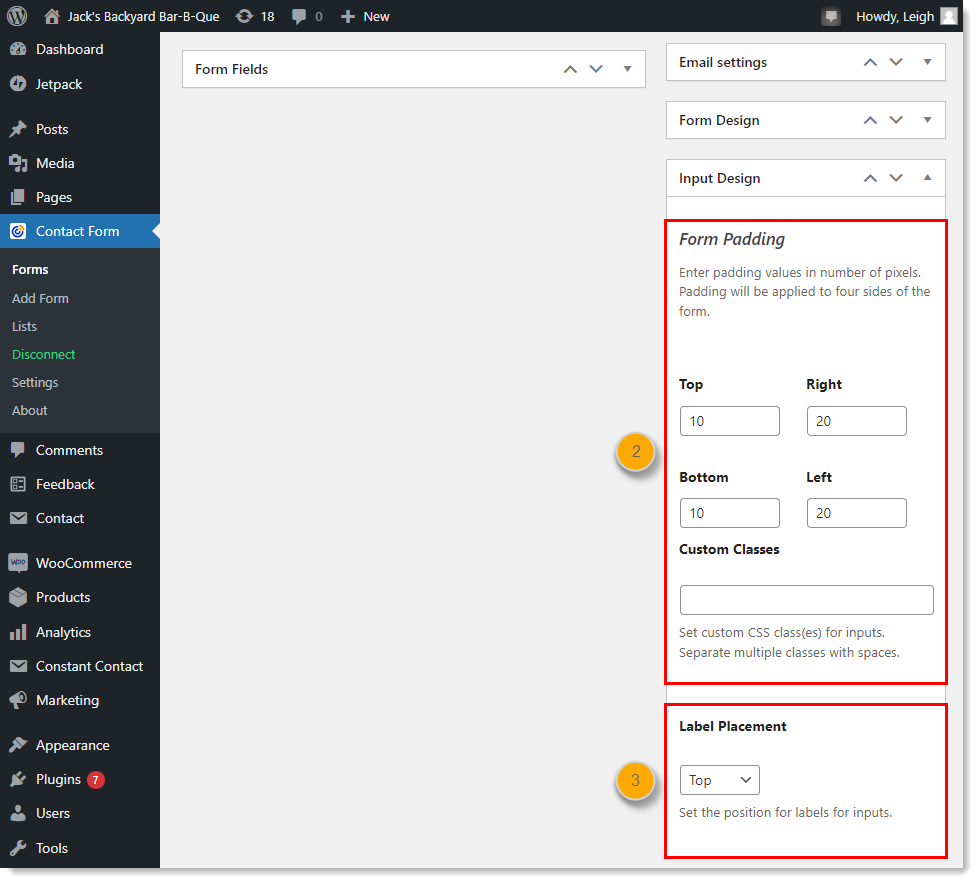
Adjust the form padding, add custom CSS classes for inputs, and adjust label placement for your form.
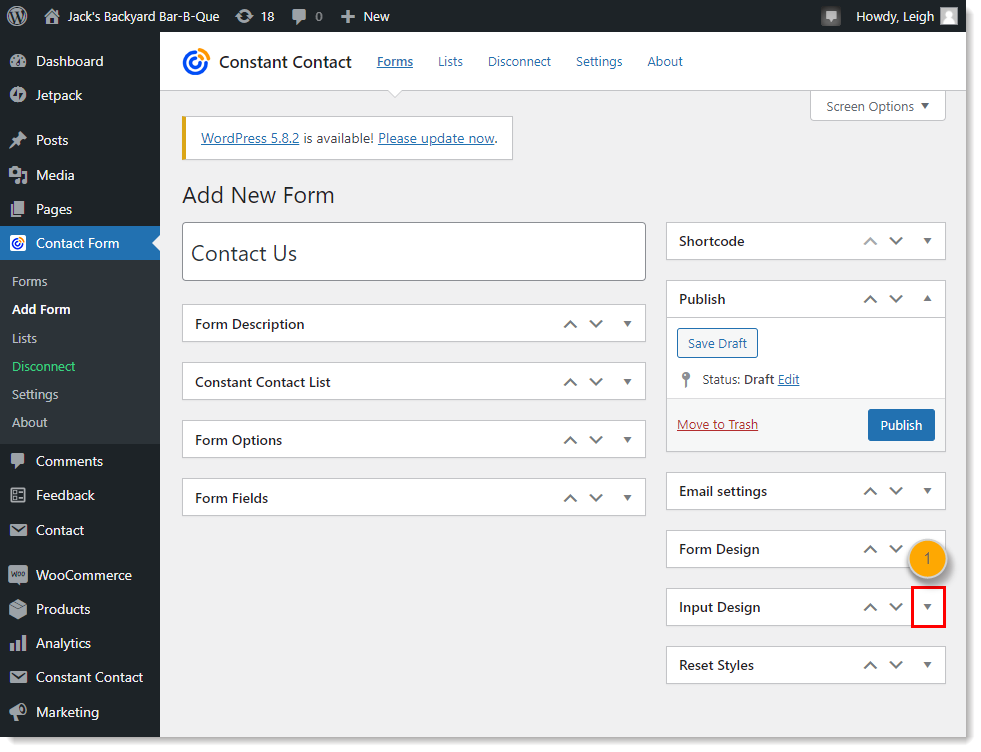
- Expand the Input Design section.
- Define the pixel values so that there is space between the form's edge and the form text and fields. If you have custom CSS classes for inputs, enter them in the field below.
- Choose where your text fields sit in relation to their labels. For example, choose "Top" so that the the name of the field sits on top of the field, or choose "Left" so that the description is to the left of the field.
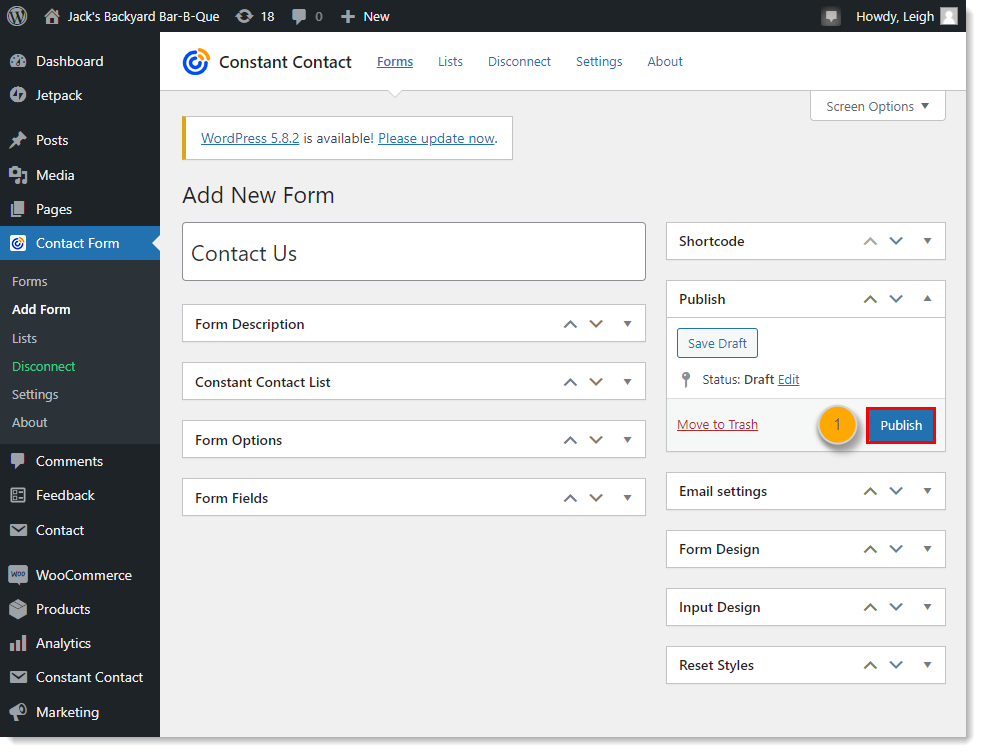
Publish the form
Publishing your form doesn't automatically make it visible to your website visitors, but makes it available for adding to a Page or Post.
- In the Publish section, click Publish.
Now that your form is created, styled, and published, it's time to add it to a webpage or blog post. When you preview the page or post you can see how the colors, font sizes, padding, and label placement appear in a form. Any time you make updates to the style, the form is updated so you don't have to keep republishing your pages or posts.


