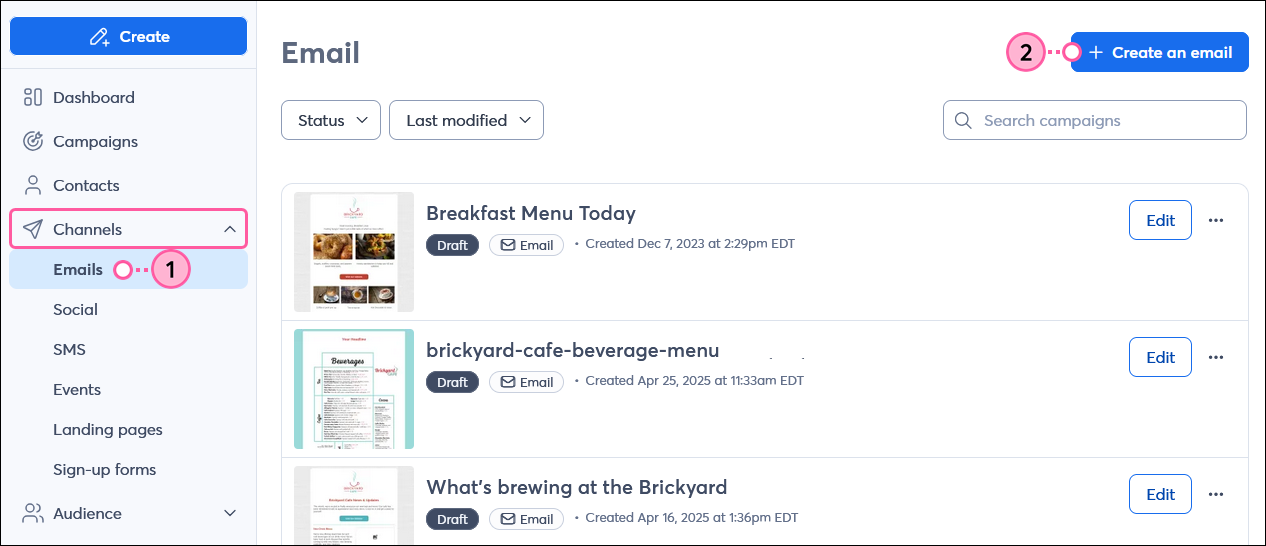
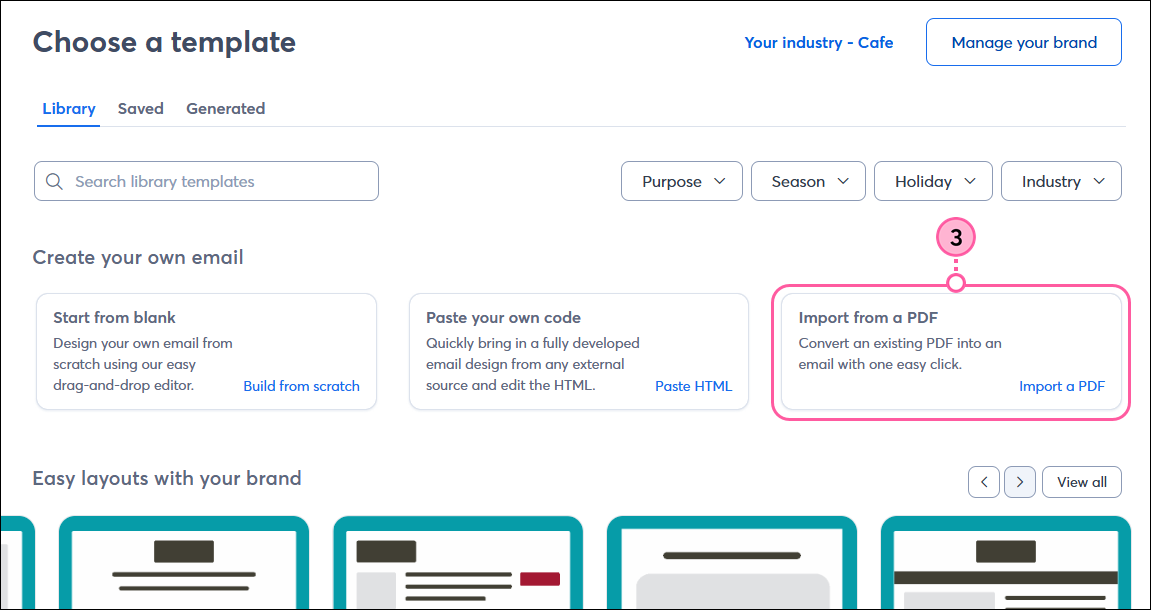
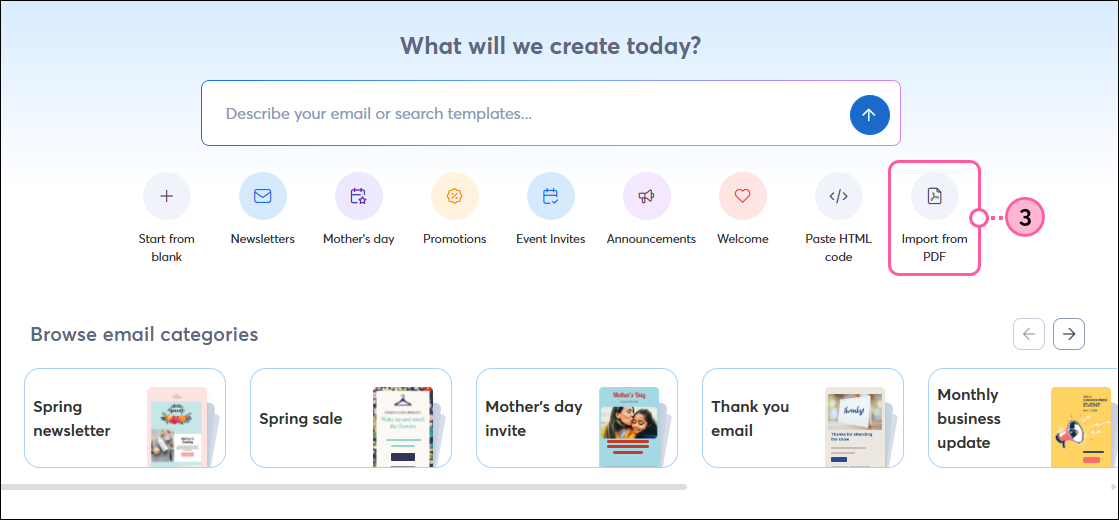
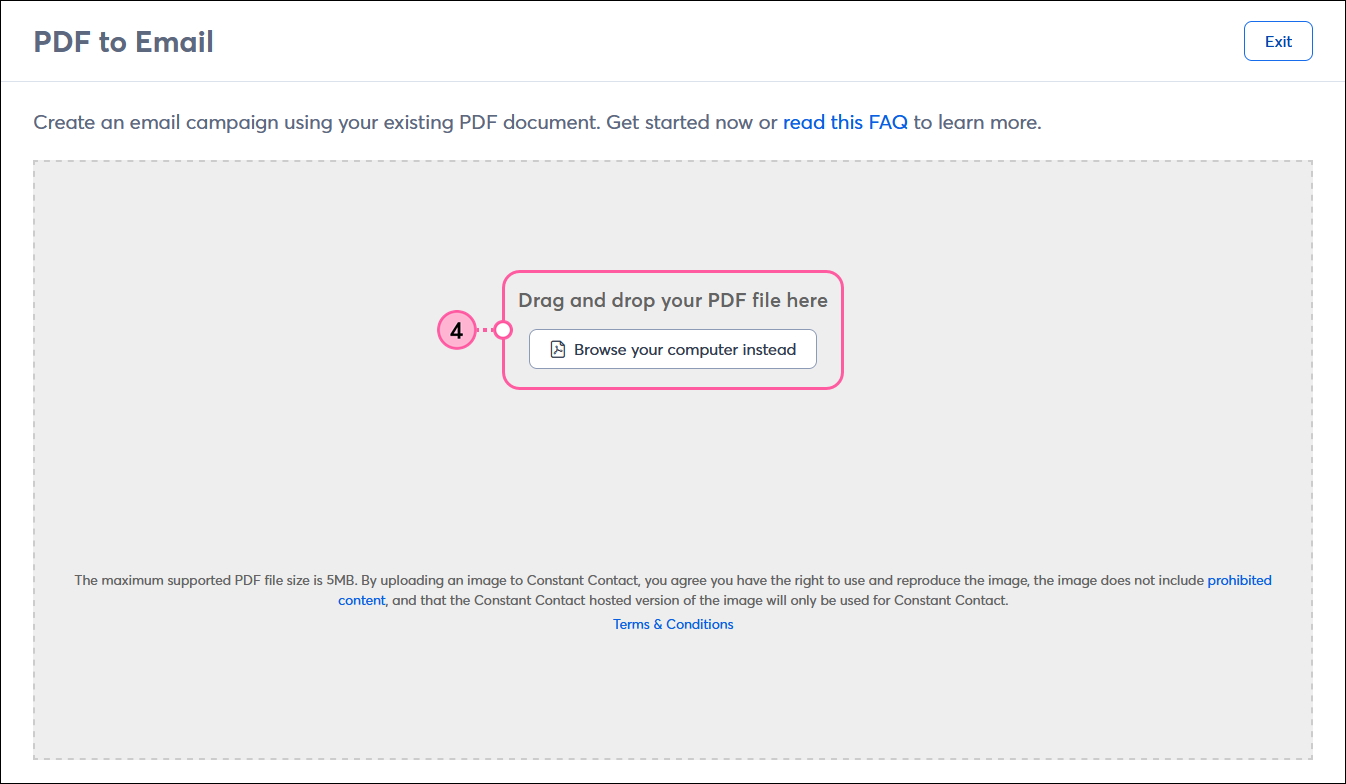
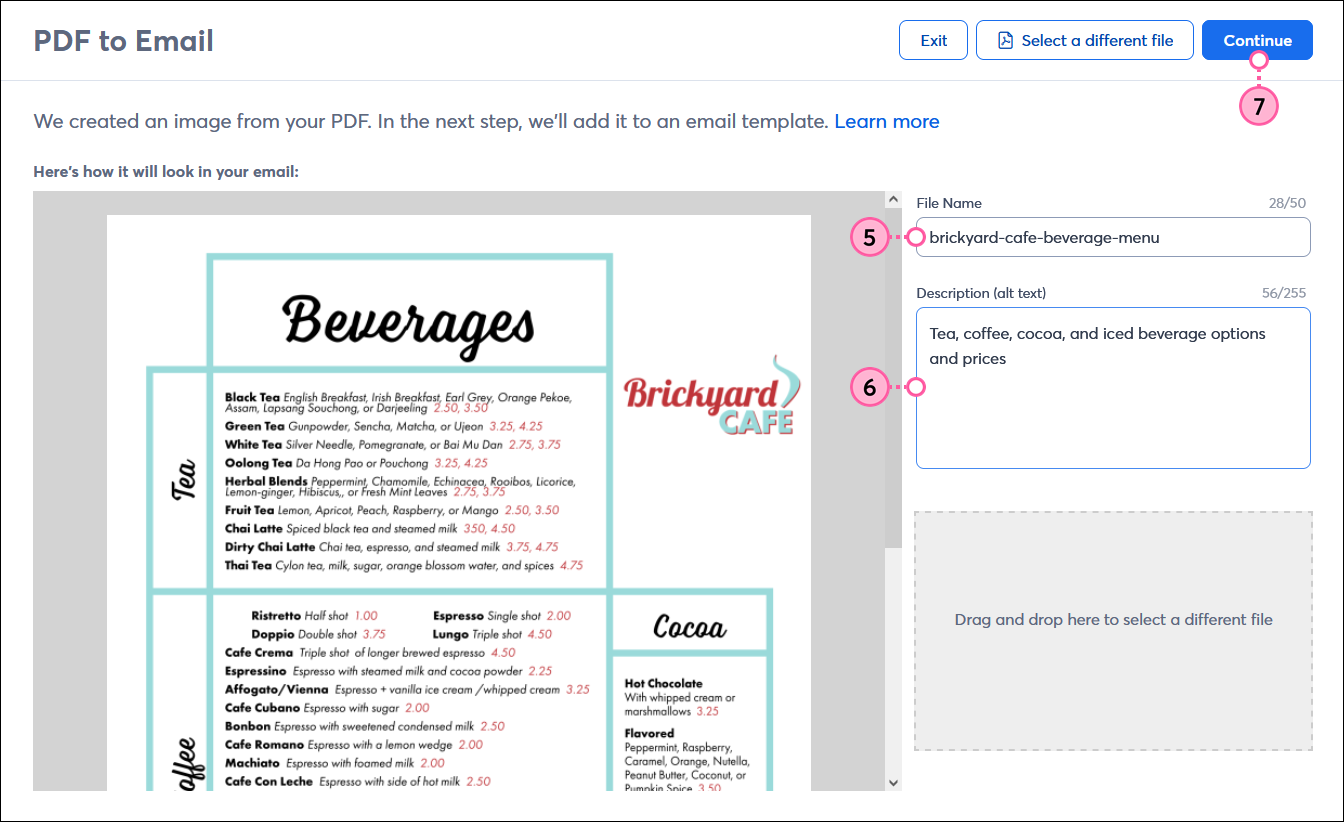
We're making it easier to get around Constant Contact with a brand new left navigation. Not all accounts have that change yet, so if your navigation looks different from our articles, that's why–but everything from the top can now be found on the left!

Email and Digital Marketing
How can we help you?
Search our help articles, video tutorials, and quickstart guides

You've got this. You've got us. Search our Knowledge Base to quickly find answers to your questions.

Convert a PDF into an email

Article: 000006465
Updated: April 28, 2025

Automatically create an email that includes an image of the first page of a PDF and a button that links to the full document

Do you have a PDF that you want to use for an email, but don't want to recreate all the content in an email format? Instead of copying an existing email or choosing a new template, you can import your PDF to create the email!


How it works

When you create an email from an imported PDF, it saves you time and lets you fit a large amount of information into the relatively small space of an email:

  • When you import your PDF, it's automatically uploaded into your Library.
  • An image of the first page of your PDF is added to your email template, and it can be treated just like any other image—you can resize it or turn it into a clickable image. If you want to include more than the first page of the PDF in your email, you can take screenshots of the additional pages in your document to insert as images.
  • The email template automatically includes a button linking to your PDF so your contacts can easily download the full document. You can customize the button to say whatever you want and apply styles, like rounded or squared corners or a border.
  • The template is automatically branded with the main color used in your PDF, but you have full control to customize the colors throughout your email further.
  • The template includes a block of placeholder text to prevent you from sending out an image-only email, and you can add more text blocks and other content as needed to round out your content. 


How to create an email from a PDF

exclamation point icon
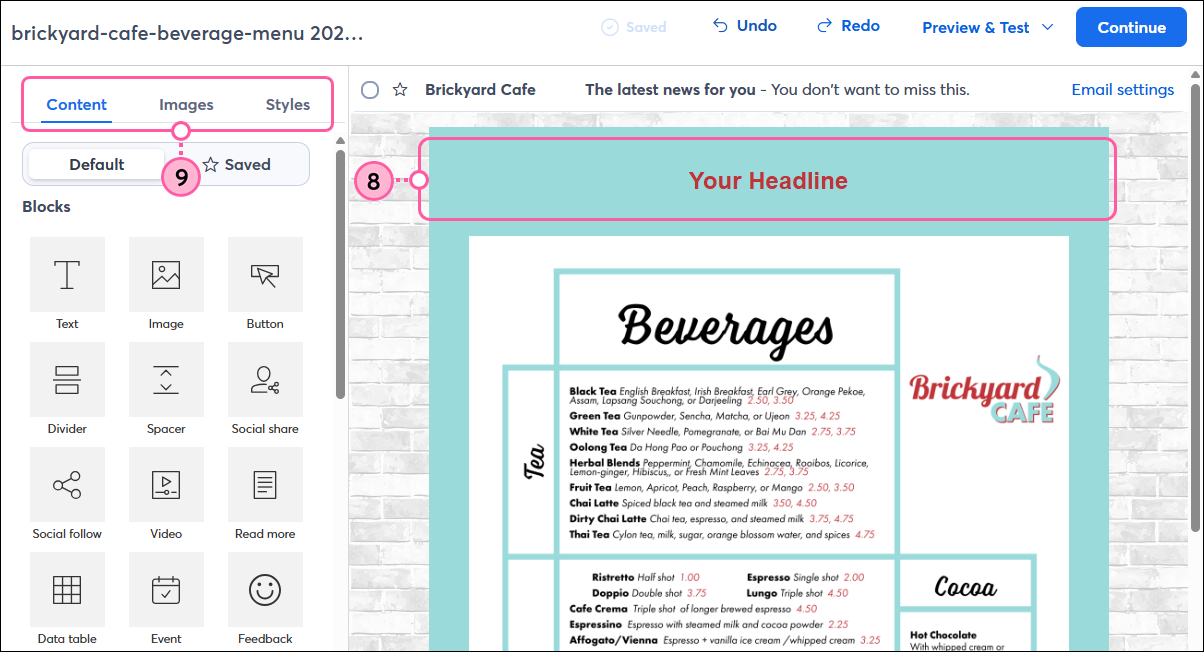
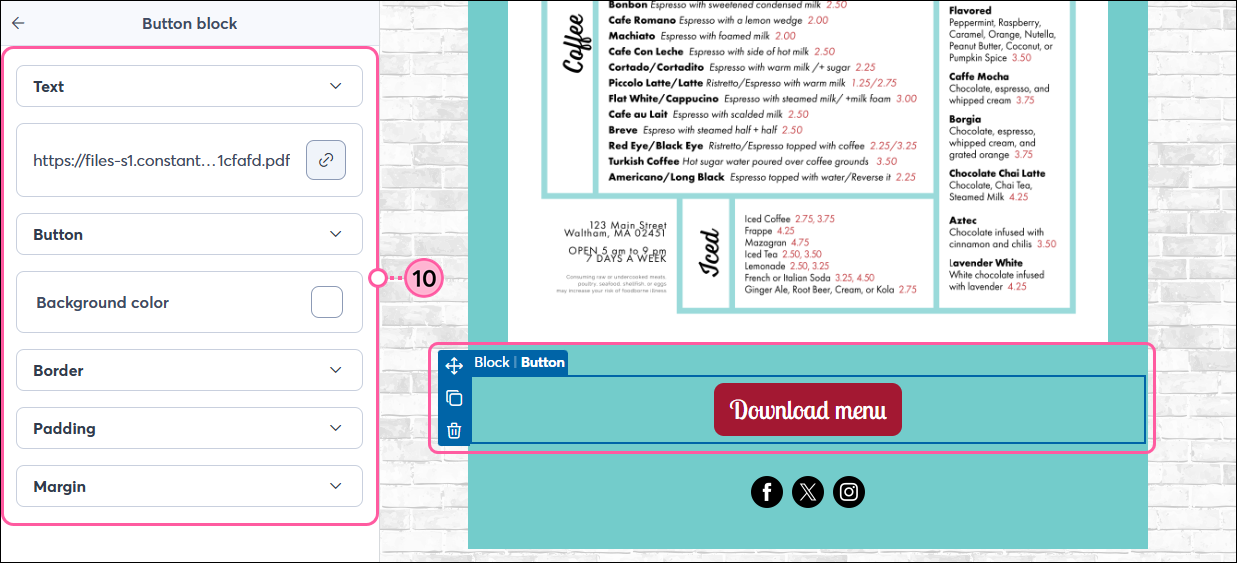
Important: Keep in mind that sending an image-only email increases the likelihood you'll end up in the spam folder, so make sure your email has a good image-to-text ratio by using headlines and text blocks from the Build tab to customize your email content further.


  1. Click Marketing channels > Email.
  2. Click the + Create an email button.

    Marketing channels menu expanded and Email option selected, Email dashboard with + Create an email button in upper-right-hand-corner  
     
  3. Place your cursor over the Convert from PDF option and click Select. If you're using a touchscreen device, you can tap on it.

    Choose a template overlay with All templates tab selcted and Convert from PDF option with Select button
     
  4. Choose the PDF you want to import. You can either drag files into the window or click the link to browse the documents on your computer.

    PDF to Email page with Drag and Drop your PDF file here field and Browse your computer instead button 
     
  5. (Optional) Change the file name of your PDF so you can easily recognize it in your Library later.
  6. Add a brief description to display when images are disabled in a contact's email program, or if an email client doesn't allow images.
  7. Click the Continue button.

    PDF to Email page with PDF Name field, Description field, and Continue button
     
  8. The template includes a Headline block to improve the image-to-text ratio and help prevent an image-only email from landing in the spam folder. Remember to edit the placeholder text. You can also add additional Text blocks as needed.
  9. The template pulls in colors from your PDF, but you can change the branding and content. Use the BuildImages, and Design tabs to customize your email further.
  1. Click on the button beneath the PDF to customize it. The editor on the left-hand side lets you change the color, border styles, and padding. The toolbar at the top of the editor lets you select a font and change the size and color.
  2. Click on the name of the email to change it to something you can easily recognize later. Your contacts never see this name.
  3. Click on the email header to customize your subject line, preheader, and "from name," and select your "from" email address and "reply-to" email address.
  4. When you're ready to schedule and send your email to your contacts, click the Continue button.

    Email editor with Button menu expanded, email name field, email header, and Continue Button


lightbulb icon
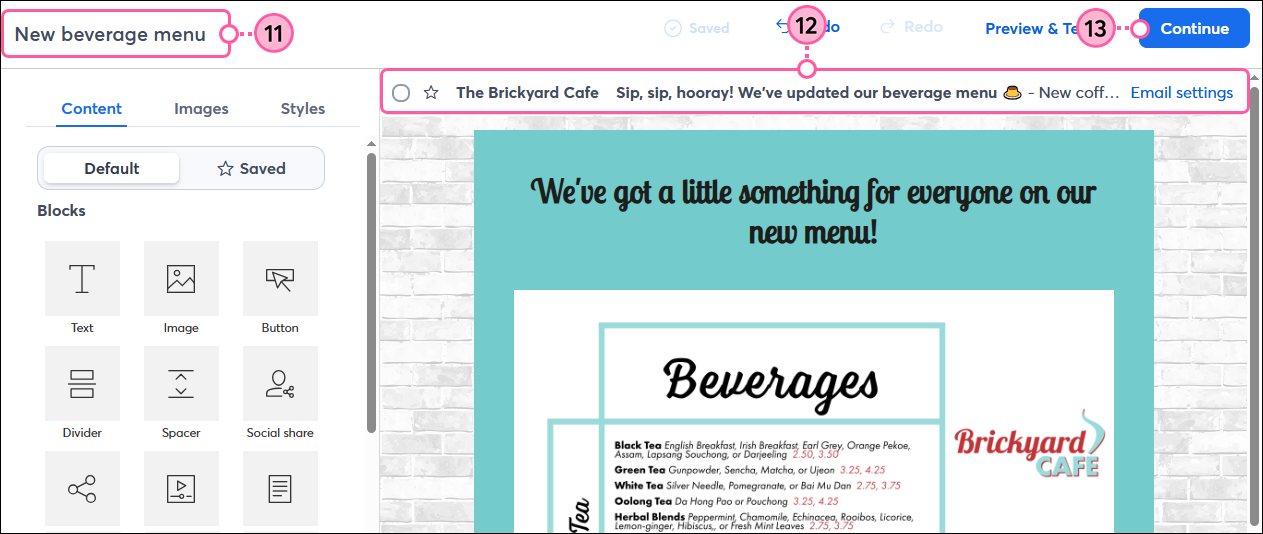
Did you know? It's always a good idea to check for errorspreview, and test your email before sending it to your contacts. Having an extra set of eyes will help you catch typos or find layout or design problems you don't know are there until you see the email in your inbox.


Questions?

Ask the Community

Did this article answer your question?


Constant Contact Logo

Copyright © 2025 · All Rights Reserved · Constant Contact · Privacy Center