We're making it easier to get around Constant Contact with a brand new left navigation. Not all accounts have that change yet, so if your navigation looks different from our articles, that's why–but everything from the top can now be found on the left!

Email and Digital Marketing
How can we help you?
Search our help articles, video tutorials, and quickstart guides

You've got this. You've got us. Search our Knowledge Base to quickly find answers to your questions.

Send a Reconfirm Opt-in email to existing contacts

Article: 000005535
Updated: February 20, 2025

Clean up an old contact list by asking contacts to reconfirm their interest in receiving your emails

Exclamation Point IconImportant: Looking to stay compliant with CASL or GDPR? We have specific email templates designed to obtain and document express permission from your existing contacts that you can use instead of a Reconfirm Opt-in email.


Growing a permission-based contact list is one of the most important ways to boost your marketing efforts. Eventually, your contact list is going to become outdated because your contacts' interests can change over time. Sending a Reconfirm Opt-in email to your existing contacts ensures that you're sending to contacts who really want to hear from you.


How the Reconfirm Opt-in email works

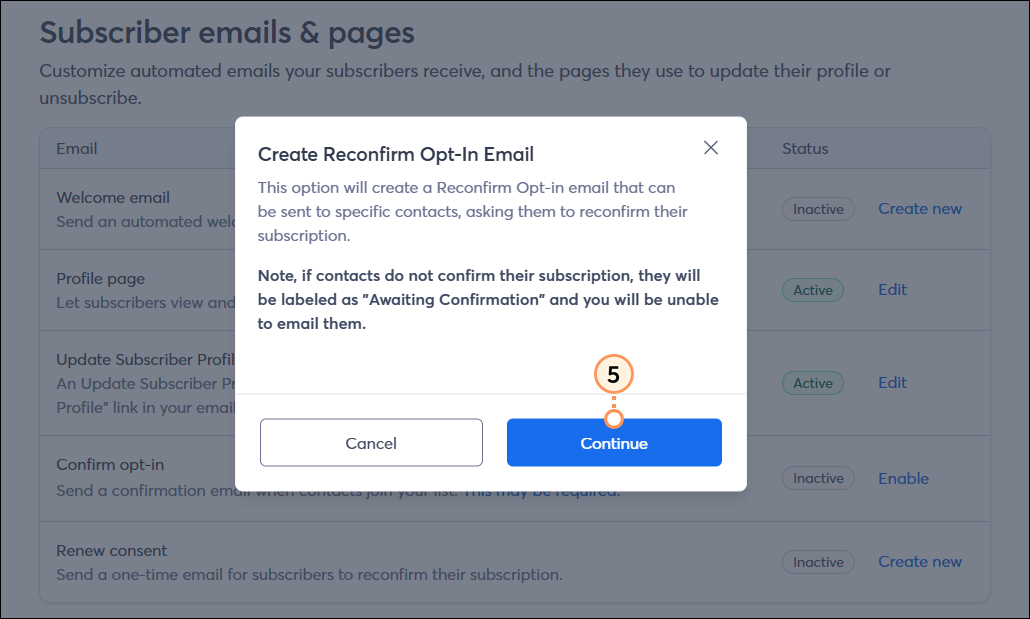
Contacts who are sent a Reconfirm Opt-in email need to click the confirmation link in the email to continue receiving emails from you. If they don't click the link, they'll be marked as "Awaiting Confirmation" in your account. You're prevented from sending email to these contacts, and they're not counted toward your billing until they click the link in the opt-in email. If it's been a little while since you sent your confirmed opt-in request and you're not seeing responses from these contacts, they're good candidates to remove from your list. They can always re-join your contact list in the future through one of our list growth tools.

Once an email address has been confirmed, it can't be edited. If a confirmed contact later changes their email address, you have to add them as a new contact because their confirmed email address isn't editable.

Light Bulb Icon
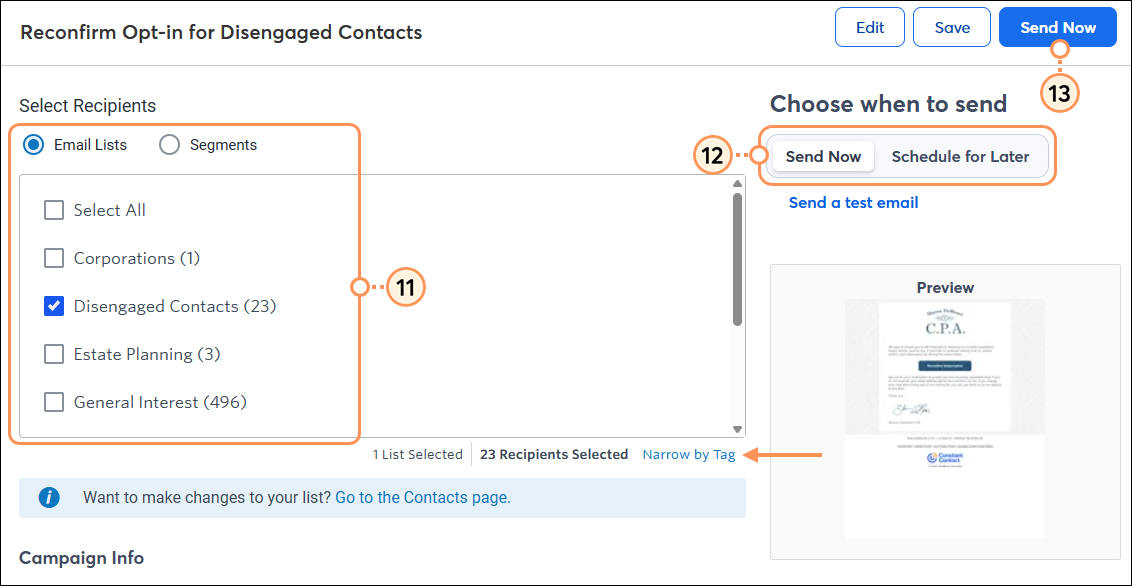
Did you know? You don't need to send a Reconfirm Opt-in email to all of your contacts! You have the option of identifying your disengaged contacts and only sending to them.


How to send the Reconfirm Opt-in email

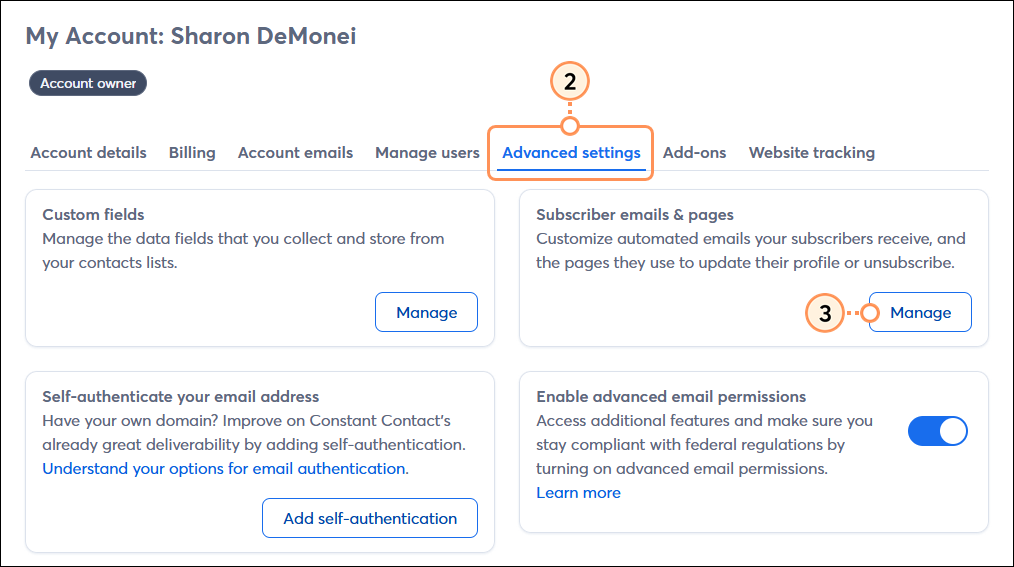
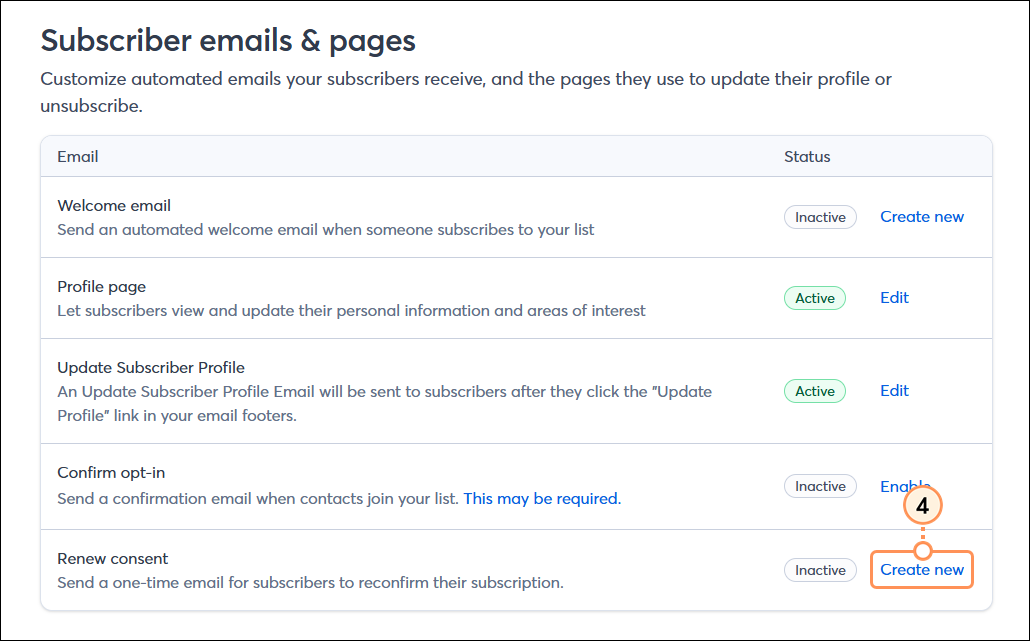
The content of the Reconfirm Opt-in email is standard, but you have a chance to edit the email to add your logo and match the tone and colors to your branding. To create and send a Reconfirm Opt-in email:

  1. Click the profile icon in the lower-left and select Account settings.
  2. Click the Advanced settings tab.
  3. In the Manage contact emails section, click Manage.

    Profile name drop-down, Account Settings option, Advanced Settings tab, Manage Contact Emails section, and Manage button
     
  4. Click Create new next to Reconfirm Opt-In to List.

    Reconfirm Opt-in section and Create new button
     
  5. Click Yes, Continue on the confirmation message.

    Create Reconfirm Opt-In Email confirmation message and Yes, Continue button
     
  6. Click to give your Reconfirm Opt-in email a name you’ll easily recognize in your account. Your contacts don’t see this name, they instead see your subject line.
  7. Click “Email settings” to edit the subject line, preheader, From name, From email address, and reply-to email address.
  8. Add your logo.
  9. (Optional) Customize the content and colors to match your branding.
  10. Once you’re finished customizing the email, click Continue.

    Campaign Name, Email Settings, logo, content, and Continue button
     
  11. Select the email lists or segment you want to send to. If you've segmented your contact lists with tags, click Narrow by Tag to either exclusively send to tagged contacts or exclude contacts with specific tags.
  12. Choose when you want to send the email:
  • Send Now - To immediately begin sending your email. Your email will typically send within a few minutes depending on your list size. To prevent any accidental sends, you'll be prompted to confirm your selection.
  • Schedule for Later - To select a future date and time to send your email.
  1. Click Send Now or Schedule.

    Send Options and Save Button


Line Graph IconGrow your list: Removing disengaged contacts is a good practice that helps boost your open rate, but if you're worried about the size of your list, we've got tons of tools to help you grow your list and keep your contacts engaged.


Questions?

Ask the Community

Did this article answer your question?


Constant Contact Logo

Copyright © 2025 · All Rights Reserved · Constant Contact · Privacy Center