After you've created an email and sent it to your contacts, you can extend your reach by also sharing it on social media. It's a great way to reach people who aren't contacts yet! When you share an email, the post includes the permanent URL for your email by default, and you can customize the text and image that's shared, too.
 | Save time: Before you create your post, take a minute to connect your Facebook, Instagram, LinkedIn, or TikTok profiles to your Constant Contact account so that you don't have to do it in the middle of creating your post. |
Understand how it works
When you share an email on social media, you're sharing the permanent URL for your email to your own social profiles as if you were pasting a link into a post created within your own social media accounts.
- You select the email you want to share - Any sent or scheduled email can be shared through a social post. Email drafts don't generate a permanent URL and can't be shared.
- You choose the platforms to share on - A single social post lets you select different social media platforms, and select from different profiles on a single platform as well. You just need to make sure that each compatible platform you want to share to is connected to your Constant Contact account.
- You select an image - Since the post includes a link preview, you can only have one image per post when sharing your email on Facebook or LinkedIn. Image ratios of 1:91:1 and 4:5 are the most compatible with the link preview across all social networks. Posts to Instagram and TikTok allow for additional images or a video because they don't allow clickable links.
- You customize the post content - The text you include within your post is up to you! Posts to Facebook and Instagram automatically include the permanent URL for your email and generate a link preview. The link preview pulls in an image from your email that can be replaced with an image from your Library. Posts to Instagram and TikTok are blank slates because they don't allow clickable links. You can add the URL for your email, but it appears as regular text that your Instagram and TikTok followers have to copy and paste into a browser for viewing.
- Your email is shared once - A social post isn't recurring, and your post is scheduled to publish once. You can share your email multiple times, and even schedule a post in advance, but you have to perform the action to create and share each post.
 | Did you know? Instagram and TikTok don't allow clickable URLs within their post content, but you can point people to the link in your bio! Our "link in bio" landing page lets you list a number of different URLs, and you can even include the permanent URL for your email. Once you link the landing page in your bio, it can be updated within your Constant Contact account to replace the link to the most current email you want to share. |
Share an email through a social post
- Click Channels > Emails.
- To help narrow your search:
- Select "Sent" or "Scheduled" from the Status drop-down menu.
- Select an option from the Last modified drop-down menu.
- Next to your sent or scheduled email, click the three dots to open the menu and select the "Share" option.
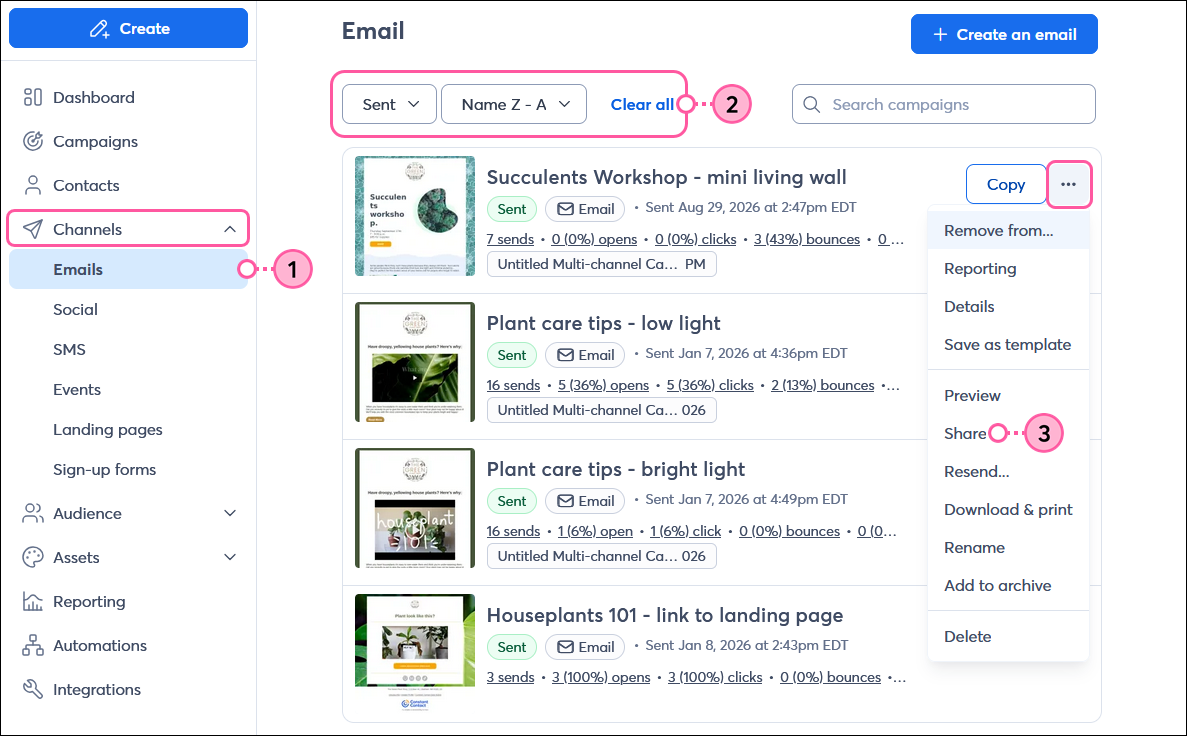
- From the Share... overlay, click the Post on social option.
Note: If you want to start with a summary of your email, click Summarize with AI and then skip down to the steps below.

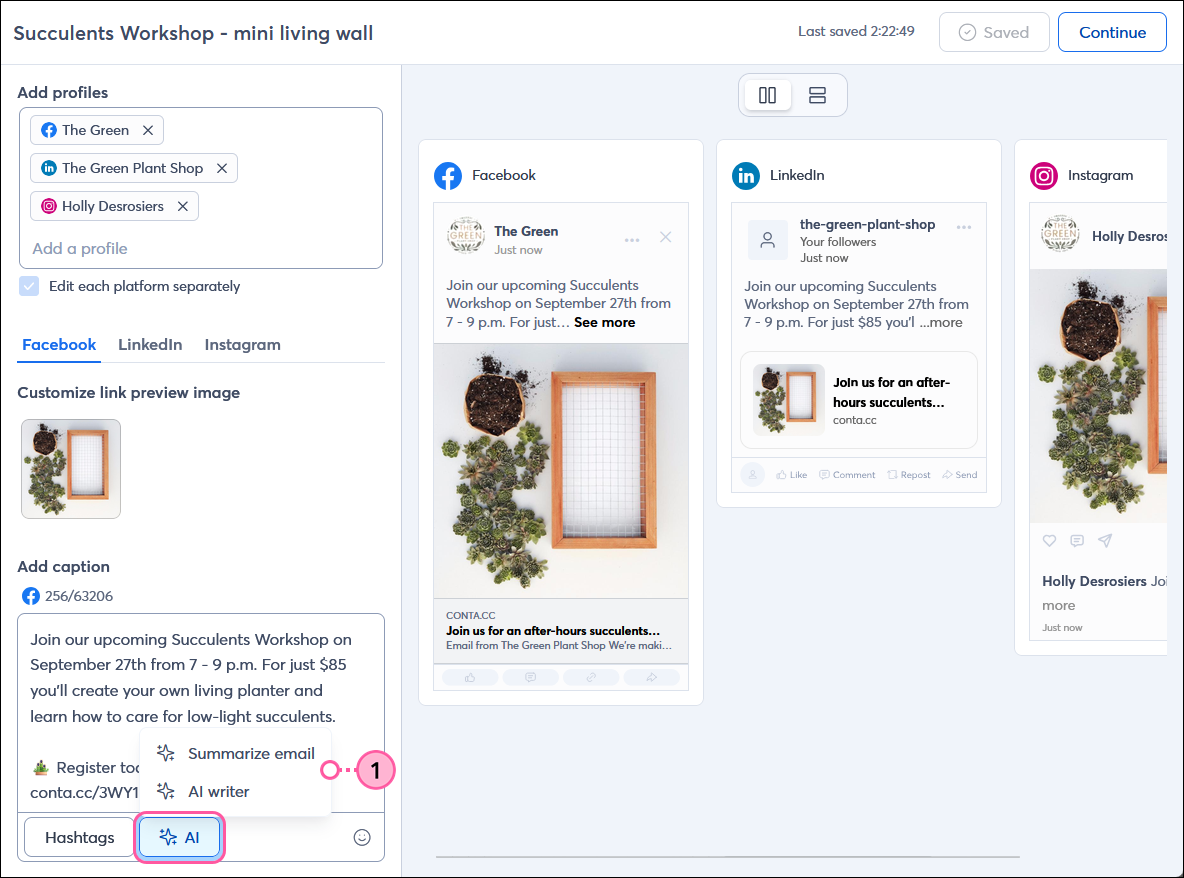
- Select the social profiles you want to share your email on.
Note: If you want to create posts with different messaging, check the "Edit each platform separately" option. If you select Instagram or TIkTok you must edit each platform separately. - Click the + button to add an image from your Library. Image ratios of 1:91:1 and 4:5 are the most compatible with the link preview across all social networks.
Note: GIF images are not fully supported in the link preview. If you choose a GIF from your Library, the image displays in the preview as animated, but won't be animated when the post is published to your social profiles. - In the Add caption field, enter the text for your social post, including any hashtags, @username tags, and emojis. As you type, you can see a preview of what your post looks like on each selected social profile.
Note: If you're not sure what to write, click the AI button to get started! Depending on your email plan you can use AI to summarize your email or you can enter in a few keywords to create the content of your post! - Click the Continue button to schedule your post.

Once you've shared your post, give it a little time for your friends and followers to interact with it, and then check the reporting to see how well it's working! Don't forget to take some time to respond to comments and answer questions; the more you engage with your audience, the more they'll engage with you.
Use AI to summarize your email for the post description
 | Upgrade your plan: Not seeing the Content Generator in your account? It may not be an available feature in your current email plan or trial account. Upgrading your email plan gives you access to additional features and products. Learn more. The ability to summarize your email is only compatible with emails created in our Cross Platform Editor. |
AI can be such a time-saver! If you're not quite sure how to word your post, you can quickly generate a summary of your email and use it as a jumping-off point.
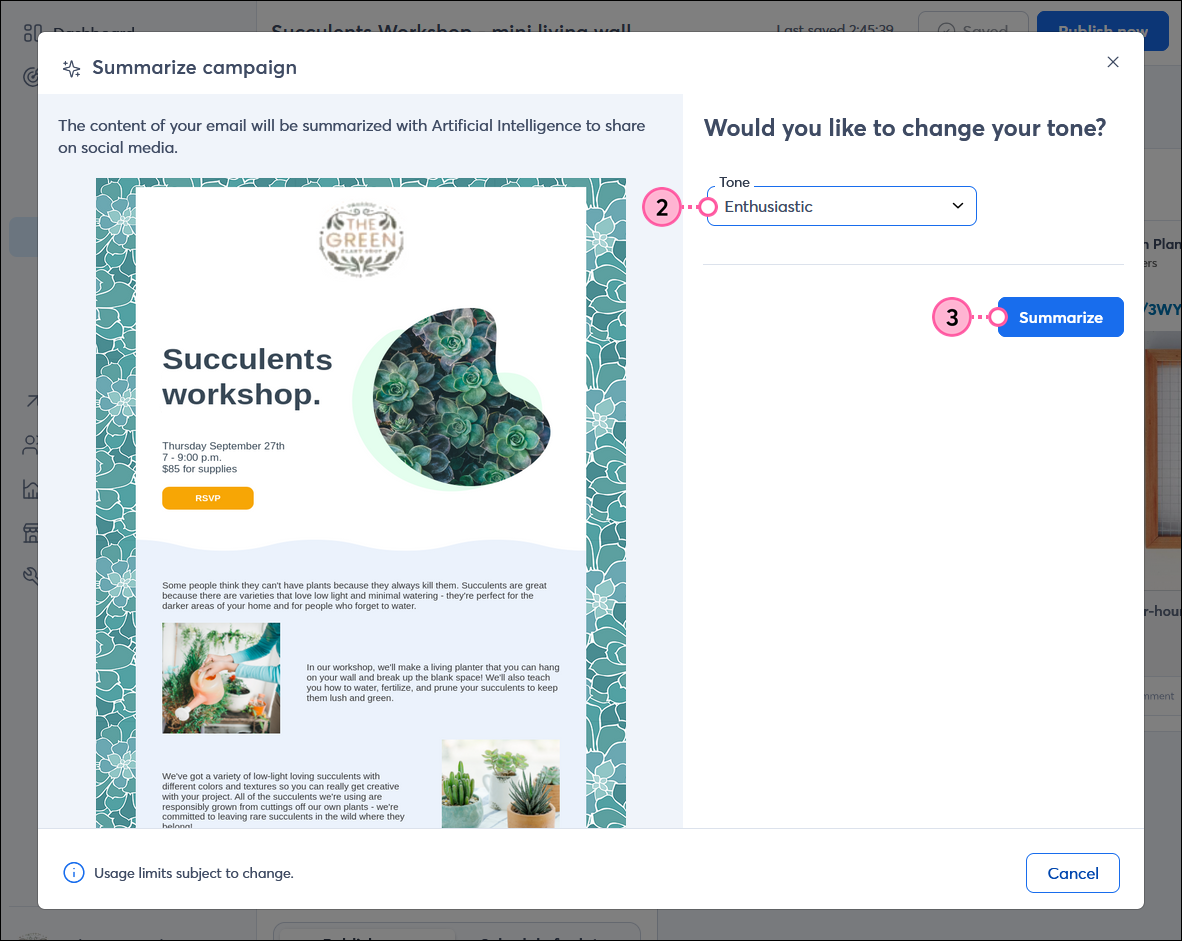
- While editing the caption for your social post, click Content Generator > Summarize email.
Note: If you're not already in the social post editor, follow steps 1-4 above to access the Content Generator for your email, then proceed to step 2 below.
- Select the tone you want to use from the drop-down menu.
- Click the Summarize button.
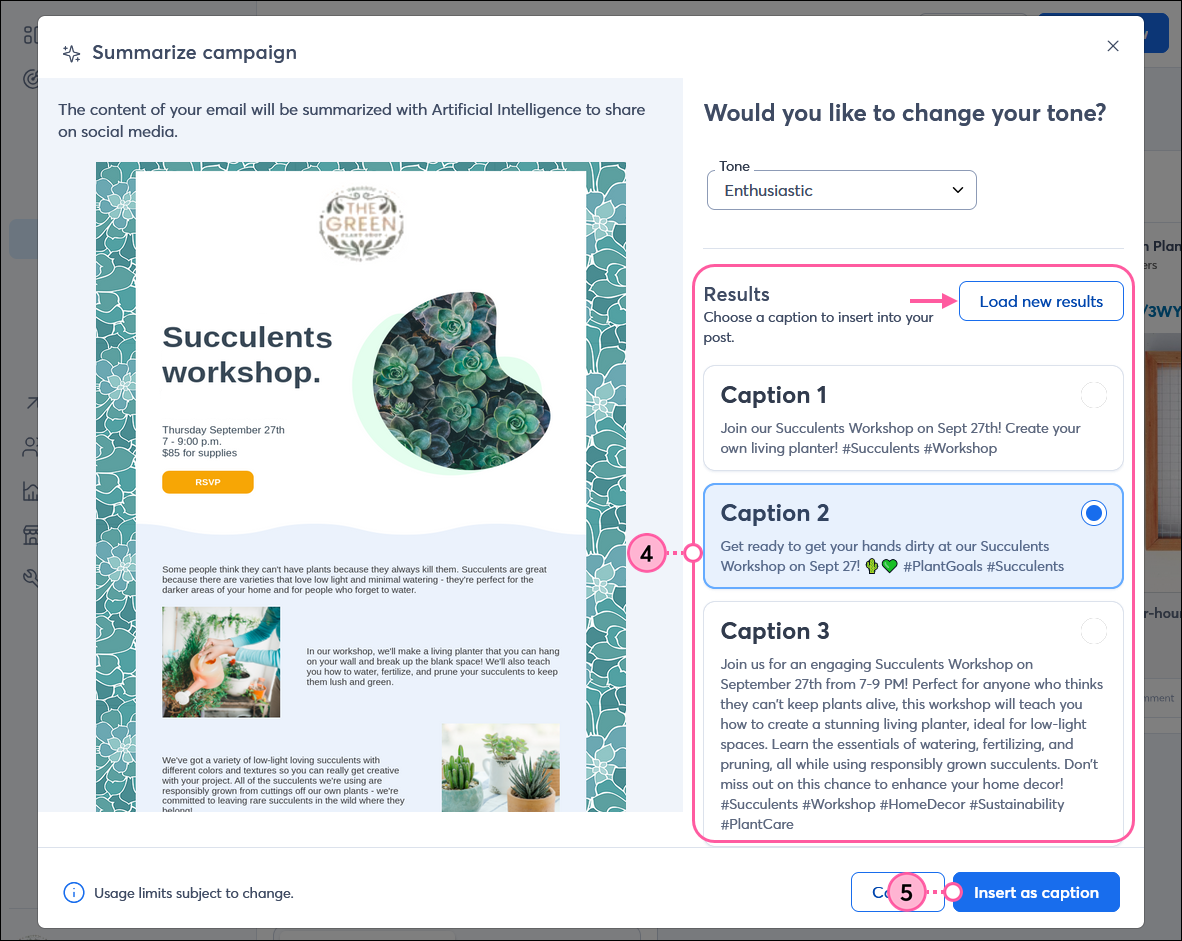
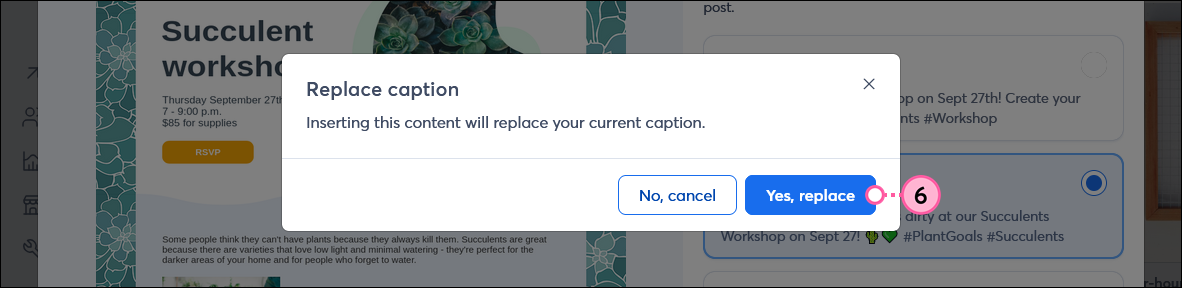
- Select one of the AI-generated captions.
Note: If they're not quite right you can click the Load new results button to generate new options, or you can further edit the content before your post it. - Click the Insert as caption button.
- Click the Yes, replace button.
Now you're back in the social post editor and you can make edits to the post content, change the image, select the social profiles you want to share on, and finally schedule it to post.
Any links we provide from non-Constant Contact sites or information about non-Constant Contact products or services are provided as a courtesy and should not be construed as an endorsement by Constant Contact.