We're making it easier to get around Constant Contact with a brand new left navigation. Not all accounts have that change yet, so if your navigation looks different from our articles, that's why–but everything from the top can now be found on the left!

Email and Digital Marketing
How can we help you?
Search our help articles, video tutorials, and quickstart guides

You've got this. You've got us. Search our Knowledge Base to quickly find answers to your questions.

Customize what each contact sees in your email with dynamic content

Article: 000028143
Updated: September 12, 2023

Add, edit, or remove dynamic content in your email to show relevant information to contacts based on their city, state, or other detail

Email Plus IconReview your plan: This feature is not available in all Constant Contact plans. If you don’t have full access, you may need to upgrade your plan.
 

See how it's done: Check out how to use this feature in our video tutorial:


Sending targeted emails is key to making sure your contacts are only receiving the information that’s important to them, but you don’t always have the time to create and send multiple versions of your email. Dynamic content blocks let you customize one email to show or hide content based on the details you've collected from your contacts, such as their city, state, job title, or any custom field you’ve created. This allows your contacts to only see what is relevant to them.

For example, if you hold events in multiple cities or states, you can send one email containing a list of all your upcoming events but only show your contacts the events happening in their area.

 
Exclamation Point IconImportant: To use dynamic content, you’ll need to collect additional details from your contacts beyond just their name and email address.
 

Add dynamic content

While editing your email, you can choose to make any block "dynamic," including text, images, events, calls-to-action, and more.
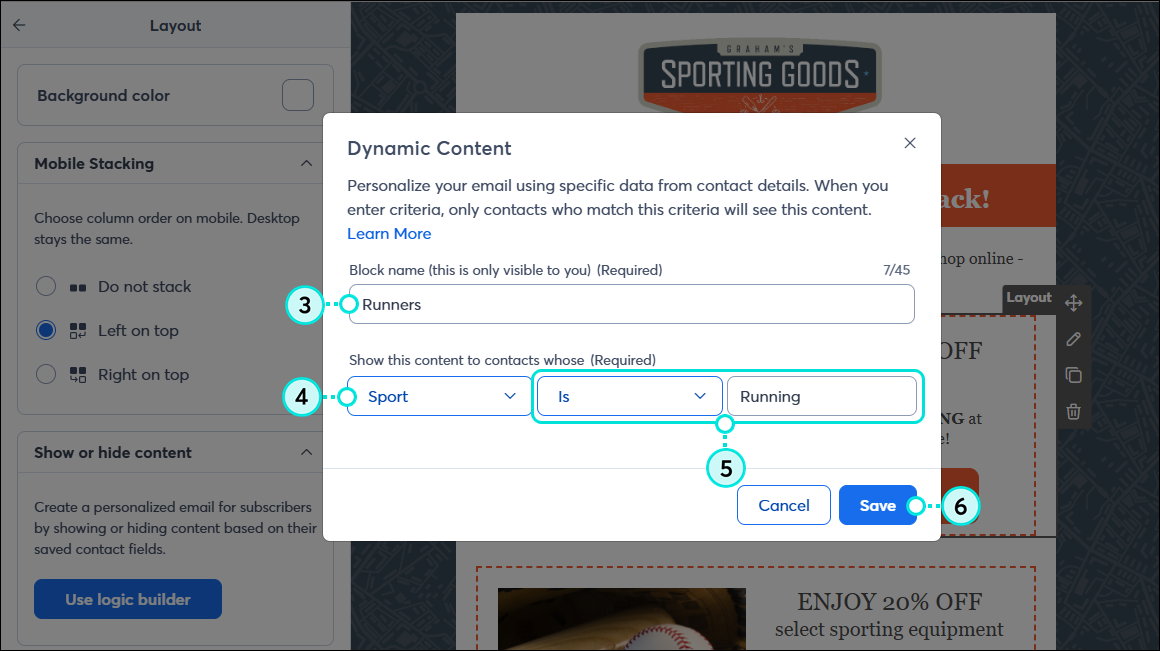
  1. Place your mouse over the block you want shown to specific contacts and, depending on the email editor you're using, click the lightbulb or lightning bolt symbol.
     
    Lightbulb SymbolLightning Bolt Symbol

     
  2. Switch the toggle on to make this block a dynamic content block.
  3. Enter a name for the block that will be easy for you to recognize later. This will be helpful when previewing your email.
  4. From the drop-down, select the contact detail you want to base the block's criteria on:
  • Custom fields
  • City
  • Company Name
  • Country
  • Job Title 
  • Postal Code 
  • State
  1. Choose whether the contact detail you selected:
  • is
  • is not blank - choosing this will show the block to contacts who have any information on file for the selected contact detail. 
  1. If you selected "is," enter text in the field to specify what your contact's detail must match in order for them to see the content. For example, if you're looking to target customers in the city of Boston, you would select “City” from the contact detail drop-down, choose “is,” and type "Boston" in the field.
    Exclamation Point IconImportant: Be sure to enter the criteria exactly as it appears in your contact's profile. For example, if your contact's state is spelled out instead of abbreviated, you will want to enter it the same way to ensure the dynamic content is seen.​​
  2. Click Save.

    Add Dynamic Content Criteria
     

Depending on your email editor, a blue or green dotted line appears around the block in your email draft to indicate the content that will only be visible to contacts who meet your selected criteria. Content outside the dotted line will be seen by all recipients. The dotted line won't display in the sent email.

To further customize your email for different contacts, repeat steps 1-7 for each content block.

 
Exclamation Point IconImportant: When adding a dynamic content block into your email, make sure to also add a default block which will be visible to those contacts who do not meet the criteria defined in the dynamic content blocks.
 

Edit dynamic content

To change which contacts will see the dynamic content block:

  1. Place your mouse over the block and either click the blue lightbulb or green lightning bolt symbol.
     
    Dynamic Content Block with Name and Lightbulb SymbolDynamic Content Block Name and Lightning Bolt Symbol

     
  2. Edit the block name and criteria accordingly.
  3. Click Save.​

    Edit Dynamic Content Criteria


Remove dynamic content

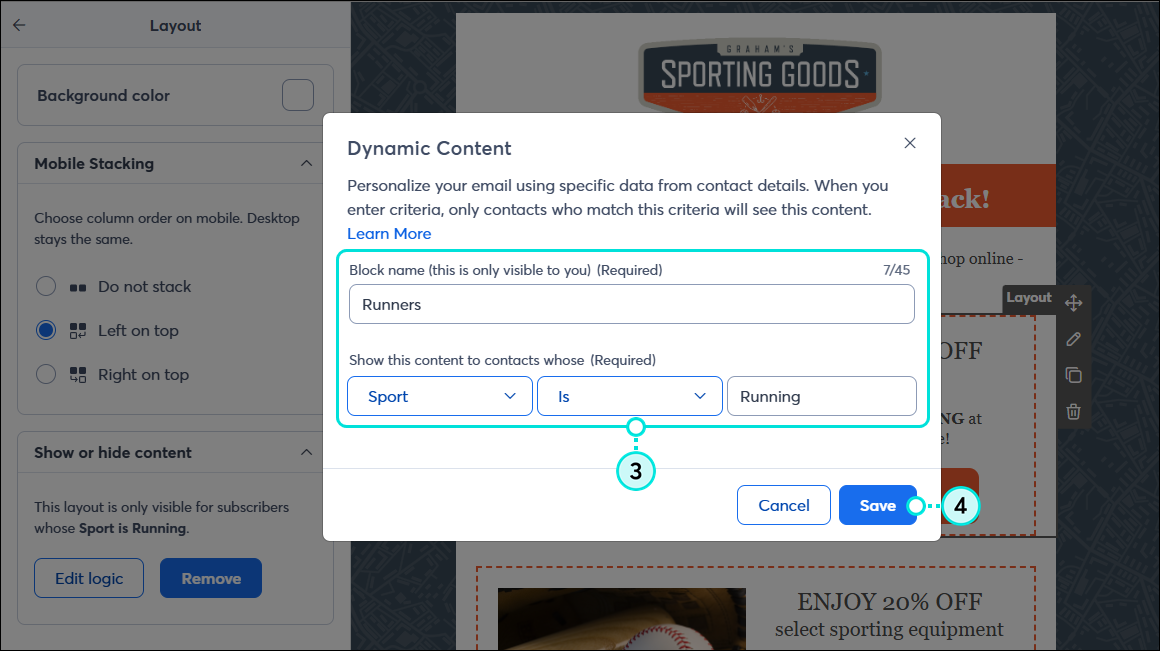
To remove the dynamic content criteria from the block and allow all contacts to see this content:

  1. Place your mouse over the block and either click the blue lightbulb or green lightning bolt symbol.
     
    Dynamic Content Block with Name and Lightbulb SymbolDynamic Content Block Name and Lightning Bolt Symbol

     
  2. Switch the toggle off.
  3. Click Save.

    Toggle Off Dynamic Content


Preview your dynamic content

Once you’re done editing your email and are ready to see how it will look to your contacts:
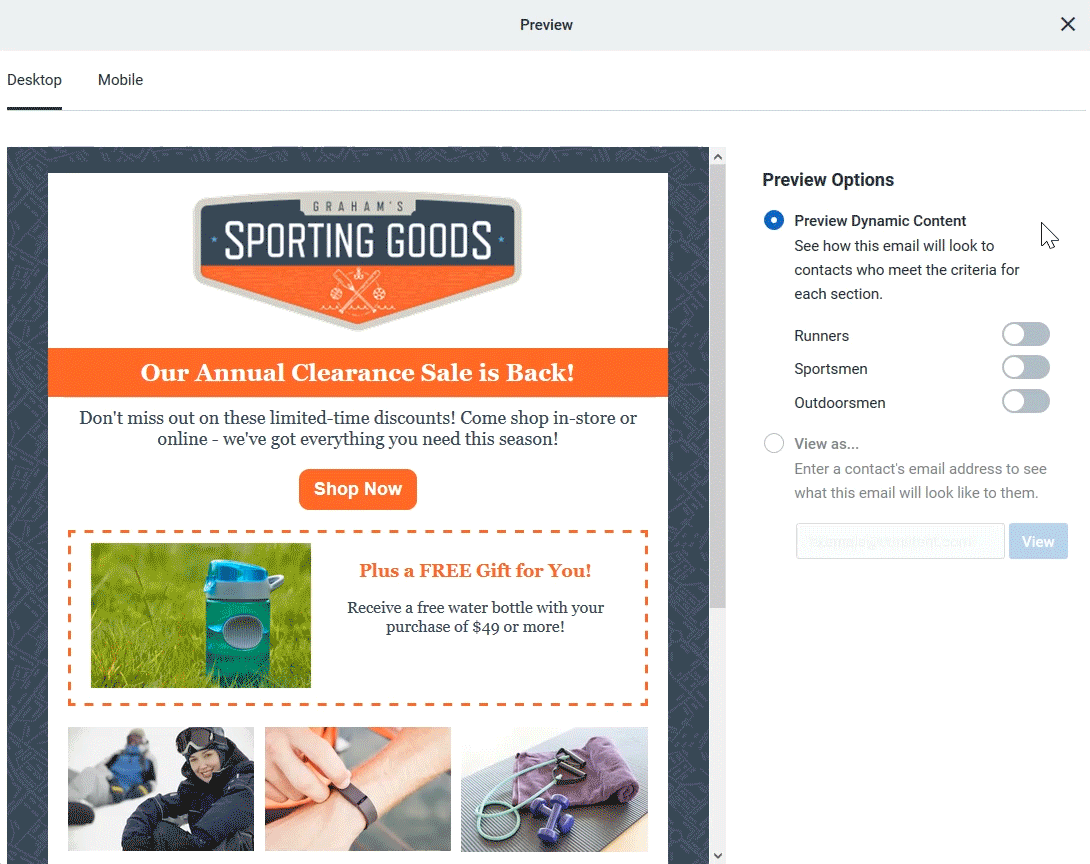
  1. Click the Preview & Test or Check & Preview button and select “Preview” from the drop-down.​
     
    Preview and Test DropdownCheck and Preview Dropdown

     
  2. Under the Preview Dynamic Content option, click the toggle switch next to the dynamic content block you want to preview. This will show you how the email will look to the contacts who meet the criteria for that block.
  3. Select the View as option, enter a specific contact's email address, and click View to preview how the email will look to that recipient. 

    Preview Dynamic Content


Now you’re ready to send your email and target different contacts all in one email!

 
Exclamation Point IconImportant: When sending a test version of your email, you'll see the dynamic content based on the details in your own account. Dynamic content blocks using custom fields will not display in your test email.


Questions?

Ask the Community

Did this article answer your question?


Constant Contact Logo

Copyright © 2025 · All Rights Reserved · Constant Contact · Privacy Center