We're making it easier to get around Constant Contact with a brand new left navigation. Not all accounts have that change yet, so if your navigation looks different from our articles, that's why–but everything from the top can now be found on the left!

Email and Digital Marketing
How can we help you?
Search our help articles, video tutorials, and quickstart guides

You've got this. You've got us. Search our Knowledge Base to quickly find answers to your questions.

Automatically send a series of emails to contacts when they engage with an email

Article: 000027931
Updated: March 24, 2025

Set up an automated email series triggered to send when a contact opens or clicks a link in a specific email

Email Plus IconReview your plan: This feature is not available in all Constant Contact plans. If you don’t have full access, you may need to upgrade your plan.


Want to automatically send relevant follow-up emails to contacts who show interest in a certain topic? You can set up an automated email series, also known as a drip campaign, that will trigger to send when a contact engages with a specific email, such as opening it or clicking a link. For example, if a customer expresses interest in a particular service by clicking a "Learn More" link in your email, you can automatically follow up with more information. Or, if someone has opened your fundraiser campaign, you can send a short series of emails about your cause to help encourage them to donate.


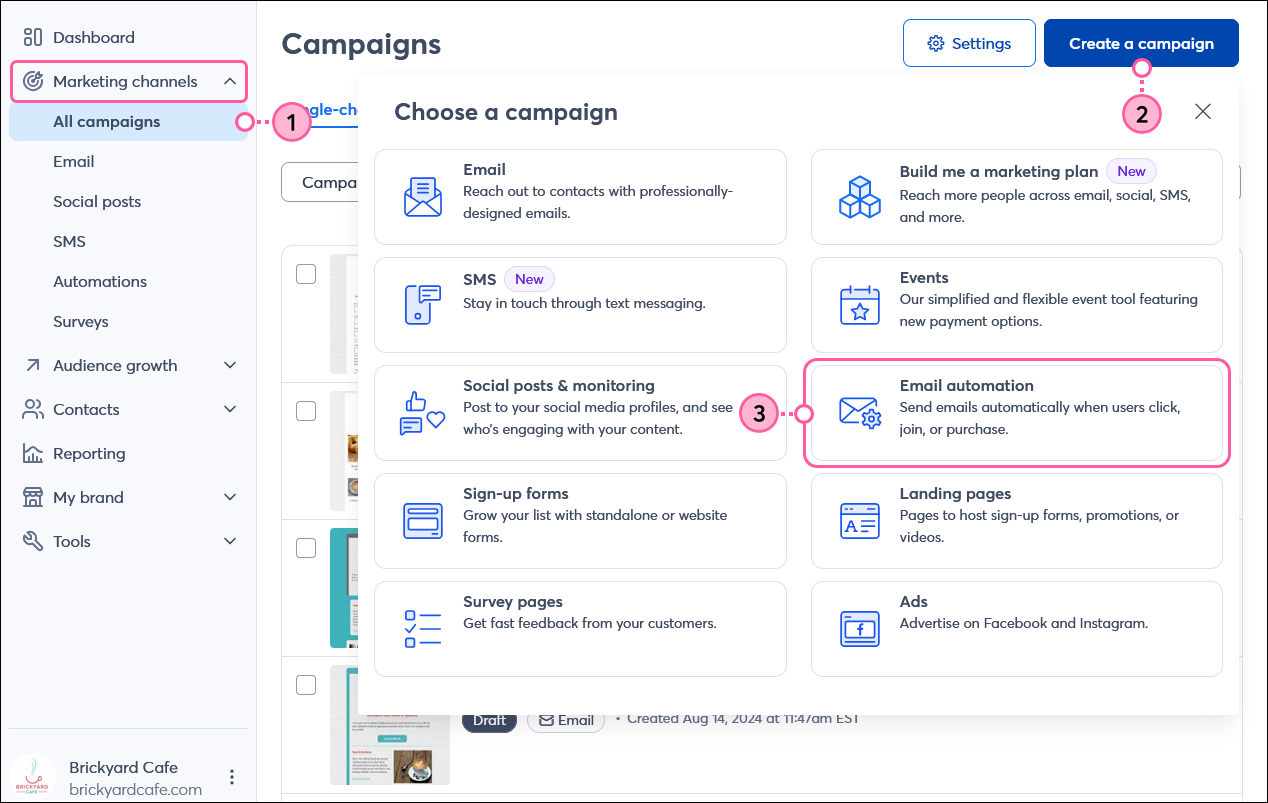
There are just a few steps to create an automated email series:


Choose your trigger

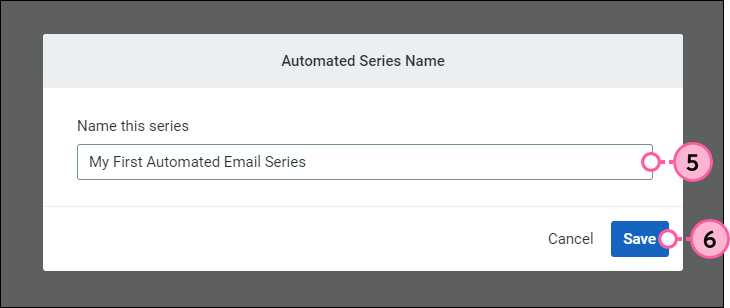
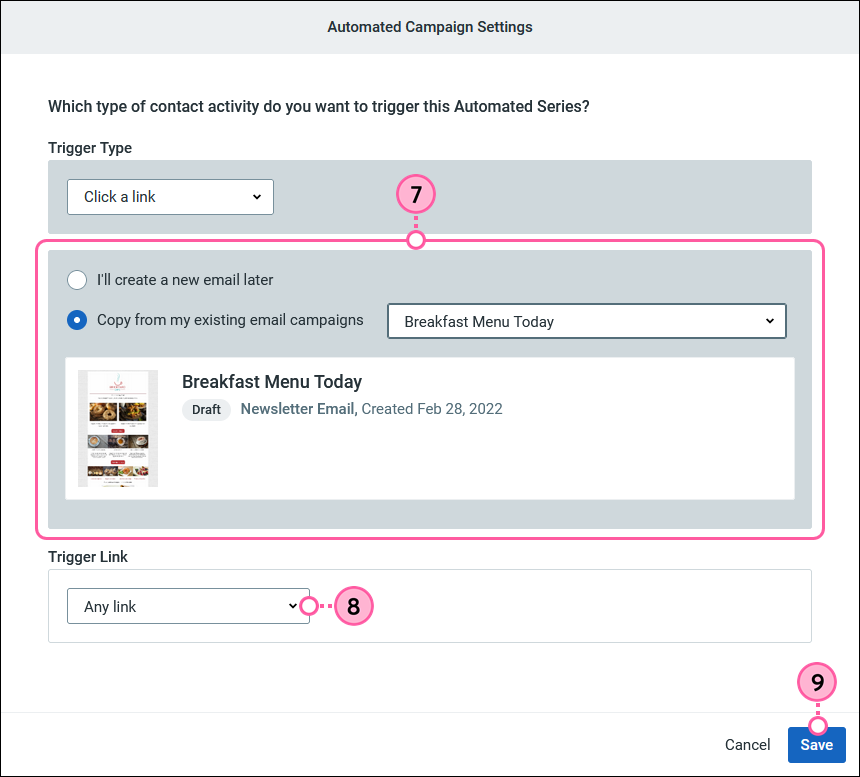
The first step to creating your automated email series is selecting how you want contacts to trigger the series, such as when a contact opens or clicks a link in a specific email. Part of setting up this type of series is creating the "Trigger Email" for your contacts to engage with.

  1. Click Marketing channels > All campaigns.
  2. Click Create a campaign.
  3. Select Email automation.
     
    Exclamation Point IconNote: If you see “Automations” instead of “Email automation,” please reference this article instead.


    Left navigation, Marketing Channels and All Campaigns option, Create a Campaign button, and Email Automation Campaign Type
     
  4. Select Opens your email or Clicks a link.

    Choose an Email Automation dialogue box with Opens Your Email and Clicks a Link options
     
  5. Name your new series.
    Note: Contacts who receive an email from your series won't see this name — they instead see the subject line for each email.
  6. Click Save.

    Screenshot of naming an Automated Email Series.

  7. Select how you'd like to create your Trigger Email:
  • I'll create a new email later - Create a new email from scratch at a later time.
  • Copy from my existing email campaigns - From the drop-down, select a previous email in your account to make a copy of.
  1. (Optional) Select which link in your email will act as the trigger to receive the email series. 
    Note: If you chose to create your Trigger Email later, you'll need to leave this field blank until you've created the email and inserted a link.
  2. Click Save.

    Screenshot of all the different options you have when picking a trigger.
     
  3. If you need to make edits to your Trigger, click the three dots in the right-hand corner and select from the drop-down:
  • Copy Email - Save a copy of your Trigger Email to your Campaigns page to use outside of the series.
  • Edit Trigger - Change the Trigger Type or Trigger Email selected.
  • Edit Email - Make edits to the Trigger Email. 
  • Delete Trigger - Delete the Trigger Email to start fresh.

    Edit Trigger Options
     

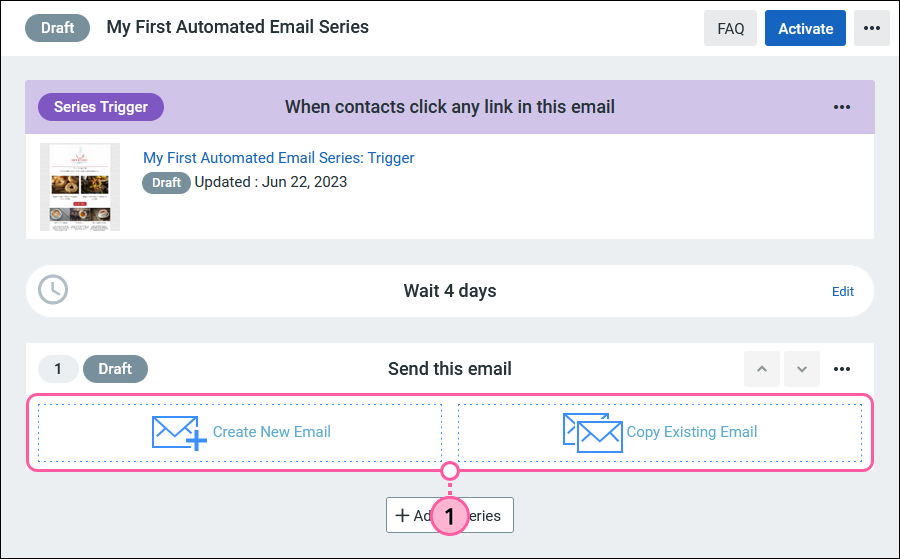
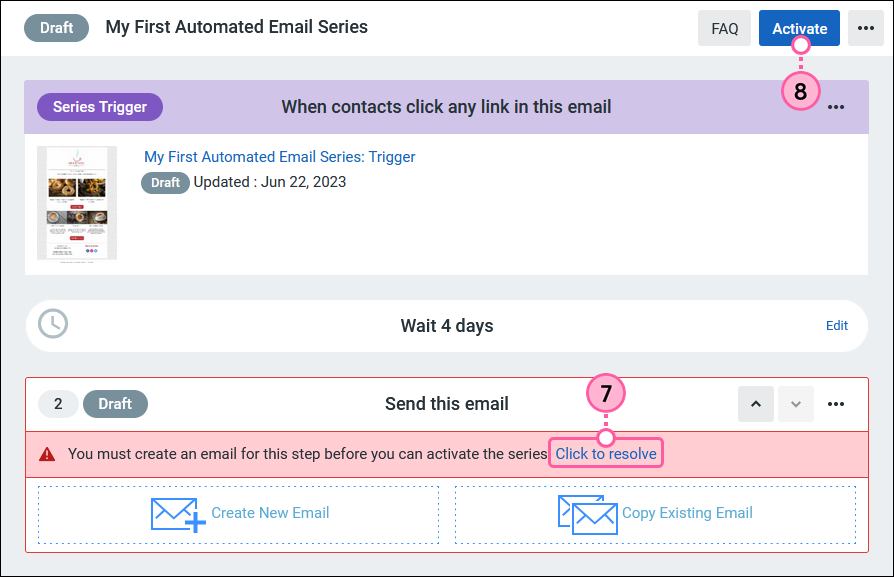
Now that you have your Trigger Email set, it's time to add more emails to your automated email series. You won't be able to add emails to your series once it's Active, so be sure to build out your series before activating.


Add emails to your series

Adding emails to your automated series puts contacts on the path of your choosing — whether it’s a journey to learn more about your organization, an educational series about a service you provide, or a series of special promotions to your more engaged contacts, the possibilities are endless! Whoever activates your trigger is automatically queued to receive the series, regardless of whether that person engages with additional emails in the series.


Exclamation Point IconImportant: You won't be able to add emails to your series once it's Active, so be sure to build out your series with emails before activating.


    1. For the first Step after your Trigger, select how you'd like to create the email:
    • Create New Email - Select a template to create a new email from scratch.
    • Copy Existing Email - Select one of your previous emails from the drop-down to make a copy of and click Save.

      Create New Email or Copy Existing Email
    1. If you selected the Create New Email option, select an email template and add your content. Once you’re done editing the email, click Continue to be brought back to your Automated Email Series draft. 

      Edit Email and Continue Button
       
    2. (Optional) To create another email and add it to the end of your series, click the + Add to series button.

      Add to Series button
       
    1. Select how you'd like to create the next email:
    • Create New Email - Create a new email from scratch.
    • Copy Existing Email - Select one of your previous emails from the drop-down to make a copy of and click Save.
    Automated Campaign Step Setup


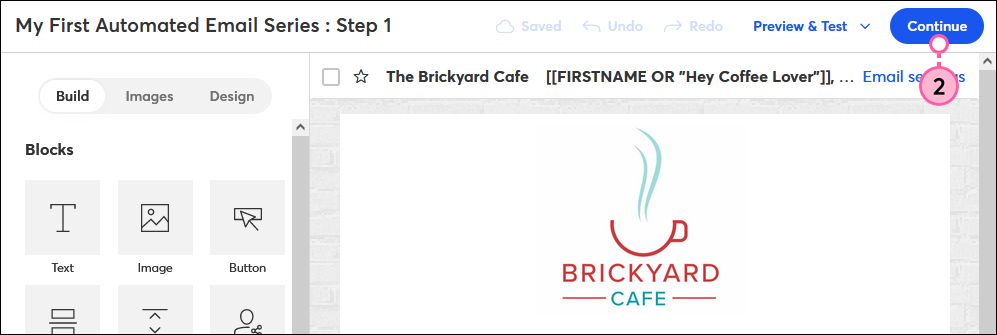
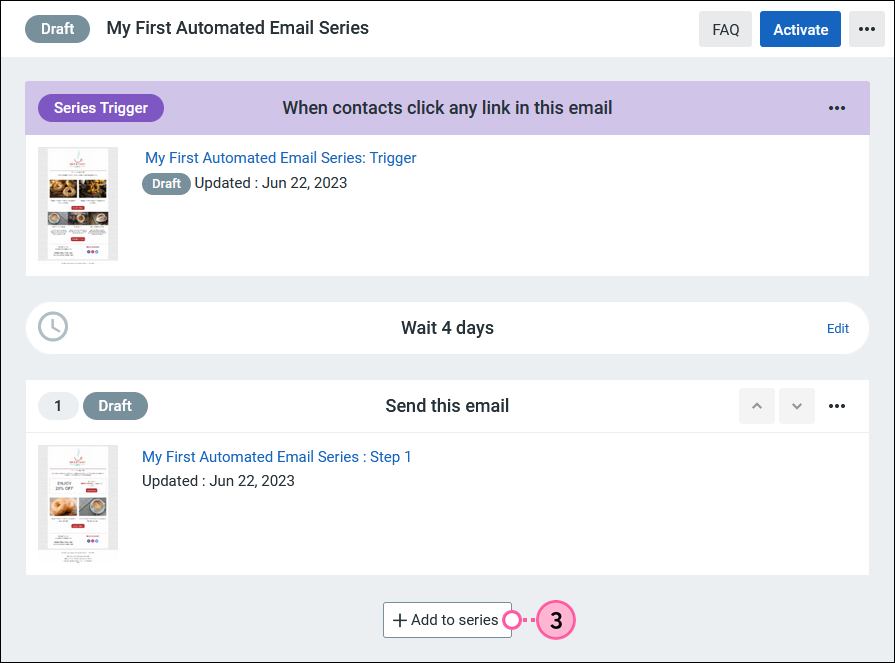
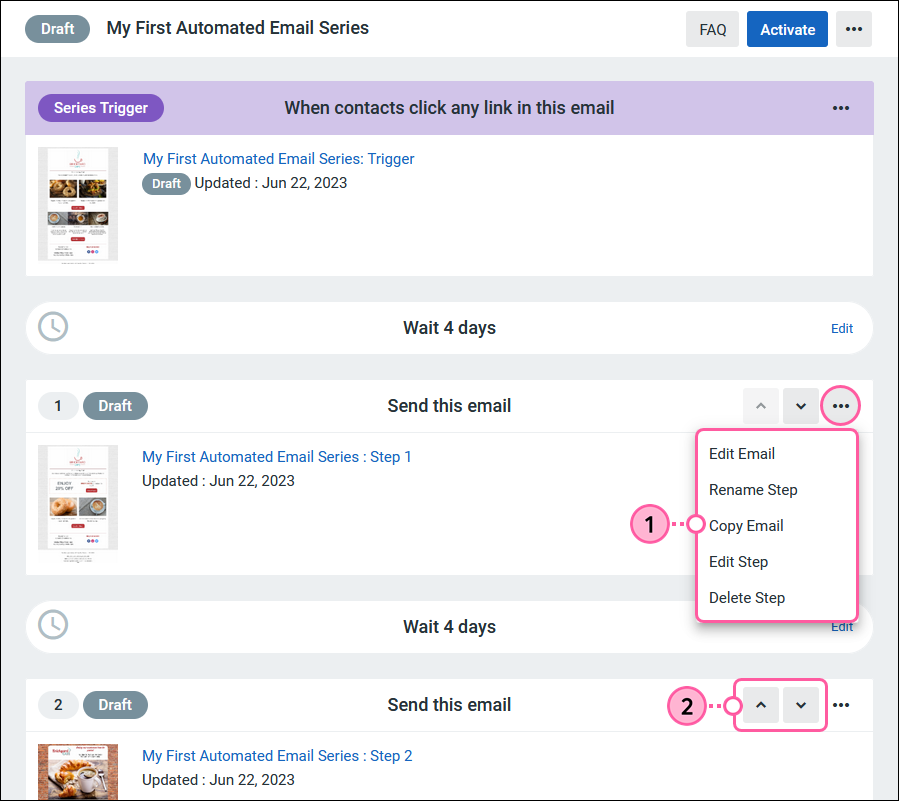
    Repeat the steps for each email in your series. Your automated email series can hold a maximum of 31 emails. 

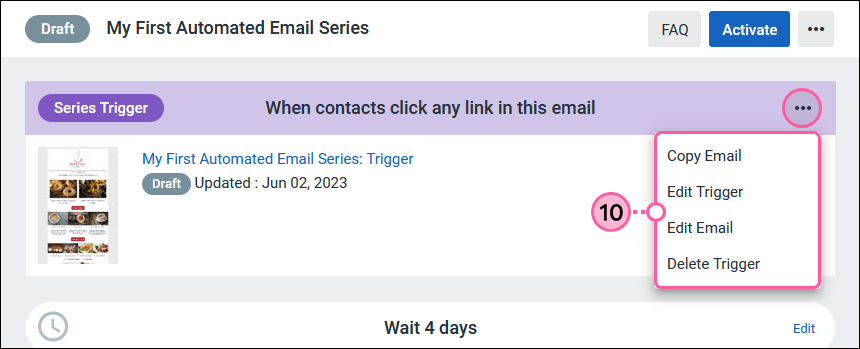
    If you need to make any changes to a Step:

    1. Click the three dots and select from the drop-down:
    • Edit Email - Make changes to the email you’ve created or copied for this step.
    • Rename Step - Change the name of the email for this step.
    • Copy Email - Save a copy of this email to your Campaigns page to use outside of the series.
    • Edit Step - Choose a different email to send for this step.
    • Delete Step - Remove the step completely to start fresh.
    1. Use the arrows to move an email up or down one step in the series. 
      Note: The Time Delay before the email will move as part of the step, except when moving a Step 1 email that is set to Send immediately after the Trigger. 
    Automated Campaign Step Setup page


    Set a time delay between steps

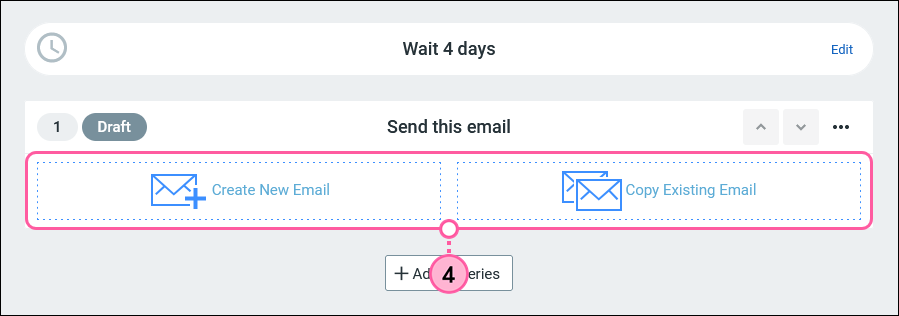
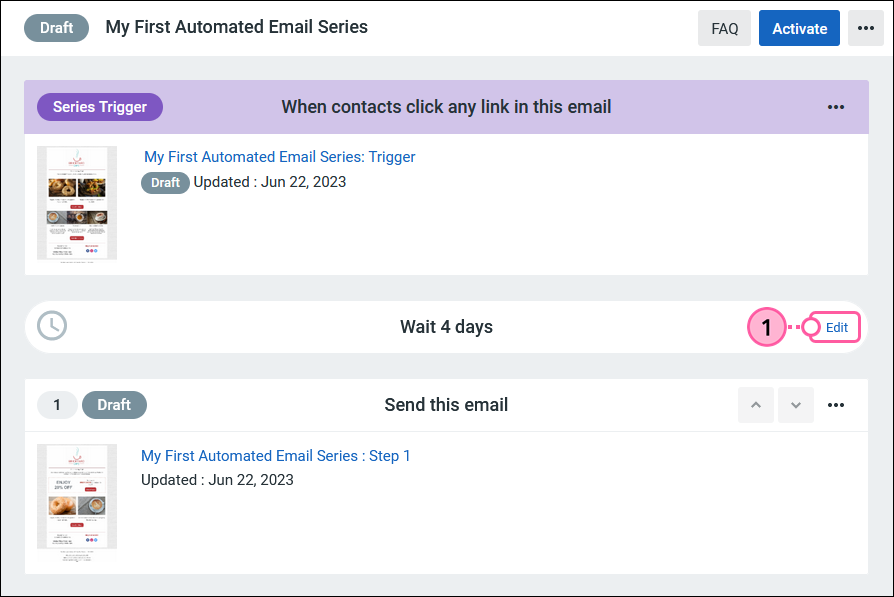
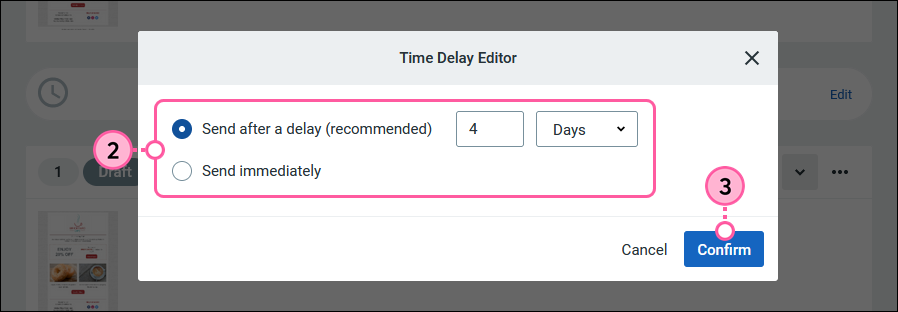
    To specify how long you want to wait before sending the next email in the series:

    1. Click "Edit" on a Time Delay block between emails.

      Edit Time Delay Block

    2. Select how long you want to wait for the next email to send:
    • Send after a delay (recommended) - Select an amount of time before the next email in the series sends. This works alongside your custom Delivery Settings, if you set any.
    • Send immediately - Send the next email in your series immediately after contacts finish the previous step. Selecting this option runs the risk of sending two emails within hours of each other. 
      Note: The option to Send immediately is only available for the first Step email after the Series Trigger. 
    1. Click Confirm and repeat for each email in the series.

      Time Delay Editor


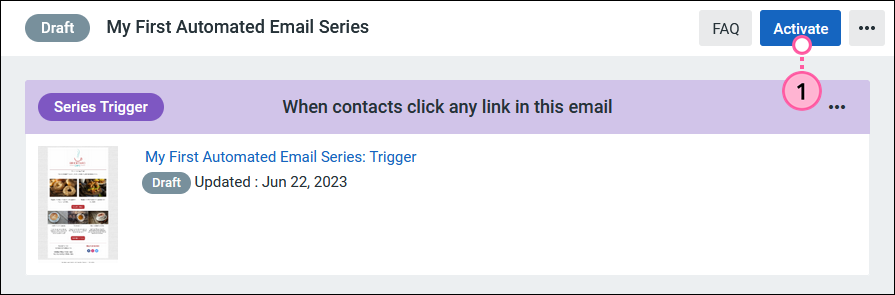
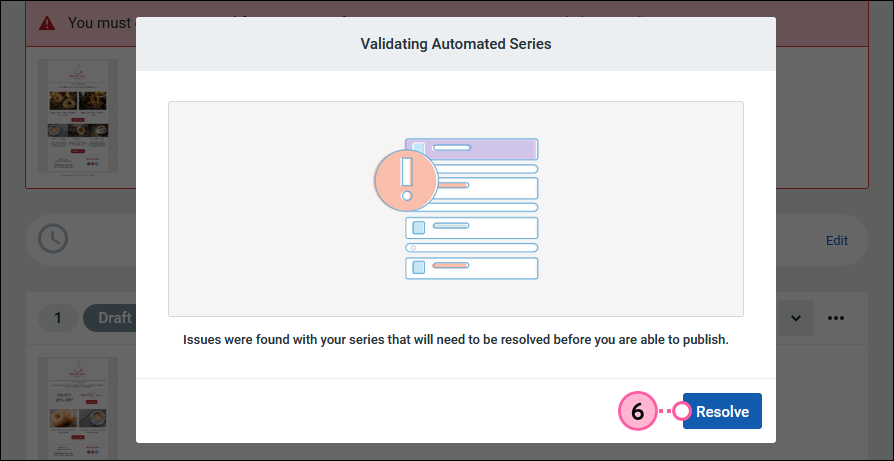
     When your Steps and time delays are fully built out, you're ready to activate your series


    (Optional) Set custom delivery settings for your series

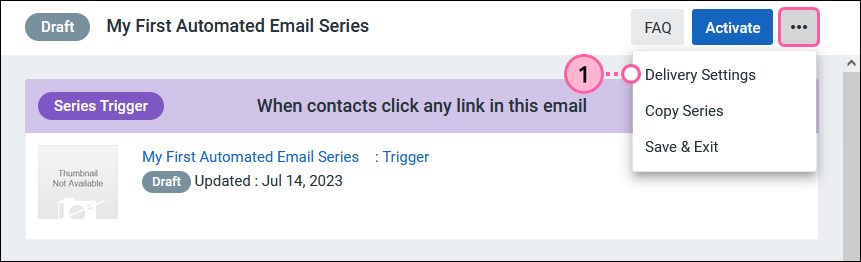
    The Delivery Settings for your automated email series are turned off by default. This means that your series relies solely on the Time Delays you set to determine when to send each email. Because of this, your contacts could potentially end up receiving an email at midnight on a Sunday. If you don’t mind when your contacts receive emails from you, feel free to skip ahead to activating your automated email series. If you want more control, you can adjust your Delivery Settings to match your customers' expectations. 
     

    design tipDid you know? Your Delivery Settings work together with the Time Delays to find the best time to send. Setting your series to wait four hours before sending the next email means that after the four hours, it will then check your Delivery Settings for the next day and time you want it to send. Your email could potentially be on hold for days.


    1. Click the three dots and select Delivery Settings from the drop-down.

      More Drop-down and Delivery Settings option
    1. Check the "Use Custom Delivery Settings" box to select your custom time-frame.
    2. Select the days and time range you only want your emails sent on.
      Important: All send times are in Eastern Time. 
    3. Click Save.

      Delivery Settings selection


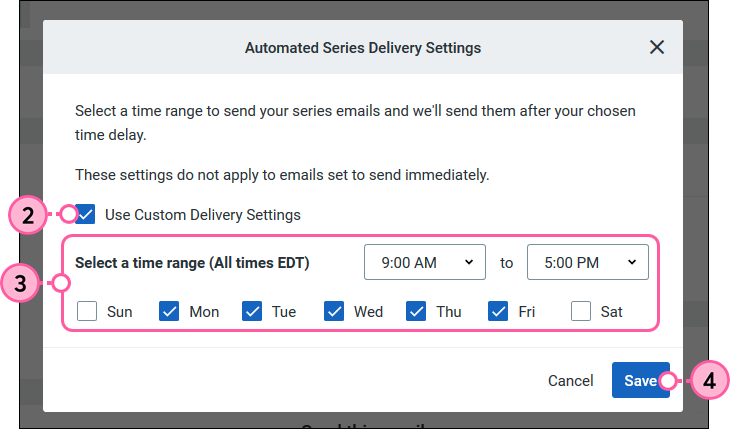
    When you're finished setting your custom delivery times, you’re ready to activate your series


    Activate your series

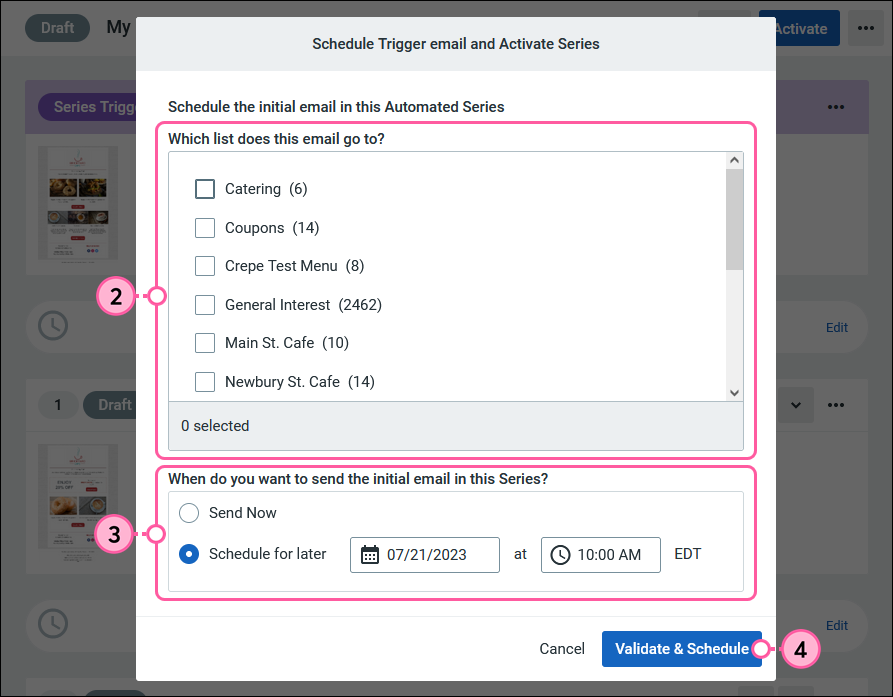
    Now that you’ve built out your series, it’s time to activate it! Part of the activation process is scheduling your Trigger Email to send. Once your Trigger Email sends, contacts who engage with it are added to the queue to receive the rest of the emails in the series.

    Note: Once your Trigger Email is sent, contacts who are added to the list(s) it was sent to are not automatically sent the Trigger Email to join the automated series. 


    Exclamation Point IconImportant: Once your automated email series is Active, you can only make edits to the content of step emails. You won't be able to add, re-order, or delete any steps, or edit any of the time delays between steps.


    1. Within your Draft automated email series, click Activate.

      Screenshot of the Automated Email Series page with the Activate button selected.
       
    2. Check the box for each mailing list you want to send the Trigger Email to.
    3. Select when you want to begin sending:
    • Send Now - Start sending the Trigger Email to your selected mailing lists right away. 
      Note: Depending on how large your list is, it could take up to an hour for your email to begin sending.
    • Schedule for later - Choose a future day and time to send.
      Note: The time displayed is in Eastern Standard Time.
    1. Click Validate & Schedule.

      Screenshot of the Schedule Trigger email and Activate Series window.
       
    2. Click Continue to have your series scanned for errors. If no issues are detected, your series automatically updates to the Scheduled status.

      Screenshot of the Schedule Trigger email and Activate Series window.
       
    3. If issues are detected in your series, click Resolve to see all the errors highlighted in red.

      Issues Found Message
       
    4. Click the "Click to resolve" link to fix the issue. 
    5. When all highlighted issues are resolved, click Activate to continue scheduling your series.

      Click to Resolve Link
       

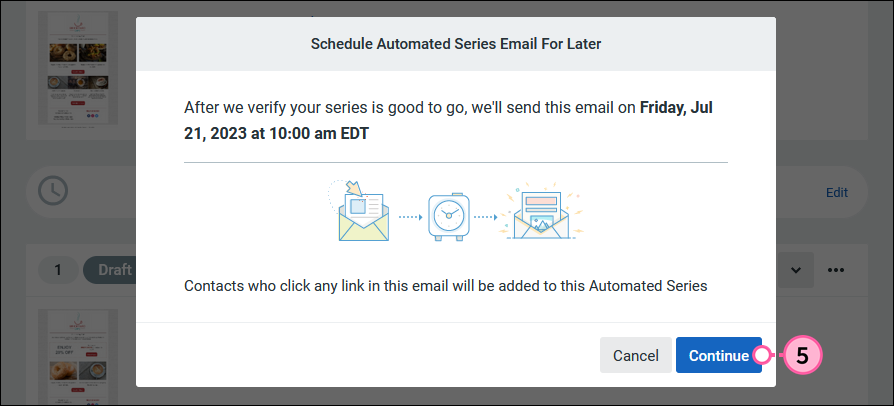
    Once your series is Scheduled, you have the chance to Unschedule to pull it back into Draft status. Once your Trigger Email sends and your series becomes Active, contacts who trigger the series are added to the queue to receive the next email and you can check the reporting as your series progresses. Contacts can trigger the series for 14 days, unless you decide to manually disable your trigger or stop your series early


    Light Bulb IconDid you know? The trigger is automatically disabled after 14 days because it's unlikely your contacts will open or click through your Trigger Email after this period of time. When your trigger is disabled, no new contacts are added to the queue, but your series remains Active and any queued contacts continue to receive the series.


    Questions?

    Ask the Community

    Did this article answer your question?


    Constant Contact Logo

    Copyright © 2025 · All Rights Reserved · Constant Contact · Privacy Center