We're making it easier to get around Constant Contact with a brand new left navigation. Not all accounts have that change yet, so if your navigation looks different from our articles, that's why–but everything from the top can now be found on the left!

Email and Digital Marketing
How can we help you?
Search our help articles, video tutorials, and quickstart guides

You've got this. You've got us. Search our Knowledge Base to quickly find answers to your questions.

Find your contacts by their engagement level using segmentation

Article: 000026095
Updated: April 8, 2025

Use a pre-built segment to filter out your most, somewhat, and least engaged contacts, or create a custom segment of contacts based on engagement and other criteria

Email Plus IconReview your plan: This feature is not available in all Constant Contact plans. If you don’t have full access, you may need to upgrade your plan.


Using segmentation to stay engaged with your most active subscribers not only builds a stronger relationship with them, but also helps to increase your open rates because they'll be looking for your emails in their inbox. However, over time, you may notice that some customers aren't engaging with your content as much as they once were. Using segmentation to find the contacts who consistently do not open your emails gives you the opportunity to re-engage with them too.


Light Bulb IconLearn more: Looking for more information about how your contacts engage with your emails? Your contact insights can give you the bigger picture and help you better understand engagement.


View a pre-built segment

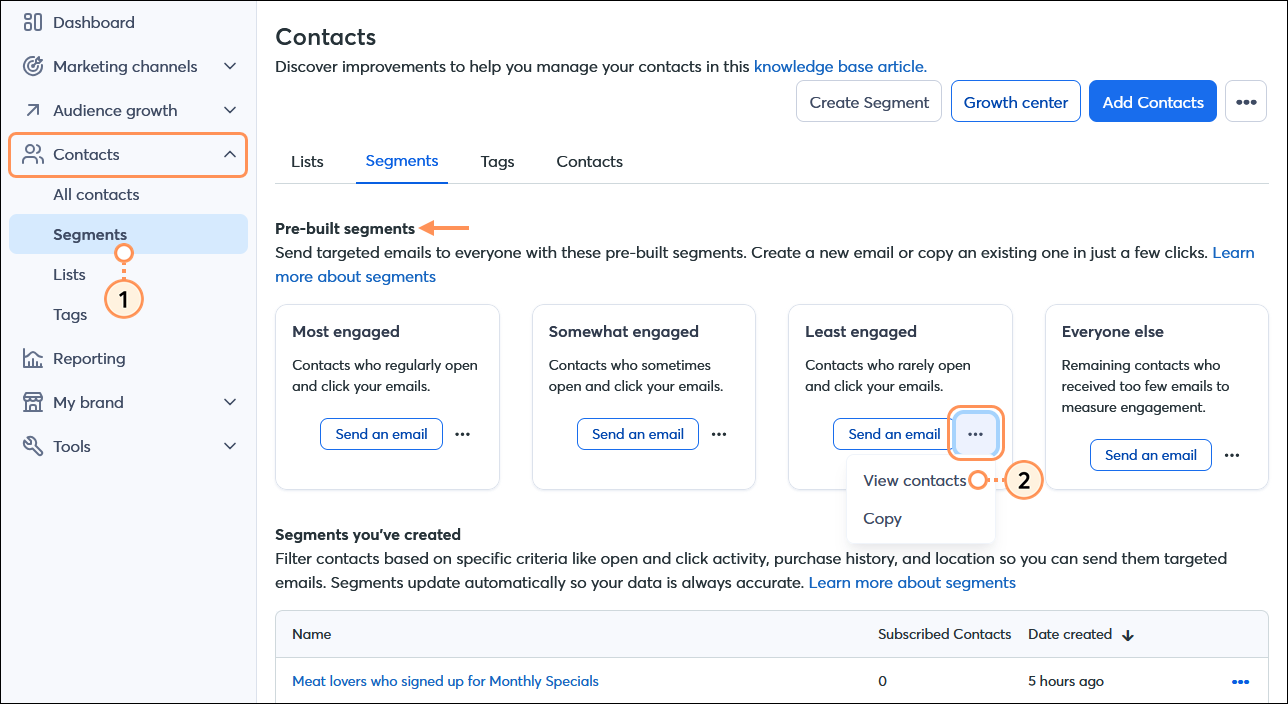
Using a pre-built segment is the quickest way to find your most, somewhat, and least engaged contacts, and everyone else too.

  1. In the left-hand menu, click Contacts > Segments.
  2. In the Pre-built segments section, find the engagement option you want to work with and click . . . > View contacts.

    Contacts menu expanded with Segments option selected, Contacts dashboard with Segments tab selected, Pre-built segments section, Least engaged menu expanded and View contacts option
     
  3. From the prebuilt segment view, you can:
  • Send a targeted email to the segment - Click Send an emailIt brings you right into the email template picker, and when you're ready to send, the "least engaged" segment is pre-selected for you. The segment automatically refreshes when you send, so you know your email is going to the right audience too.
  • Copy the segment - By copying, you can give your segment a unique name and customize it with additional criteria, like any other custom segment.
  • Add the segment to a list - Click . . . > Add to list
  • Export the contacts - Click . . . > Export. When you export the email address is included by default, and you can include first and last name, and date added.

    Least engaged segment view with Send an email button and menu expanded with Copy, Add to List, and Export options


Create a custom segment

Video Player IconSee how it's done: Check out our video tutorial for segmenting your contacts by their engagement activity.


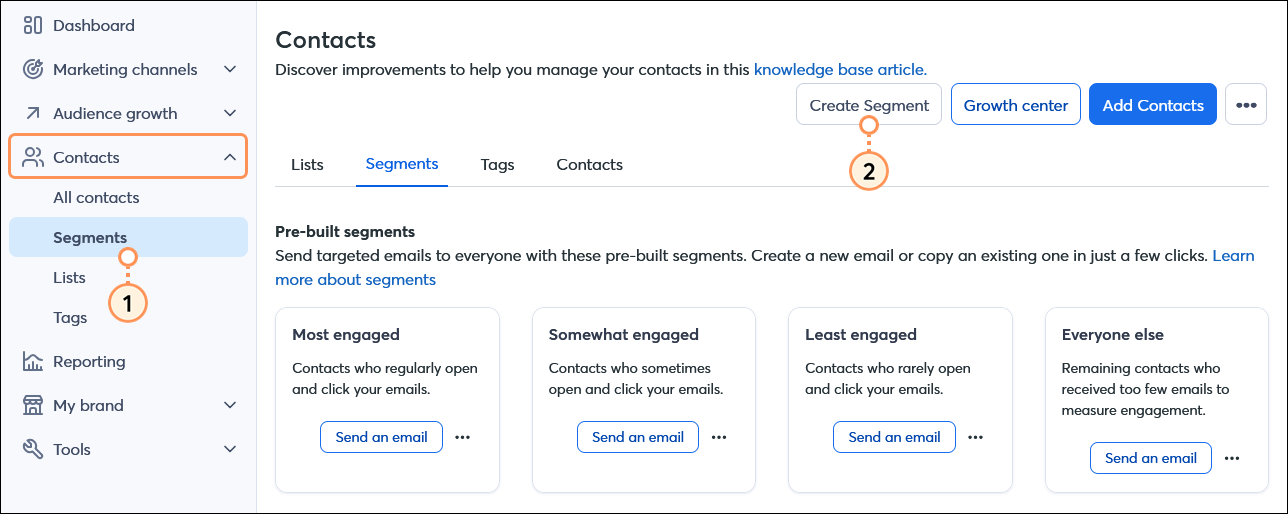
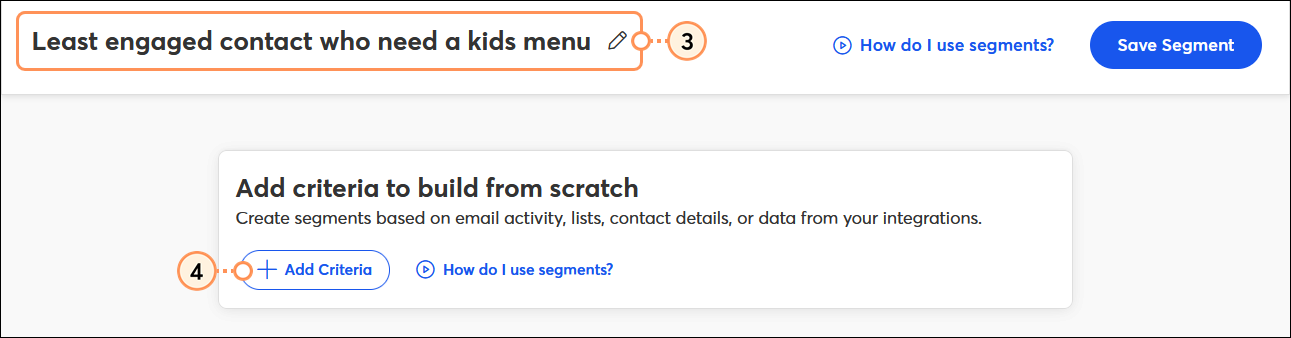
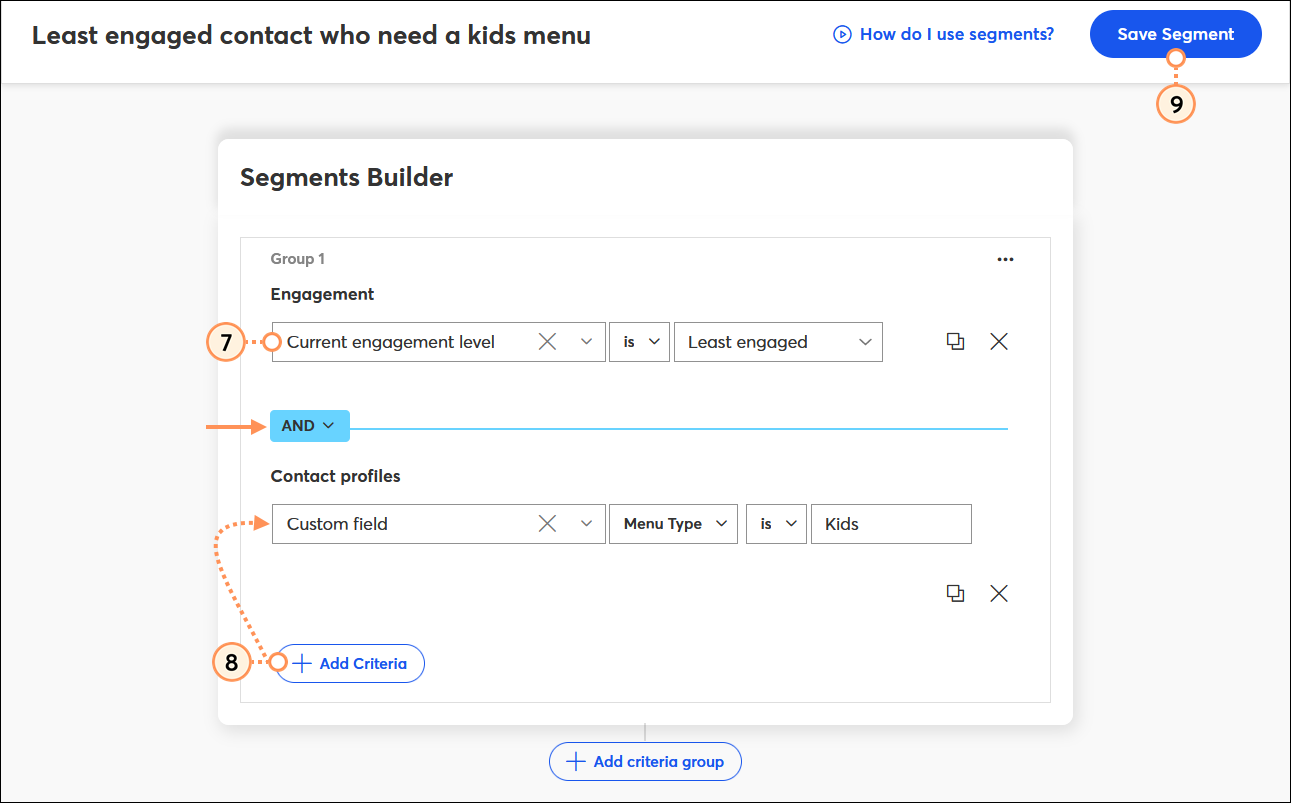
Using a custom segment lets you combine contact engagement data with other criteria, like list membership, contact details, and ecommerce behavior. Emails that were sent less than 24 hours ago aren’t factored into a contact’s engagement level.
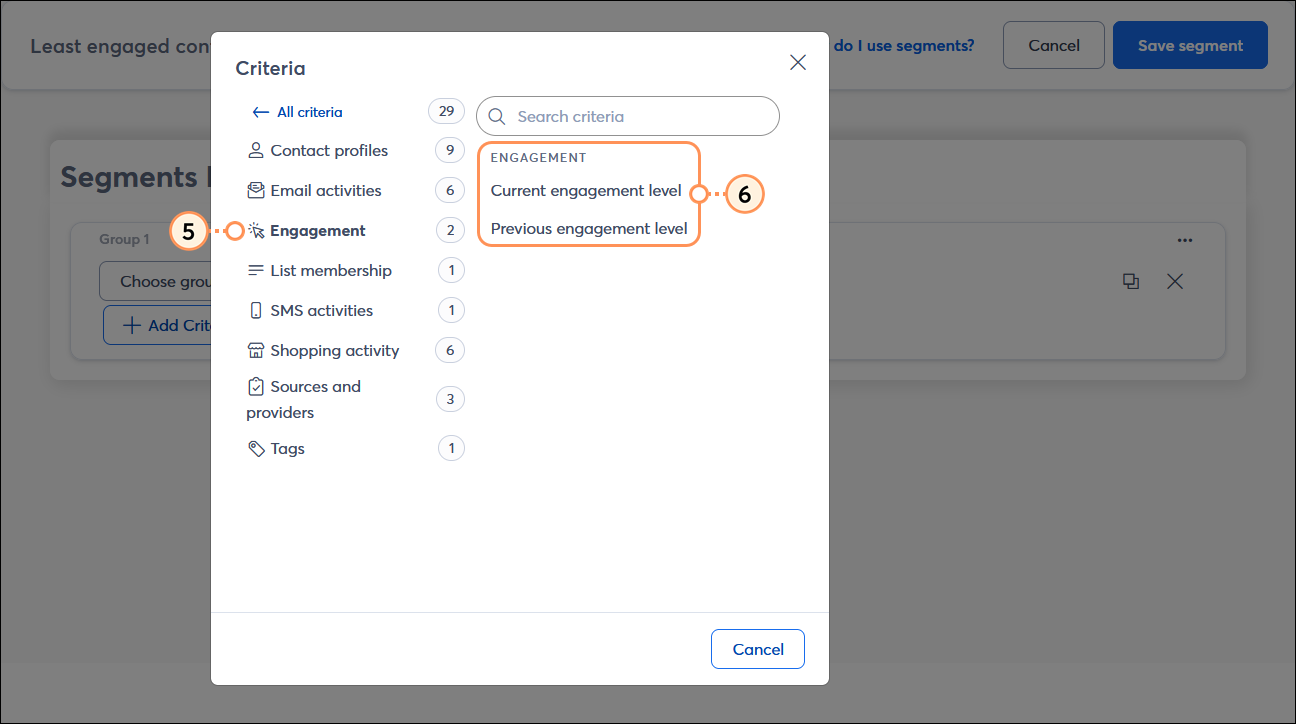
  1. In the left-hand menu, click Contacts > Segments.
  2. Click the Create Segment button in the upper right-hand corner of the screen.

    Contacts menu expanded with Segments option selected, Contacts dashboard with Segments tab selected, and Create Segment button
     
  3. Give your segment a name so you can easily recognize it in your account later.
  4. Click the +Add Criteria button.

    Segment Builder with name field and Add Criteria button
     
  5. Click the Engagement criteria to narrow your options. There are two options:
  • Current engagement level
  • Previous engagement level
  1. Click on the criteria to select it.

    Criteria overlay with All criteria options and Engagement option selected, and Current engagement level and Previous engagement level options
     
  2. Use the drop-down menus to select the operators for each criteria in your segment:
     
    Engagement criteriaOperator 1Operator 2
    Current engagement level
    • is
    • is not
    • Most engaged
    • Somewhat engaged
    • Least engaged
    • Everyone else
    Previous engagement level
    • is
    • is not
    • Most engaged
    • Somewhat engaged
    • Least engaged
    • Everyone else


  3. Select additional criteria to further narrow your segment. Keep in mind that the size of your list matters for segmentation. If your list is on the smaller side, keep the criteria to a minimum because you run the risk that no contacts meet your criteria.
     Note: You can add logic to your criteria by clicking + OR or + AND. Selecting + OR finds contacts who meet any of the selected detail criteria, while + AND finds contacts who meet all of the selected criteria. Criteria groups allow you to add + AND and + OR between multiple criteria.
  4. Click the Save Segment button.

    Segments Builder with Engagement criteria and Contact profiles criteria, Add Criteria button, and Save Segment button


Engage with the contacts in your resulting segment

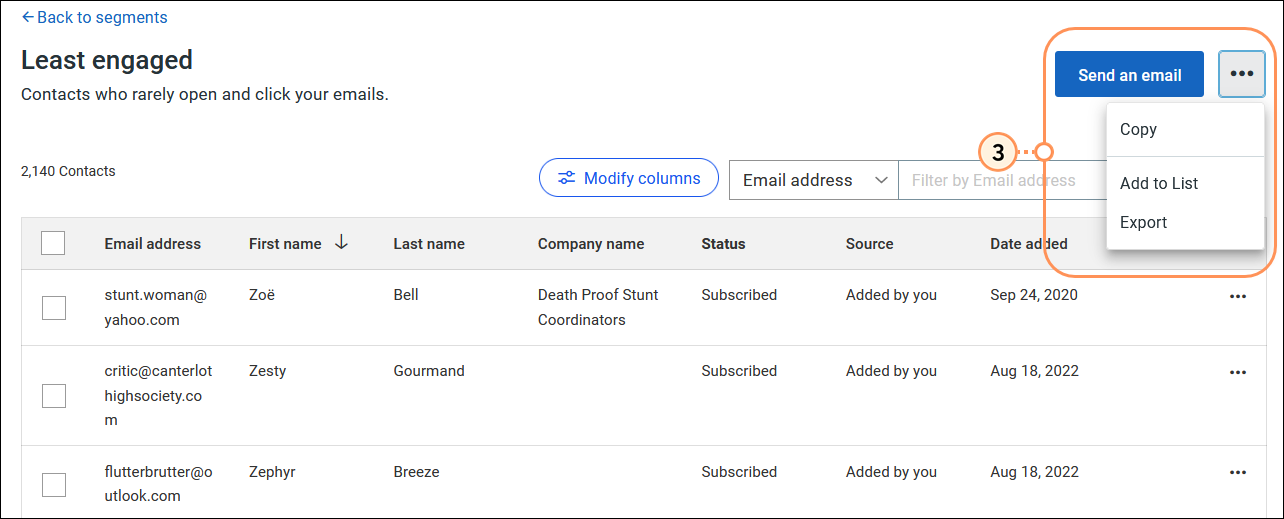
Now that you've created a segment, you have a couple of choices for handling the contacts:

  • Reward engaged contacts - Engagement is high, but you need to work to keep it that way! Consider sending special content or discount offers for being loyal subscribers. 
  • Try and re-engage disengaged contacts - You're ready to send targeted emails directly to this segment to reconnect. Consider sending them a special discount or offer to re-engage them, or send a survey to get feedback on your content or collect information about what they want to receive from you.


Questions?

Ask the Community

Did this article answer your question?


Constant Contact Logo

Copyright © 2025 · All Rights Reserved · Constant Contact · Privacy Center