After you've installed the Constant Contact Forms plugin for WordPress and synced your contact lists, you can capture new sign-ups or collect feedback and questions from the visitors who view your website.
Create a new form
There are two types of forms you can create a sign-up form to add new contacts to your mailing list, or a "contact us" form to collect comments and feedback from your website visitors.
- From your WordPress account, click Contact form > Add new form.
- Give your form an internal name. Your website visitors won't see this!

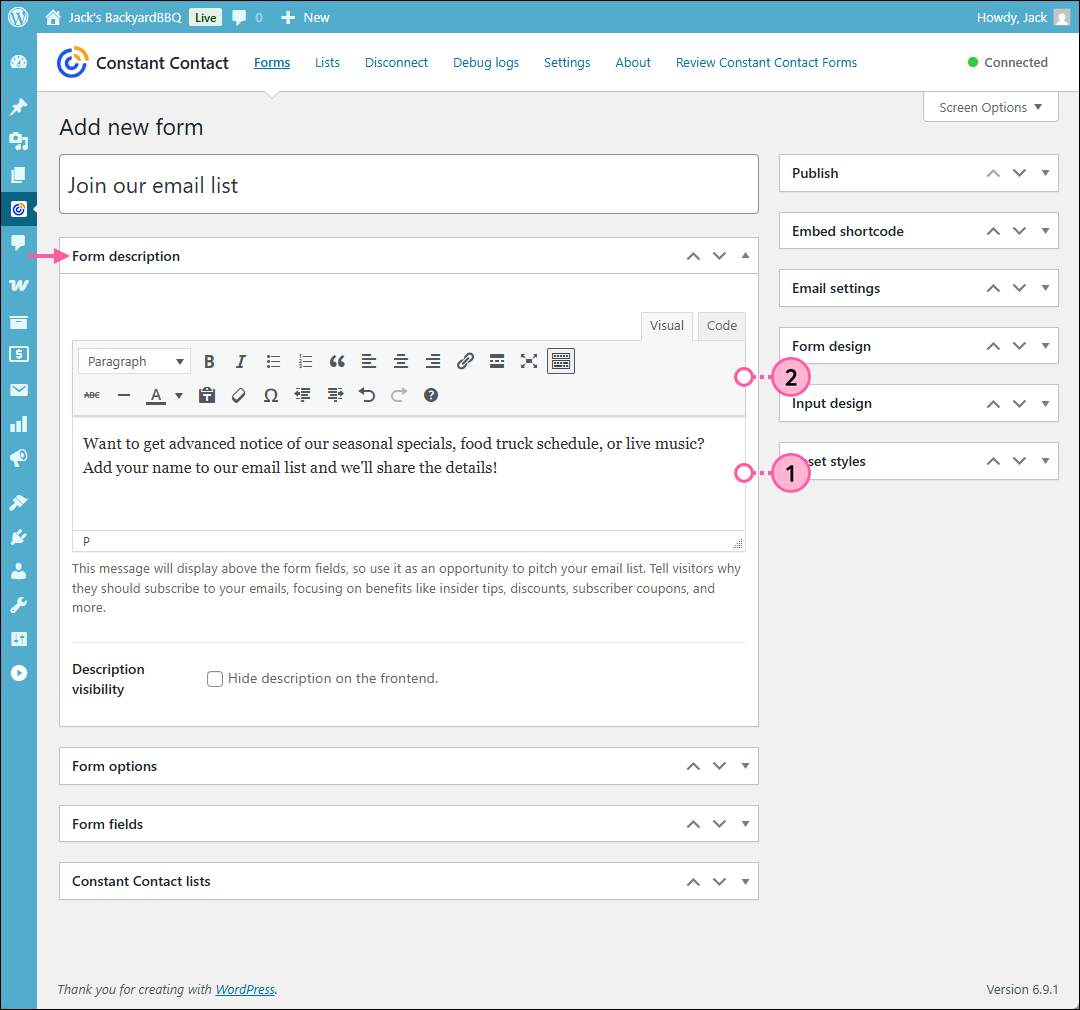
Enter the form's description
Ask your website visitors for questions or feedback. This is a good place to provide a turnaround time for answers or explain what you do with feedback. If you plan on adding respondents to your mailing list, make it clear here, too!
- In the Form description field:
- Sign-up form - Describe the type of content you plan to send and provide the frequency your new sign-ups can expect to receive your emails.
- Contact us form - Explain the kind of information or feedback you're looking for your site visitors to submit.
- Use the editor tools to style your text as desired.
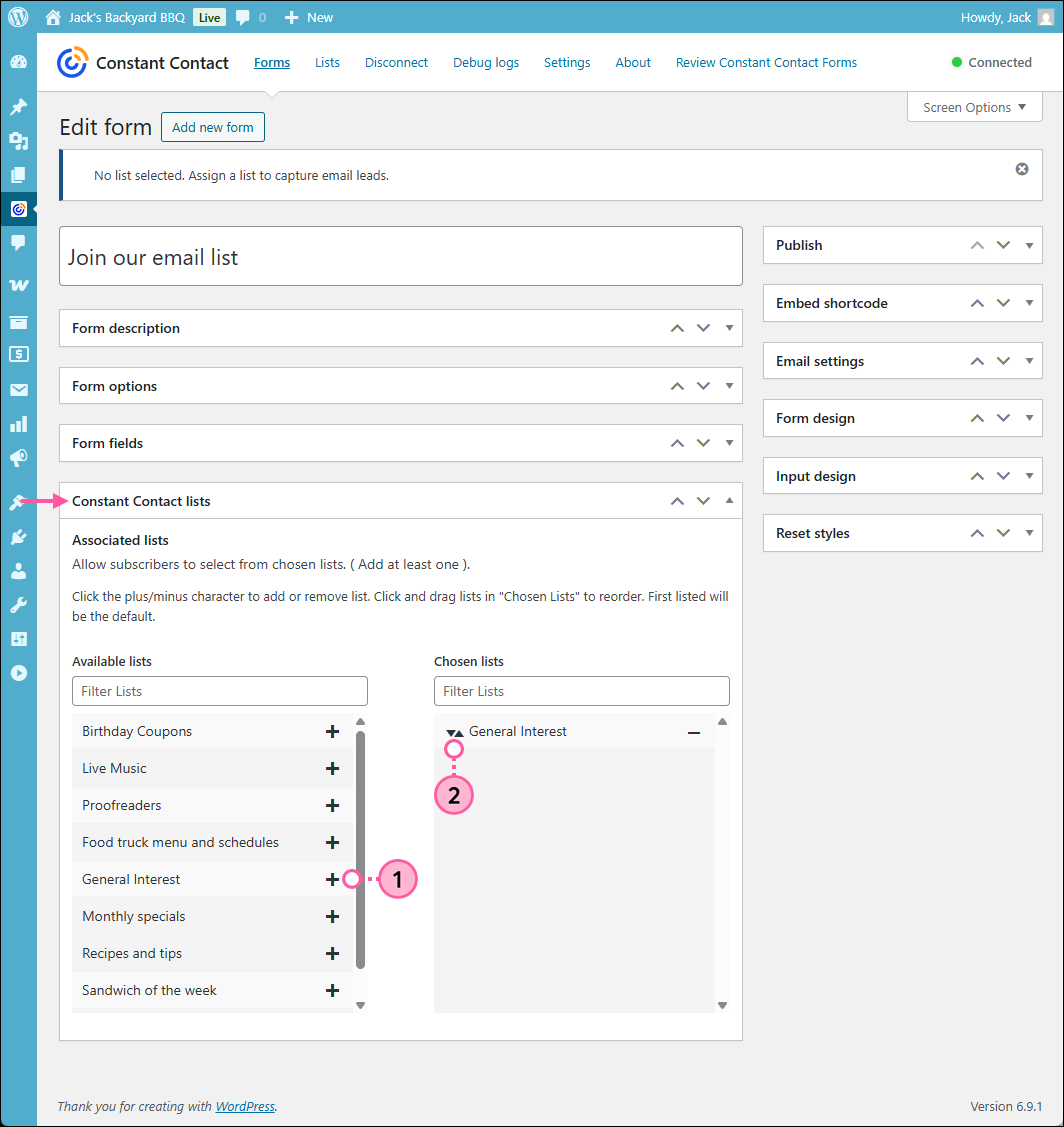
Select a contact list
If you want to add the people who submit your form to your mailing list, you can select a list from your Constant Contact account to add them to.
- In the Constant Contact lists section, view or search for a list in the Available lists field and then click the + (plus sign) next to a list to add it to your form. You can select multiple lists that your contacts can choose to opt-into.
- (Optional) In the Chosen lists field you can use the arrows to change the order that you want your lists to be displayed. If you want to remove a list, click the - (minus sign).
 | Did you know? For the best experience for your newest contacts, when their engagement is at its highest, make sure to set up a welcome automation for the list you select! You can greet your new contacts with a simple welcome email, or create a series of several emails to go out over time. |
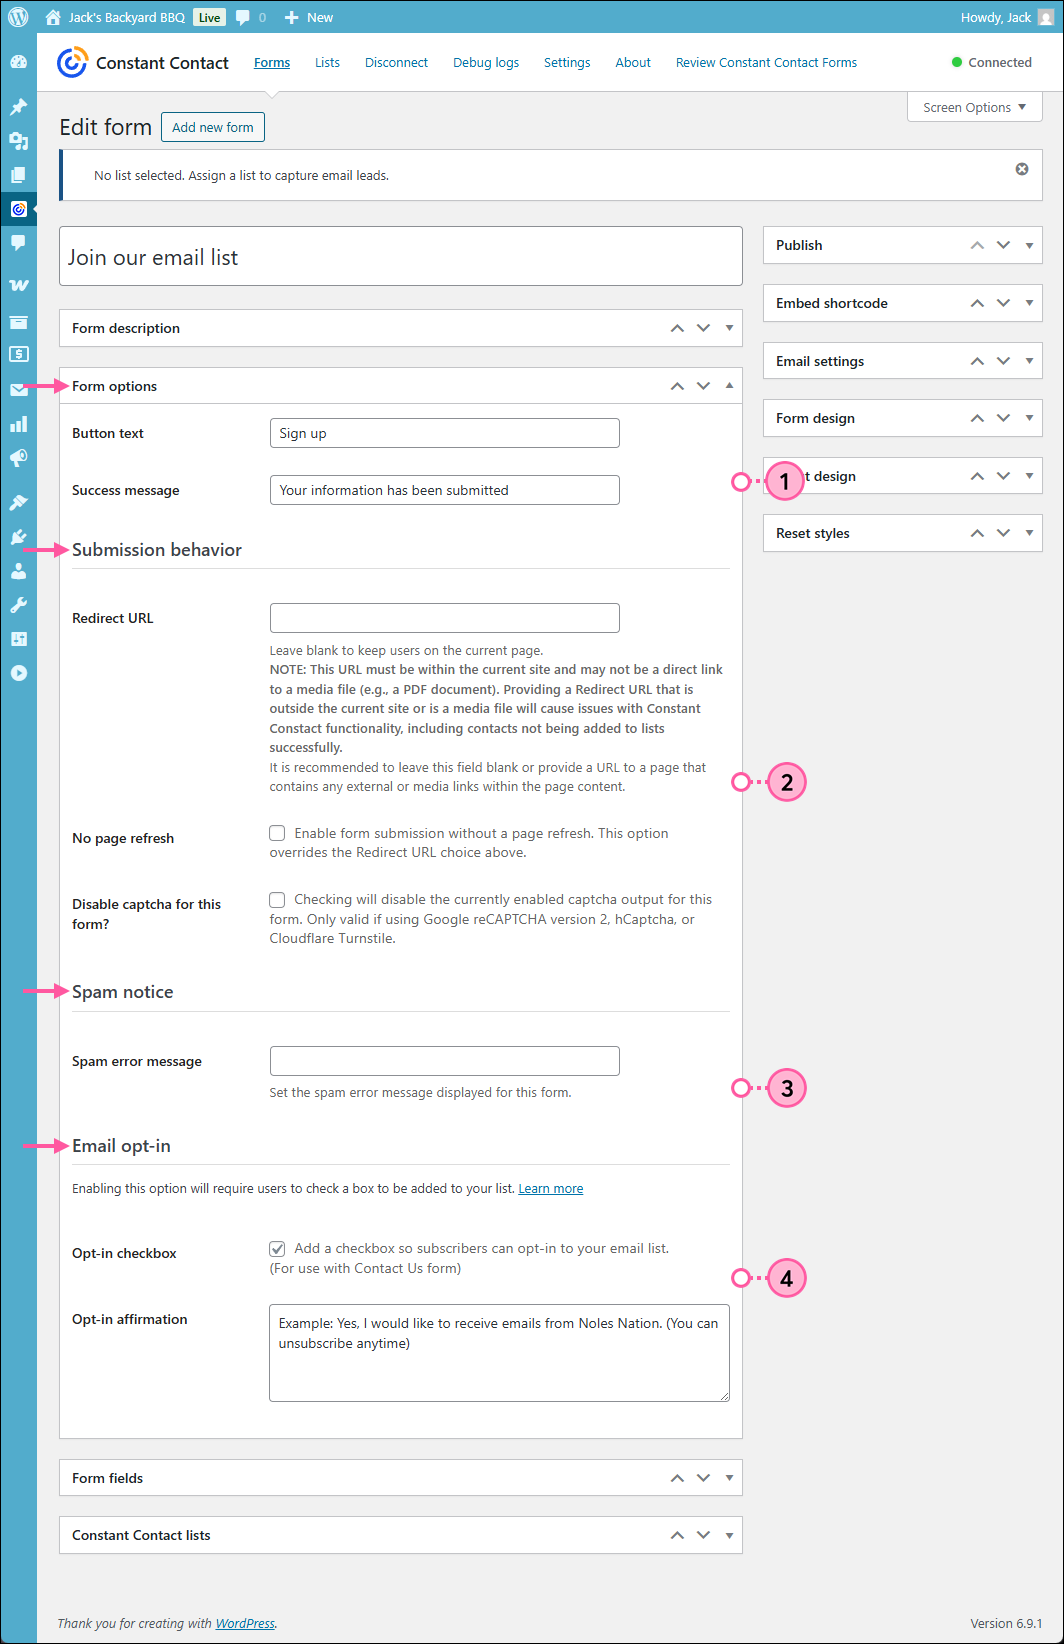
Set up the form's options
Form options include the button text and success message for submitting your form, a redirect URL, spam error message, and email opt-in.
- In the Form options section:
- Customize the text you want to appear on the button your new contacts click to submit their opt-in.
- Customize the message your new contacts see after they successfully sign-up for your list.
- (Optional) In the Submission behavior section:
- Enter a URL in the Redirect URL field if you want to send your new sign-ups to a specific webpage after they've submitted your form. The URL must be within your WordPress site and
- Check the "No page refresh" box only if you don't want the page to refresh when a user submits your form. If you chose to enter a redirect URL, leave this box empty.
- A captcha service provides extra protection against fraudulent sign-ups and spam comments through your form, however if you need to disable the captcha service, you can check the "Disable captcha for this form?" box.
- In the Spam notice section, you can enter a message you want to display when a bot fills in the hidden "honeypot field" and tries to submit your form in the Spam error message field.
- In the Email opt-in section, you can require your new sign-ups to confirm that they want to join your list after they submit your form.
Create the form's fields
The form fields are the contact information you want to collect from your sign-ups. An email address is required, but whatever information you collect beyond that is up to you.
- In the Form options section, click the Add another field button.
- Choose an option from the Select a Field drop-down menu:
- First name and Last Name - Maps to the first and last name contact fields in your Constant Contact account.
- Phone number - Maps to the "other" phone number field in your Constant Contact account.
Important: When a contact submits a phone number through a WordPress form, it doesn't opt them into SMS Marketing. If want to collect SMS sign-ups, you must add a link to an SMS-enabled Sign-up Landing Page to your webpage instead. - Address - Maps to the home address fields in your Constant Contact account.
- Job Title and Company - Maps to the job title and company fields in your Constant Contact account.
- Anniversary - Maps to the anniversary field in your Constant Contact account.
- Birthday - Maps to the birthday field in your Constant Contact account.
- Custom Text Field - Maps to a custom field in your Constant Contact account. If you use the exact wording of an existing custom field it maps to the that field. If create a new custom field name, a new field is added to your Constnat Contact account.
Note: Custom date fields are not supported by the Forms for WordPress plugin at this time. - Custom Text Area - This field is used for when you want to give your website visitors room to provide feedback and suggestions. It does not map into your Constant Contact account. Instead, this information is included in the email that is sent to your WordPress admin (see below). You can include more than one Custom Text Area in your form.
- Enter a Field label. The label automatically defaults to the Constant Contact contact heading, but you can change the wording to match your branding.
- (Optional) Provide a description for the field so that your website visitors know exactly what you expect them to enter. This is especially helpful if you're using custom fields.
- (Optional) Check the "Required" box so that the field must be filled in before the form can be submitted.
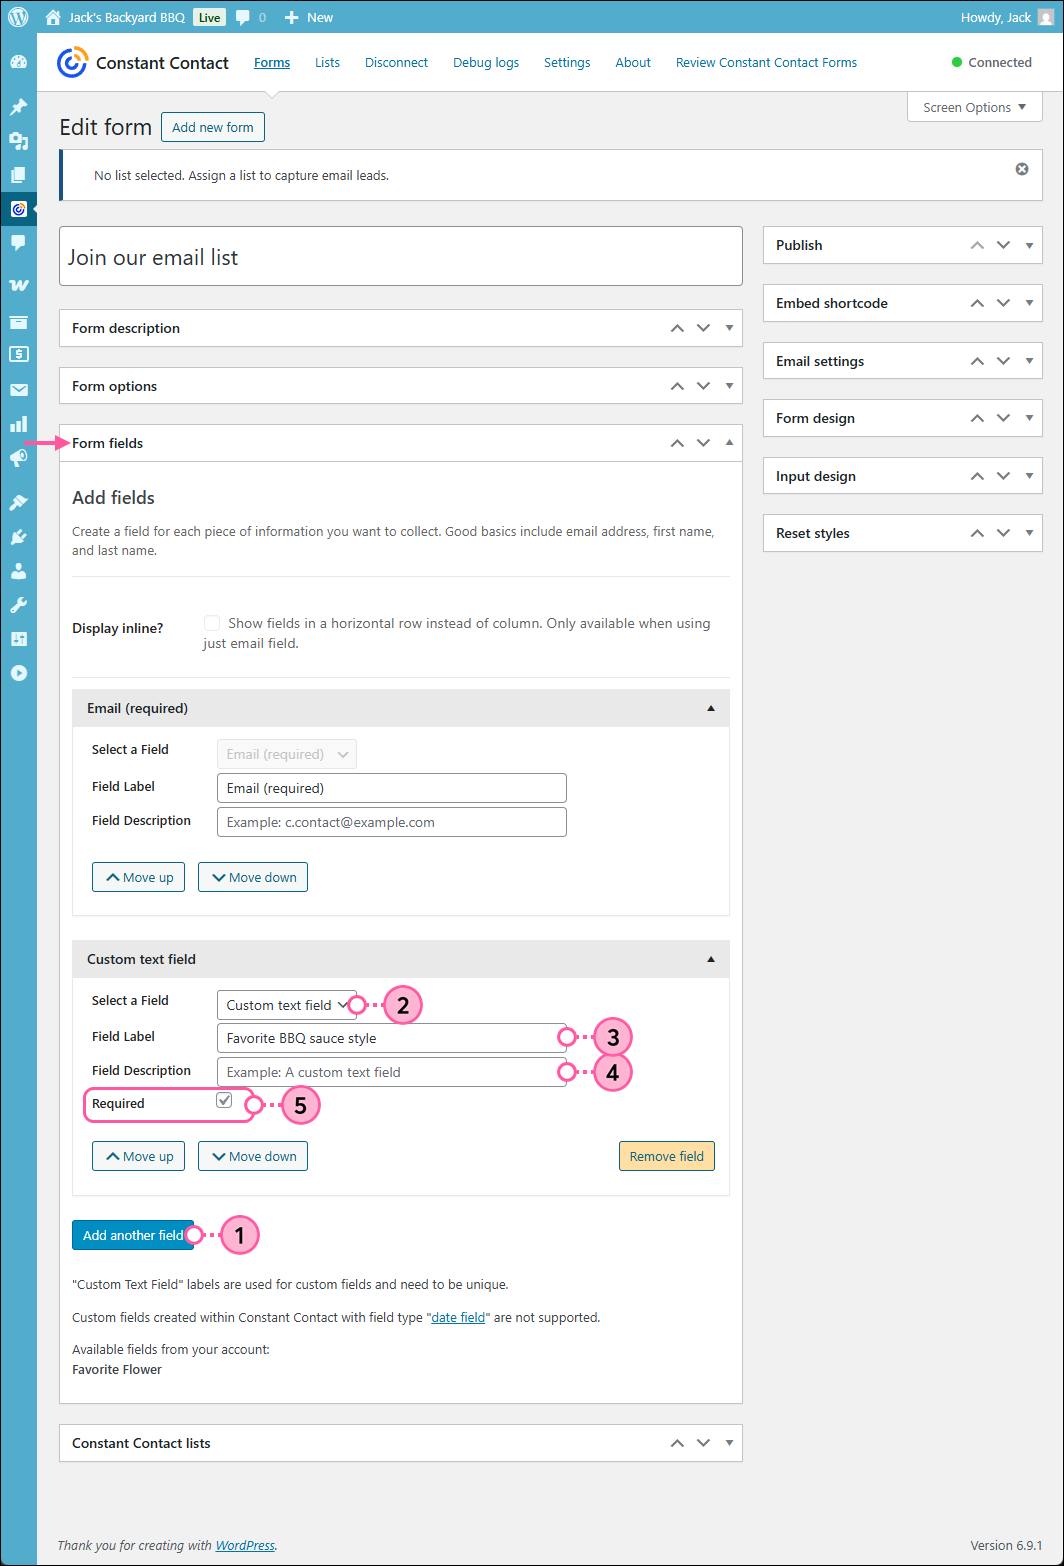
Repeat the steps for each contact field you want to include on your form.
Select the form's email settings
 | Important: With the help of your WordPress administrator, you can set up your WordPress server to receive an email each time someone submits your form. If you're having issues receiving a general email about sign-ups, check your WordPress email address by clicking Settings > General. Your WordPress admin must set up your WordPress server to use this notification feature; we cannot troubleshoot this functionality on the Constant Contact side. |
You can receive an email notification at an address of your choosing every time someone submits your form.
- In the Email settings section, enter an email address into the Email recipients field. You can add multiple email addresses by separating them with a comma.
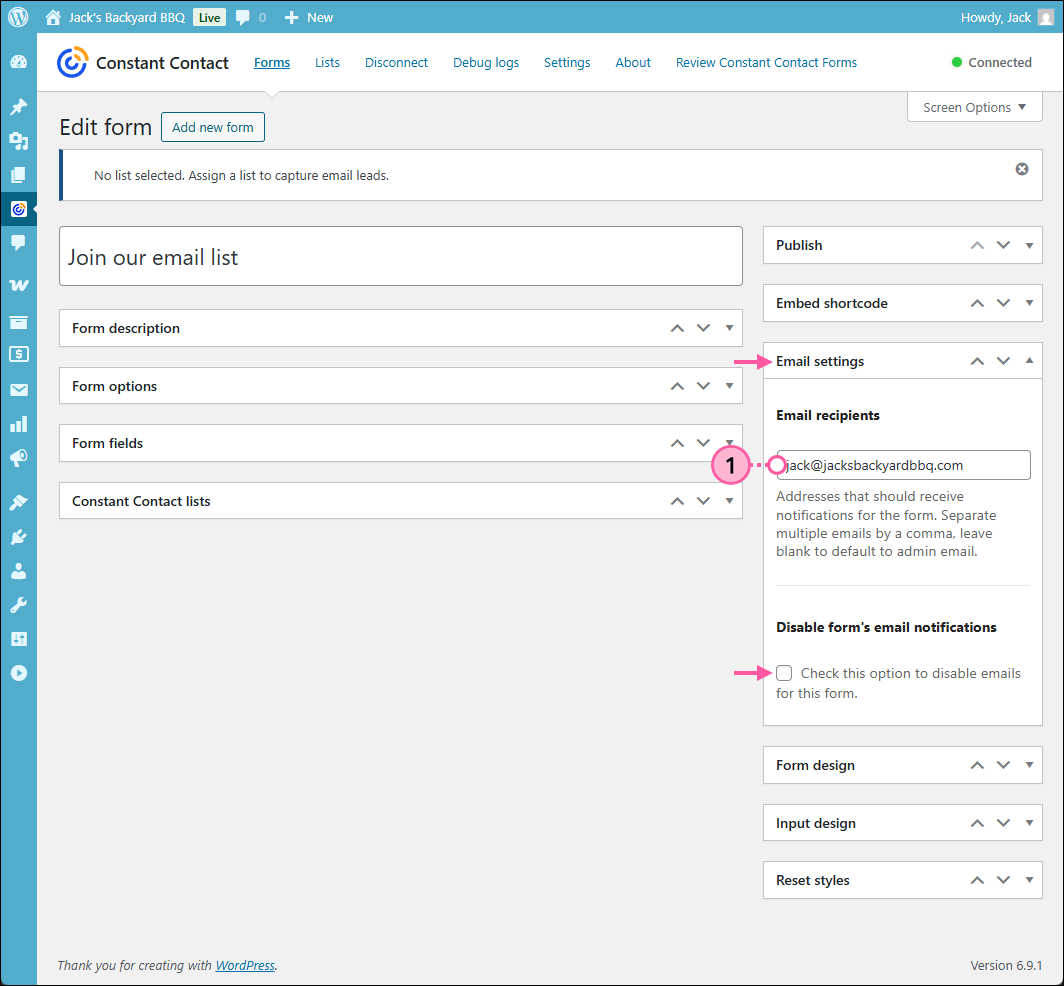
You can disable the email notifications at any time by checking the box next to the "Disable form's email notifications" option.
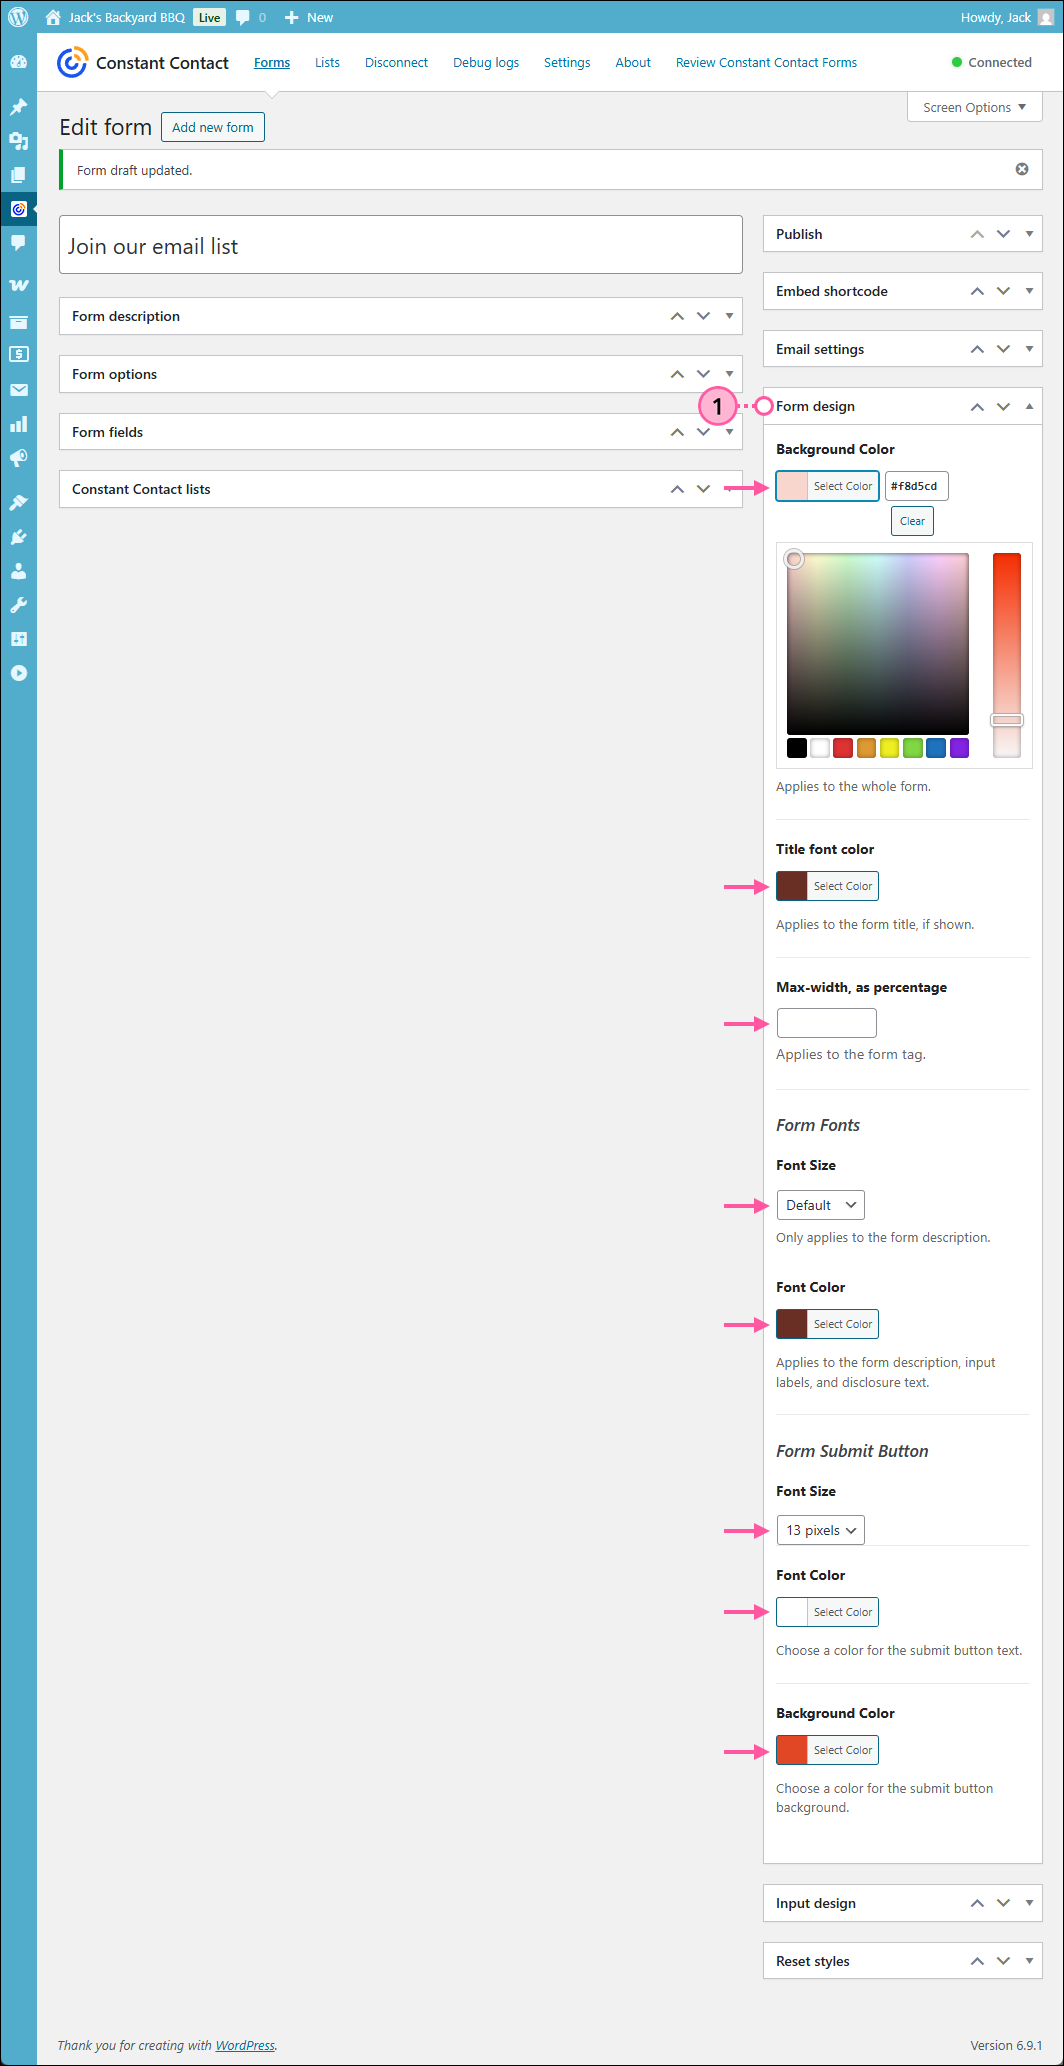
Customize the form's design
The form allows for minimal styling, but inherits as much as it can from the WordPress theme you're using on your website. If you don't like the look of your form, a front-end developer with CSS knowledge can look over your site to determine if there are any style rules that are interfering with the form.
- In the Form Design section, choose the color and font sizes for the form. The font and "Default" font size is determined by your WordPress theme.
- Background color - Applies to the entire form.
- Title font color - Applies to the form's title, if shown.
- Max-width, as percentage - Applies to the form tag.
- Form Fonts: font size - Applies only to the form description.
- Form Fonts: font color - Applies to the form description, input labels, and disclosure text.
- Form Submit Button: font size - Applies only to the button text.
- Form Submit Button: font color - Applies only to the button text.
- Form Submit Button: background color - Applies only to the button.
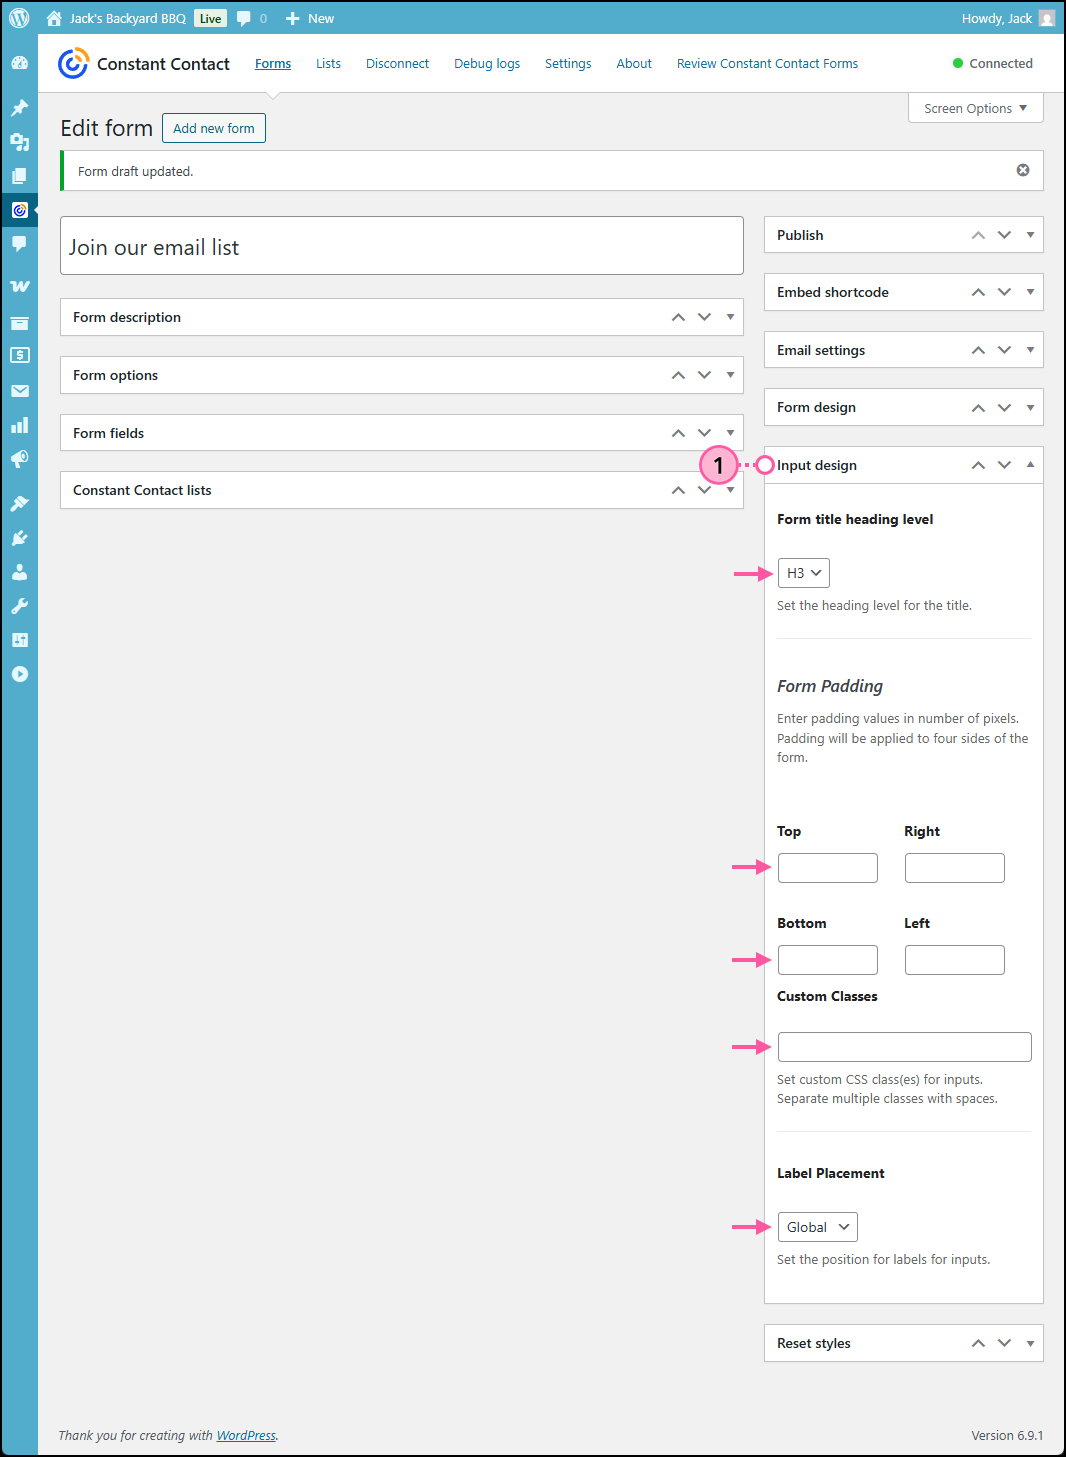
Customize the form's input design
Adjust the form padding, add custom CSS classes for inputs, and adjust label placement for your form.
- From the Input design section, you can:
- Form title heading level - Choose the HTML heading style for your form's title.
- Form Padding - Define the pixel values so that there is space between the form's edge and the form text and fields.
- Custom Classes - Enter custom CSS classes for inputs and separate multiple classes with a comma.
- Label Placement - Choose where your text fields sit in relation to their labels. For example, choose "Top" so that the name of the field sits on top of the field, or choose "Left" so that the description is to the left of the field.
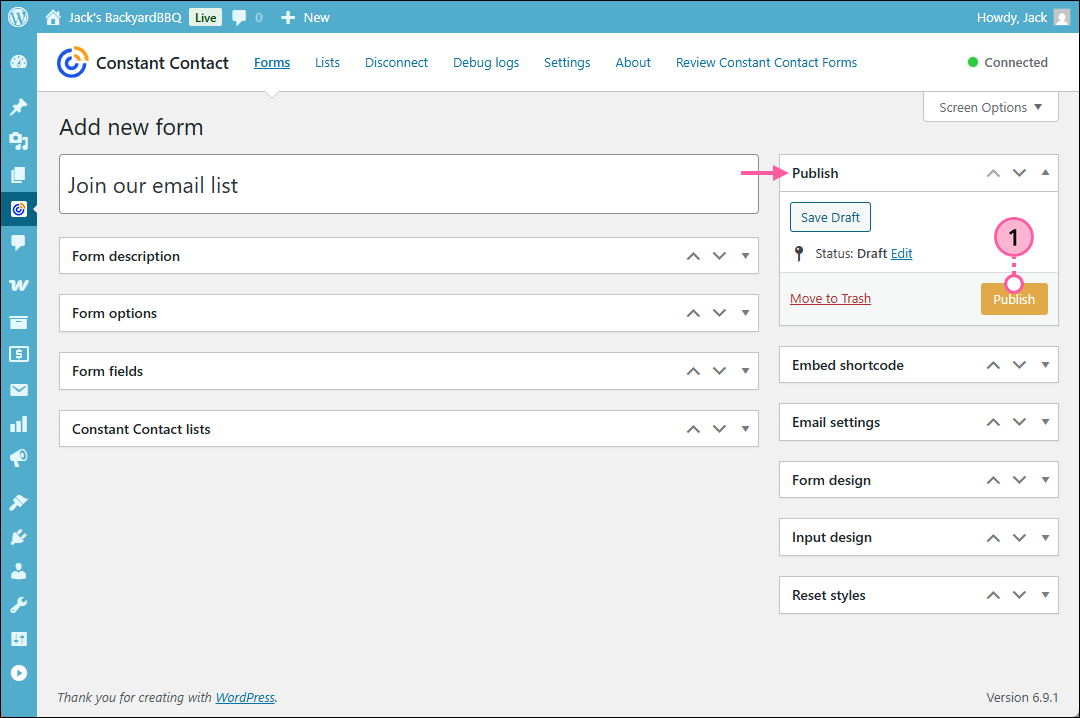
Publish the form
Publishing your form doesn't automatically make it visible to your website visitors, but makes it available for adding to a Page or Post.
- In the Publish section on the left-hand side of the page, click the .
Now that your form is created, styled, and published, it's time to add it to a webpage or blog post. When a contact signs up through your form, they're added to the list you specified in your Constant Contact account.
- If a contact was already a part of your list and signs up through your form with the same email address, the information they supply from your form is updated in their existing contact record; new information is added or updated, but nothing is removed from the contact record if a field is left blank.
- If a contact was already part of your list and signs up with a different email address, they're added as a brand new contact.
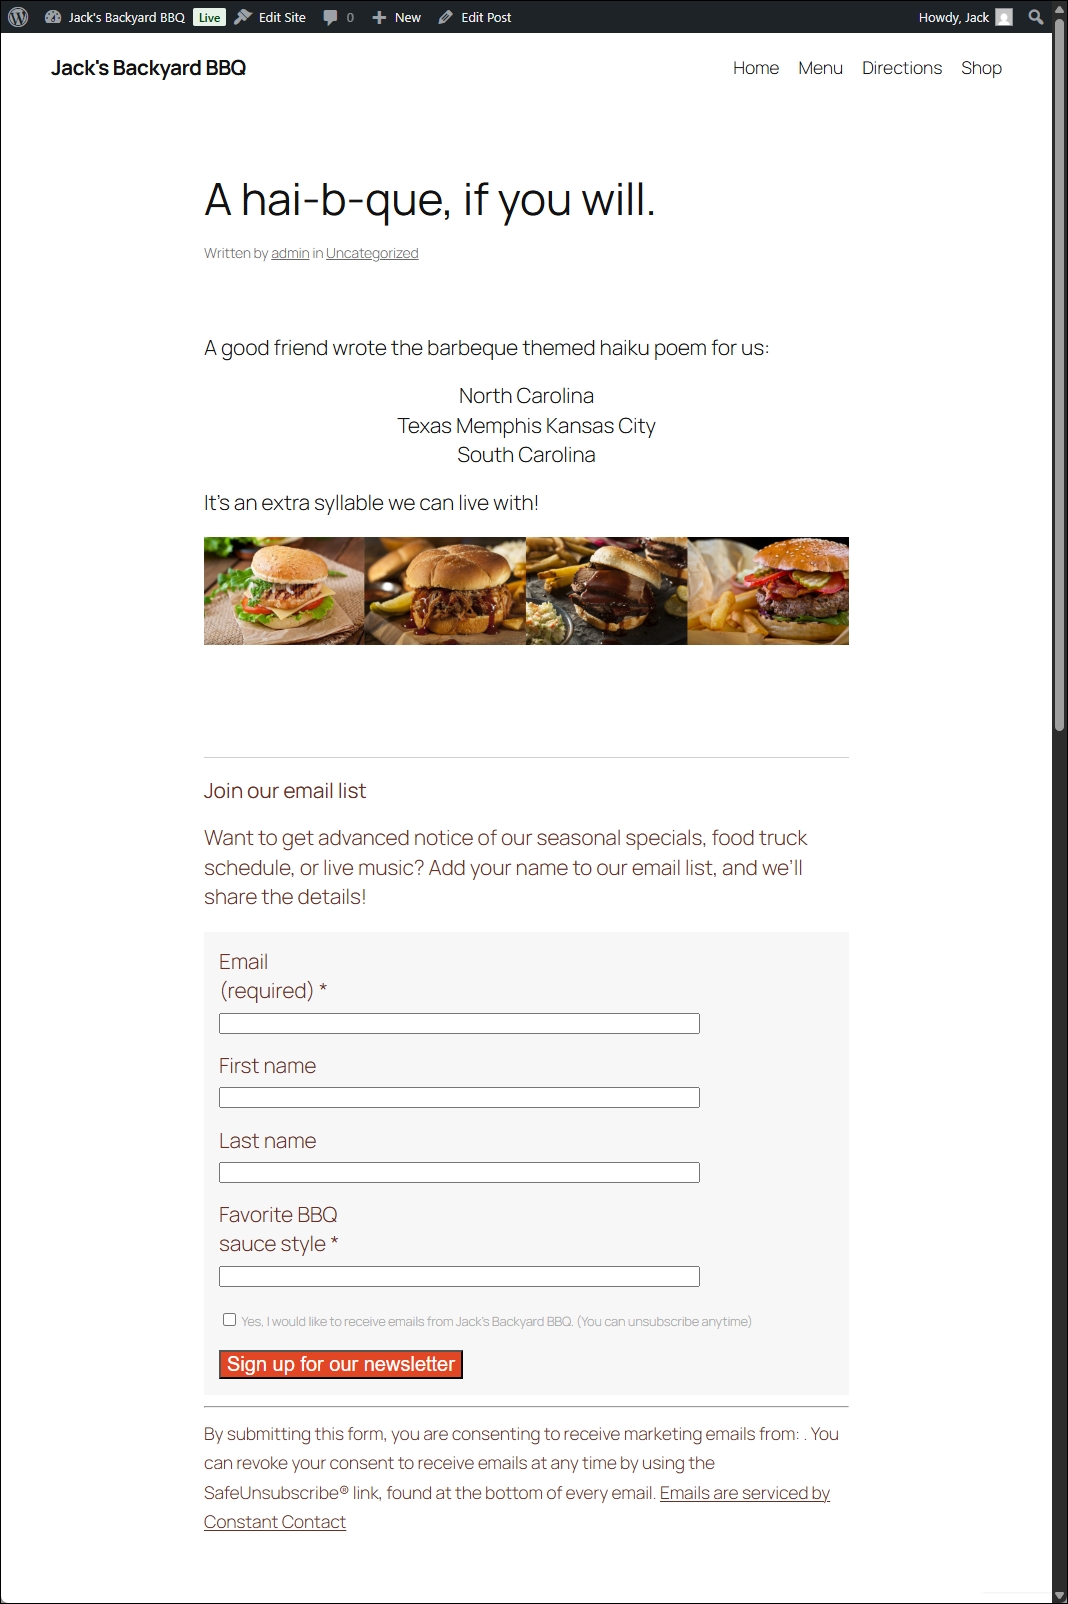
View an example of a published form
When you preview the page or post you can see how the colors, font sizes, padding, and label placement appear in a form. Any time you make updates to the style, the form is updated so you don't have to keep republishing your pages or posts.